User:Susanna: Difference between revisions
| Line 115: | Line 115: | ||
[[EYE film]] | [[EYE film]] | ||
[[ | [[Frown - Photobook]] | ||
[[A Transparent Handmade Camera]] | [[A Transparent Handmade Camera]] | ||
Revision as of 11:07, 10 April 2019
Self-Directed Research
TRIMESTER 2
Polaroid // Emulsion Lift
Pinhole camera // Solargraphy
TRIMESTER 1
Analog photography
I came to the PZI with the intention to learn more about photography and cinematography. For these first few months I focused my attention on analog photography. I took several pictures with my Lubitel 2 (120mm) and my Praktica (35mm) both with colour and b&w film. As Barend suggested I set myself a challenge: to take 10 photos a day for 10 days and then just look at them and see where this experiment would take me. It was not easy as at first I was stuck with the question on what to photograph. I couldn't find subjects that were interesting enough to capture. After a couple of days I shifted my focus on how to photograph things. I followed some courses on Lynda.com about analog photography and I applied some of the suggestions given. Exposure is definitely something I played with, setting the ISO on the camera to a value lower than the one on the film and playing with light sources. With the Praktica I also tested with a lens found in a flea market. The Lubitel presented more challenges as it doesn't have an internal light meter. So when I'm using it I always write down what settings I'm using and in what kind of light I am taking the photograph. With the help of the staff from the audiovisual station (and also with more online courses) I also learnt how to develop film, enlarge and make prints. As I always looked at analog as some sort of mysterious process, learning how to use the dark rooms was really interesting and revealing. The focal camera project perfectly fitted into this research. Being able to build a camera, choosing the lens and making it work was really interesting and clarified a few points. In order to push this research further I will experiment with printing techniques, and with the colour dark rooms now that they are also available. Improving my focal camera is also part of my research (see dedicated section).
DARKROOM BASICS (4. – 5. 10. 2018)
1. PREPARATION FOR BW FILM DEVELOPMENT: Use orange tool to get the end of your film out of the cassette
Cut the end to get a slightly round shape along the whole end of the film strip
insert it in the reel until it's secure on 2 tiny metal pins
take the development tank with tube in the middle, cap and reel (with film) into the small darkroom (completely lightproof)
lock the door and start winding the film onto the reel by rotating left and right part of the reel in opposite direction
when finished, tear the film cassette off
insert the reel in the bottom of the tank
close with the cap
come out
2. DEVELOPING THE BW FILM:
See the chart (which film you have, the ISO etc. – check for the developer and required time), see the container, how much liquid you need (300ml for 35mm & 500 for 120mm)
PRESTEP: fill tank with water, agitate 1 min, then every 30s for 4 more minutes, empty it
STEP 1 - DEVELOPING: fill with developer, agitate 1 min, then every 30s altogether for the time required, empty in the container for used developer
STEP 2 - STOPBATH: fill with water, agitate 1 min, empty
STEP 3 – FIXER: fill with fixer, agitate 1 min, then every 30 s altogether for 5 min, empty BACK in the fixer
STEP 4 – FINAL WASH: fill with water, agitate for 1 min, empty, REPEAT for at least 12 times (if you work alone, put the hose in the tank and let the water wash it out for at least 12 min)
STEP 5 – WATER SOLVENT: take out the reel, dunk it in dilluted soap for 1 min
STEP 6 – DRYING: take your film out of the reel, hang it in the cabinet (at least 1h)
ENLARGING THE NEGATIVES (information applies to RC paper!):
Get the chemicals ready (developer, stopbath, fixer, water - turned on to agitate)
Settings on the enlarger to begin with:
-contrast 2
-aperture (when setting on max.) on 2 stops less than max.
-desired size (with distance)
-focus (use magnifying tool to focus on the grain)
-ground board with movable slats (to define the cutting)
Insert negative in the enlarger upside down and with emulsion side down
Do the test print (depending on your negative density, contrast, exposure etc.)
DEVELOPING YOUR PRINTS (information applies to RC paper!):
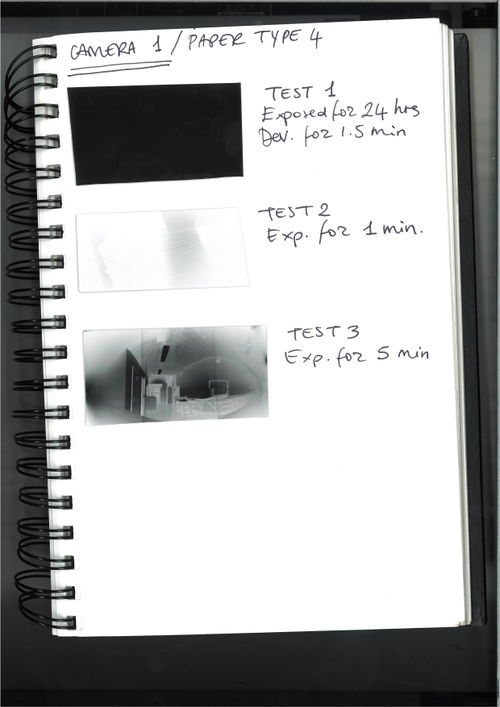
-developer 1.5 min
-stopbath 1 min
-fixer 5 min
-water 10-15 min
! Note ! clamps with fixer should never get in the developer – do not contaminate the developer with other chemicals
-drain the print, dry in the dryer
Reading Material
- The Photography Handbook - Terence Wright / selected chapters
- The Photography Reader - Liz Wells / selected chapters
- Understanding a Photograph - John Berger -> synopsis
- True Stories - Sophie Calle
- The Medium is the Massage - McLuhan -> synopsis
Thematic projects
Reading and Writing Research Methods
Methods/session 1 Three things
Methods/session 2 Self-directed methods
Methods/session 2 Notes from Only Weeds Emerge
Methods/session 9 Research Group

