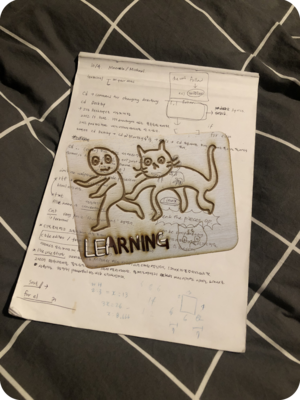
SI 16 - Vernacular Language Processing
Classes with Cristina/ M&M/ Steve / and other guest lecturers
week 1
Monday, 20 September 2021
-raspberry pi
I hold the raspberry pi for the first time. (This sounds super dramatic but it was mindblowing to me that this small device can do so many things)
Tuesday, 21 September 2021
뒤죽박죽[dwi/jug/bag/jug] (informal) mishmash, hodgepodge, when something is messy
tools that I'm used to
laptop : cinema 4D, adobe(aftereffects, premier pro, )]/ iphone: (camera, camscanner, voice recording, )/ brush, sharpie, pencil, scissor, cutter, LOTS OF HOT GLUE, thread&needle /[language..?
tools that I would like to learn
computer language, wood, metal, print, some sort of tool that I can put input and with that input make something else..?=electronics..?(ex, https://youtu.be/-hlQHYtncww)<3
=> Hmm this explains why I am taking so many station skills
Wednesday, 22 September 2021
Reading Queer Phenomenology
by Sara Ahmed with Mitsa fill in notes
week 2
Monday, 27 September 2021
raspberry pi/soupboat
deciding the name of our raspberry pi===> soupboat!
line printer
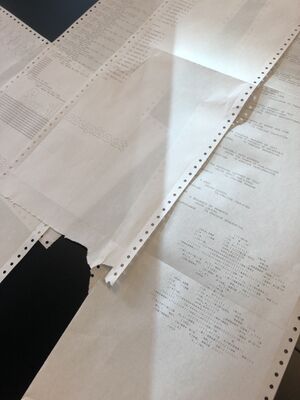
printing exercises, we learned how to use line printer. fill in samples from notebook
What I brought for the class
-a field guide to getting lost, by Rebecca Solnit
https://quintus.memoryoftheworld.org/Rebecca%20Solnit/A%20Field%20Guide%20to%20Getting%20Lost%20(12641)/A%20Field%20Guide%20to%20Getting%20Lost%20-%20Rebecca%20Solnit.pdf (11-12p)
-driving with 5 different navigations in LA by Jisoo Chung
https://www.chungjisoo.com/chotto-motto
-Bas Jan Ader
https://www.artsy.net/article/artsy-editorial-fateful-final-work-left-creator-lost-sea
Interesting ref.
- https://arstechnica.com/cars/2016/05/death-by-gps/ (DEATH BY GPS)
- https://www.wired.com/story/99-phones-fake-google-maps-traffic-jam/ (fake traffic jam)
the instruction is..
small performance exercise with Miriam and Gersande
Performance Script
1.THE INSTRUCTION IS
Lupf din rechte Arm
오른쪽 손을 들어주세요
Levez la jambe gauche
2.THE INSTRUCTION IS
Berüehr mit dinere linke Hand dis linke Chnüü
왼쪽 발을 내미세요.
Penchez la tête à droite
3.THE INSTRUCTION IS
Lupf din rechte Fuess
왼쪽으로 한바퀴 도세요.
Tournez-vous vers la gauche
4.THE INSTRUCTION IS
Dreih din Chopf noch links
왼쪽으로 한 걸음 가세요.
Levez-vous sur votre gauche
5.THE INSTRUCTION IS
Lueg mit dine Auge noch rechts
왼쪽으로 고개를 내미세요.
Asseyez-vous en tournant vers la droite
END OF THE INSTRUCTIONS.
KEYWORDS FRENCH
left = gauche / right = droite
KEYWORDS SWISS GERMAN
Rechts = Right / Links = Left
KEY WORDS KOREAN
오른쪽 (oleunjjog) = Right 왼쪽 (oen/jjog) = Left
week 3
4, 5, 6 Octobor 2021
to be not to be
week 4
week 5 (Autumn Vacation)
week 6 (Self-study Week)
week 7
1, 2 November 2021
week 8
week 9
week 10
week 11
week 12
week 13
Launch
Station Skills
Wood Station
First session (Wednesday, 29 September 2021)
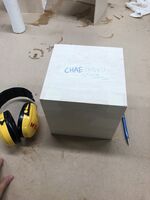
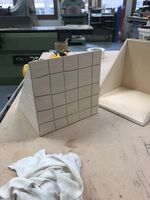
-Learned how to use different machines=[a vertical saw, don't know the name but with this, you can cut angles, the old one(the instructor used this machine to cut my cube diagonal), various sanding machines]
Also learned how to make a seamless cube by using different machines and wood glue
Second session (Wednesday, 13 October 2021)
-Turned my cube box into two mini bookshelves. Also learned how to use a hand milling machine and a hand sanding machine.
Ceramic Station
Multiple sessions (29 September, 13 October, +??, 1 December, 3 December 2021)
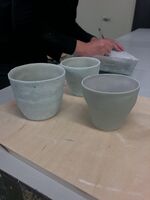
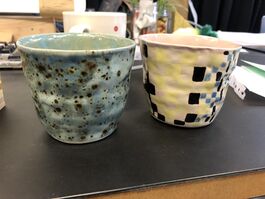
It took forever to make a cup/cups but they are beautiful so worth going through it.
Slip casting method
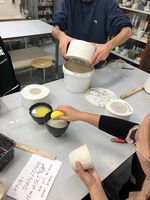
make a cup shape with clay
make the mould by using the casting technique with plaster
let it dry
pour liquid clay (this technique is called 'slip casting')
let it dry
trim the edges and smoothen the surface with a sponge
put it in the oven (680 biscuit)
glaze it
put it in the oven again (depends on your glaze either 1080 / 2080)
Build it from scratch with your hand
make a long strip with clay, smoothen the surface
careful, if you make it too big and not really smooth the surface thoroughly it might break.
Smart Textiles / Interactive Station
First session (4 November 2021)
-Learned how to do embroidery using conductive threads
Second session (11 November 2021)
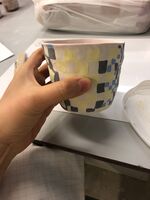
-Learned how to make soft button, switch. Also how to learn subliminal heating machine at Publication sation
How to use the heating machine
you can purchase subliminal paper at the publication station
this method works better if you use synthesized fabric
Emm tried this machine with 100% cotton tot bag the other day, and it was not really visible
ironing vliesofix at the fabric station
vliesofix purchase here
*what is vliesofix?
This Vliesofix® product is an iron on adhesive web fusing, ideal for appliqués, handcrafts, repairs, and hems. This is a transparent web like dry feeling adhesive, on a protective paper. The paper backing supports the web adhesive while drawing, tracing, and cutting your appliqué or shape, as well as when ironing.
Third session (18 November 2021)
-Learned folding techniques, how to semi-permanantly make different fabrics into folded shapes
Fourth session (25 November 2021)
-Learning how to use small eletronics like an arduino, micro conductor and ---.
void setup() {
//this is making the energy for the sensor
pinMode( 14, OUTPUT);
pinMode( 16, OUTPUT);
digitalWrite( 14, HIGH); //or HIGH and LOW the other way around
digitalWrite( 16, LOW);
pinMode( 13, OUTPUT); //led on the arduino
}
void loop() {
int light = analogRead(A1);
if ( light > 125 ) digitalWrite ( 13, HIGH);
else
digitalWrite ( 13, LOW);
delay(500);
}
Notes / Explanation
int is an integer(?) basically numbers, a certain type of number (100, 200, 20, ) not
= does not mean mathematical = sign, it's assigning a variable name
== means mathematical = sign that we normally think of.
analogRead is where Arduino will read on the physical thingy
right now the sensor is not wakened so we need different
// is for commenting, the machine won't read it
capital M means something (?) ';' indicating that this line ended
pinMode( 14, OUTPUT);
pinMode( 16, OUTPUT);
digitalWrite( 14, HIGH);
digitalWrite( 16, LOW);
high is plus
low is minus
high = plus = 5v in arduino
low = minus = 0v in arduino
=> so we just made a small battery!
Fifth session (2 December 2021)
-Learned how to make noise by using arduino and conductive materials such as pencils
useful resorces
- Fashioning Technology, a DIY intro to smart crafting
- Switch Craft, battery-powered crafts to make and sew, by Alsion Lewis with Fang-yu Lin
links
- https://pad.xpub.nl/p/smarttxt
- http://interactionstation.wdka.hro.nl/wiki/Main_Page (need to check out later)
- https://www.instagram.com/fashiontechfarm/?hl=en (Fashion Tech Farm is a studio, incubator and small-scale production facility for innovative fashion. Based in Eindhoven)
- A movie of “the” e-textile swatch book 2013: https://www.youtube.com/watch?v=YcmxE24VdWA
- Documentation of the e-textile swatch exchange books: http://etextile-summercamp.org/swatch-exchange/category/2017/
- http://interactionstation.wdka.hro.nl/wiki/Swatch_Making
- 2020 Fashion Tech Farm Expo https://drive.google.com/file/d/1VOBbxclNY3_a2zAXb4TnP8TZ9IjXIee1/view
Sewing and overlock machine
(25 November 2021)
-Learned how to use sewing machine and overlock machine, how to change threads
Doc V1/ Adv 2 Start in the digilab
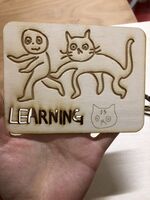
how to use the laser cutting machine
prepare your file in illustrator
RGB file/ R(255, 0, 0) is cutting / B(0, 0, 255) is kiss cutting / Black is engraving
the stroke should be 0.01pt
send your file to the computer, open it in illustrator and press print
set it to VLS -> the window will pop up to the next monitor
adjust the settings to whatever materials you wish to cut
sometimes(very rarely) z axis might be off, so make sure go-to 'systems' and check whether the z-axis is checked
you can also skip cutting/engraving by setting 'manual control' rest->skip
how to use 3D printer
prepare your file in these programs: https://www.tinkercad.com/
put your file into the SD card you prepared
make a reservation for the 3D printer
insert SD card to the 3D printer you reserved
sometimes you need to apply liquid glue onto the surface
prepare the plastic wire, and press 'print'
kinda forgot how it worked
First session (2 December 2021)
-Learned how to use the laser cutting machine
Second session (9 December 2021)
- Learned how to use the 3D printer
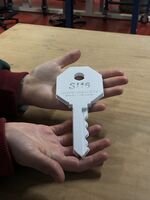
For our Special Issue 16, Erica and I 3D printed an API key!
Our initial idea was by letting this API key travel from one to another, one can have exclusive access to certain contents on our SI16 webpage through typing the API key written on this API key.
Meetings
ETC & Others ʕʘ‿ʘʔ
Roodkapje Workshop series
First Workshop 6 October 2021
a workshop on sensors and servo-motors, Dennis de Bel
Second Workshop 7 October 2021
a workshop on speech-to-text tools by Federico Poni and Francesco Luzzana(Kamo)
Third Workshop 9 October 2021
Soul of the Beast: The Magic of Chance/Chaos with Telemagic
To be able to have fun with your button this is how you go along:
Get an Arduino Uno (https://www.hackerstore.nl/Artikel/244) and connect it to your computer
Download and open Arduino software (https://www.arduino.cc/en/software)
Under “Extra”: make sure your board is set to Arduino Uno, and your serial port is linked to the one your Arduino is plugged in.
Download the Firmata library (https://www.arduinolibraries.info/libraries/firmata)
(More info on firmata by Arduino: https://www.arduino.cc/en/reference/firmata)
Install the Firmata library in the Arduino Software (sketch > add library > select folder) (https://www.arduino.cc/en/guide/libraries)
Open the standard firmata sketch (file > examples > firmata > standardfirmata)
Upload this to your Arduino !
Wiring your button to your Arduino:
Single wire = 5 v
Wire connected to resistor = ground
Second wire next to resistor = A0
For more understanding on the coding aspect:
In the download folder www.rb.gy/w2or8n there is now an extra sketch called OracleBasicWithExplanation that has the explanation of every line of code used. Also there is a sketch called OracleFull that takes the sentences from an external file (.csv) which could be handy.
And some basic tips to find new magical codes:
-	Use // to uncomment(disable) parts of the code to see what changes.
-	Use println(“whatever you want to print goes here”); to get insights into how the code works
-	Change numbers to see what they do in the code.
Also with Sketch->import Library… ->add library . You can find loads of cool codes. And after you've imported the library you can go to File->Examples .
Here you can see all kinds of examples for spells that you can learn and use(copy)
Fourth Workshop 9 October 2021
electro-hacking: the return of the trash-bots with Edwin Dertien
Links
- https://edwindertien.nl/design/refurbyshment/
- https://en.wikipedia.org/wiki/Furby
- https://telemagic.online/
Zine Camp
Links
- https://pad.xpub.nl/p/WEdkGYGXCNa1WKIWHqrE (E-ZINES OFF THE GRID by Florian Cramer)
- https://patorjk.com/software/taag/#p=display&f=Graffiti&t=Type%20Something%20 (Online ASCII Art lettering)
- https://glyphdrawing.club/ (Online ASCII Art paint program/ GLYPH ASSEMBLING WORKSHOP by Julia C Aguiar)
Book Binding Workshop by Gersande
Tried 3 binding methods; 1) mini To-do-list with Japanese Binding 2) fold the paper stack in half and put it underneath heavy bricks, bind with staplers and rubber band and 3)cable tie binding method
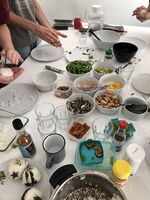
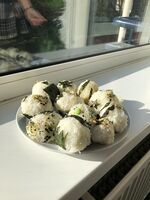
Onigiri Workshop
HTML/CSS Workshop
Experimental cooking
soups, a lot of soups, more soups
Dutch Design Week
Old material (need to clean up)
etc_Filter / Negative Space / Starting Point
atm() I'm working on rejection as a negative space(categorized as 'others' or 'et cetera') but also as a starting/turning point/a trigger for an action with Gersande.
For more info >>>etc_Filter / Negative Space / Starting Point<<<
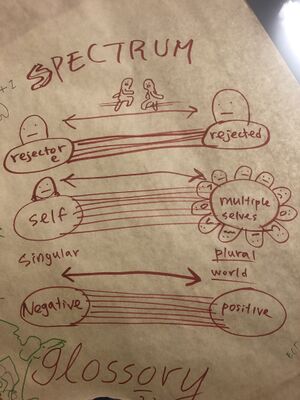
rejection as a spectrum
I feel like all the keywords in the rejection glossary are inter-connected, overlapping.
During the class with Cristina(9th of November) I draw this. A filter/slider/spectrum that every glossary fall under that slider.
Imagining a position of each glossary is ongoing shifting, a constant dialogue between these keywords.
