User:Annasandri/1
Working with Arduino
Intro
Arduino is an open source hardware and software.
The software is used to transit code to the memory of the connected machine.
It provides a user friendly environment to type C code: this is possible because it doesn’t show all the processes going on in the machine.
This aspect could be really helpful for beginners but it could turn turn into an obstacle :((.
Alternative method to create a sample
./samplify.sh *name*.wav
Basic commands
https://www.arduino.cc/reference/en/
Collecting ideas (& failures)
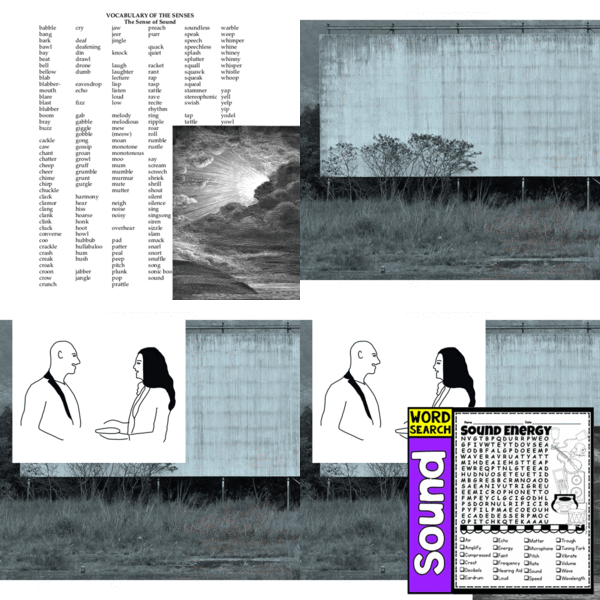
“Music is made of the same medium as speech”- reflection on vocabulary
Connections between sound vocabulary and speech vocabulary. Technical sound vocabulary has often a correspondence in terms used to describe our way to communicate.
Some examples:
- pitch 1.[sound]quality that makes it possible to judge sounds as "higher" and "lower" ; 2. [as a verb] move or be moved suddenly, especially by throwing or being thrown; 3. [noun(persuasion)]a speech or act that attempts to persuade someone to buy or do something (es, elevator pitch discourse); 4. [noun] the level of a feeling;
- juxtaposition 1. [noun]the fact of putting things that are not similar next to each other; 2. [literary] is the showing contrast by concepts placed side by side. Example: "Ask not what your country can do for you; ask what you can do for your country" J.F. Kennedy 3. [sound] an abrupt change of elements, a procedure for musical contrast like rhythmic, melodic and harmonic contrast.
Links to sound vocabulary:
http://www.stirlingaudioservices.com/gloss.htm
https://www.historyofrecording.com/Dictionary-Audio.html
Ubuweb sound library:
http://www.ubu.com/sound/
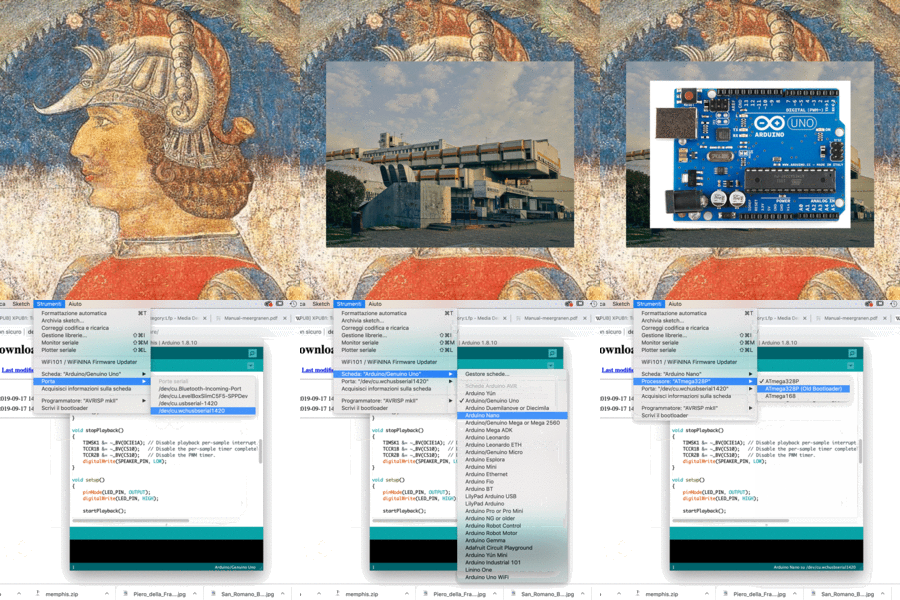
Then I tried to let my Arduino speak
ε(´סּ︵סּ`)з
https://github.com/PaulStoffregen/Talkie
https://www.arduinolibraries.info/libraries/talkie
https://github.com/ArminJo/Talkie
ε(´סּ︵סּ`)з
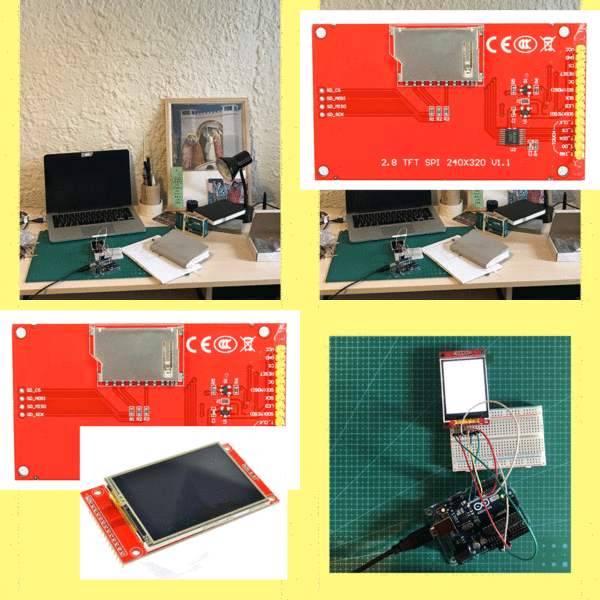
To connect a 1.8 TFT screen with Arduino
Parts used:
- 1x Arduino Uno;
- 1x ILI9341 TFT LCD display;
- Jumper Wires (males);
- 1x Breadboard.
How to wire the screen to Arduino:
LED goes to 3.3V;
SCK goes to pin 13;
SDA goes to pin 11;
DC goes to pin 9;
RST(reset) goes to pin 8;
CS goes to pin 10;
GND (ground) goes to GND;
VCC goes to 5V.
The TFT model that I used had included a SD card reader that also requires other pins.
Libraries to include in the code:
It is not that easy to find the right library for this kind of screens. Most of the tutorials available online suggest to include only the TFT and the SPI library but It didn’t work for me. I made some research and I found out that my particular model of screen needed the Adafruit GFX and the Adafruit ILI9341 libraries (which are the one compatible with my TFT display).
#include <Adafruit_GFX.h>
#include <Adafruit_ILI9341.h>
Visible speech */translation module
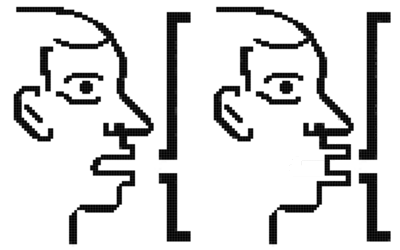
Visible Speech employs phonetic vocabularies and other oddities to visually reproduce conversations, not only as a stand alone unity but also as a part of a choral act when combined with other modules.
It communicates by using constructed & non-constructed languages, human-readable and machine-readable alphabets.
Visible speech module comes from a fascination for constructed languages, phonetic translation of speech and the endless human desire to reach an ideal universal language.
This leading interest has been arranged by considering the structure which sustains a module’s technical core and interface: an instrument built and programmed with its own particular kind of widespread alphabet, human developed and machine readable.
Content|&|/|Research
I started to research for this project by looking at the possibilities of written language as a transcription of sound. Starting by this interest I’ve focused my investigation on phonetic alphabets but also on the alternative alphabets created among the history in the attempt to create a universal vocabulary.
Phonetic transcription & other universal alphabets
Phonetic alphabet/phonetic script/phonetic notation
1. a set of symbols (such as the IPA) used for phonetic transcription;
2. any of various systems of identifying letters of the alphabet by means of code words in voice communication.
A phonetic transcription is used to display a “one to one” relationship between symbols and sound. To make it effective it is based on the assumption that all the linguistic sounds are segmentable into discrete units represented by symbols.
There are mainly three types of phonetic transcription:
- 1. ALPHABETIC like IPA (=International Phonetic Alphabet) and its extended forms. A nice converter english-IPA: https://tophonetics.com/ ;
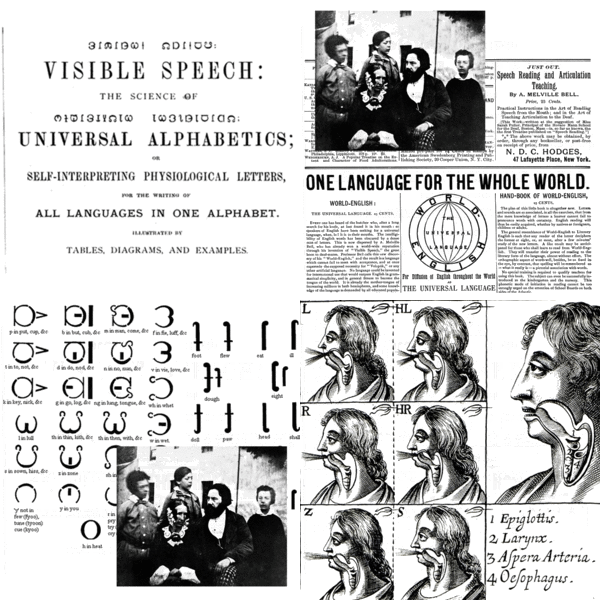
- 2. ICONIC like the Visible Speech System developed by Alexander M. Bell;
- 3. ANALPHABETIC [ they use long segment of symbols to precisely describe the component features of an articulatory gesture].
Alexander Melville Bell’s Visible Speech
Alexander Melville Bell’s Visible Speech is a particular kind of phonetic alphabet which visually represents how to physically make the sounds needed to say any word.
The system was developed in 1867 by using a spectograph to translate speech into its visual representation: Bell’s original idea was to use it as a system to translate sound into something readable in the hopes to make deaf people able to receive phone calls one day.
The spectograph system could also be used to let the deaf see their speech organs while talking in order to make them able to improve their ability to speak and articulate sounds.
Bell’s research revealed itself useful for later developments in the field of computer speech recognition, a field of research studying the recognition and translation of spoken languages into text by computers.
Blissymbols/Semanthography
It is a constructed language conceived as an ideographic writing system by Charles K. Bliss.
Vocabulary
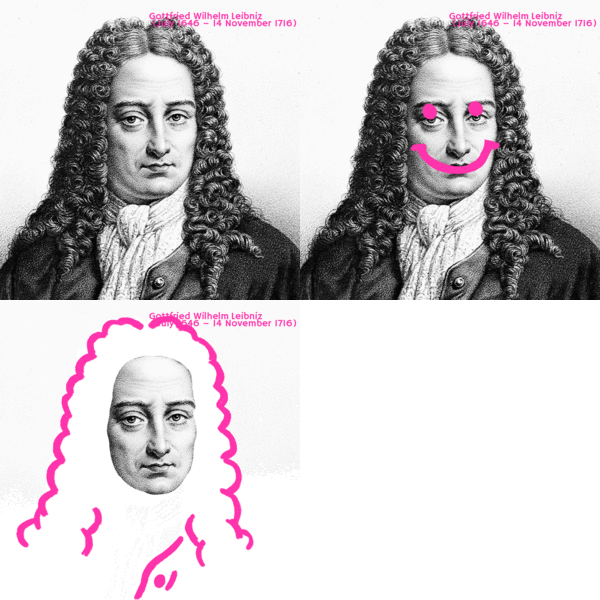
characteristica universalis= 1.the ideal language, projected by Leibniz, in which logical relations would be so transparent that, when people used the language, there would be no irresoluble dispute, but only the need to ‘calculate’.
constructed language=1. a language whose phonology, grammar, and vocabulary, instead of having developed naturally, are consciously devised; 2. artificial languages, planned languages or invented languages and in some cases fictional languages.
pasigraphy= 1. a writing system where every symbol represents a concept.
lingua franca= 1.any of various languages used as common or commercial tongues among peoples of diverse speech; 2. something resembling a common language.
glossopoeia= 1. the creation of constructed languages for artistic purposes.
universal grammar(UG)= 1.theory of the genetic component of the language faculty, usually credited to Noam Chomsky.
On Leibniz "Characteristica Universalis"
“[…]learned men have long since thought of some kind of language or universal characteristic by which all concepts and things can be put in beautiful order.” Gottfried W. Leibniz, On the General Characteristics [1679]
During the 17th century, Gottfried W. Leibniz – the German philosopher, famed as inventor of the modern binary number system and also for his exceptional optimism - started to dream about a universal language. He was trying to create a vocabulary able to rationalise universal concepts and numbers. A similar pattern to the machine language used in today’s encoding systems based on binary arithmetics. Today, four centuries after Leibniz's utopian system was theorised, we can ask to what degree his dream has been accomplished.
Are our machines speaking the ultimate Characteristica Universalis?
Leibniz’s ideal language was conceived to be effectively expressive so as to become universal. Today, by contrast, we perhaps face the opposite condition. We can see the proliferation of too many universal languages, aiming for the same result but differing at their cores. The dream of a Characteristica Universalis seems stuck in the complexity arising from the duality of human languages and machine languages, caught between the aim for entirety and the impossibility of reducing plurality. In a similar way machine languages of today can be really far removed from the user-friendliness that Leibniz theorised: “[…] a new language or script, that could be learned in one week or two”. Unfortunately today’s scenario presents itself as radically different. While anyone can use and interact with programmed technologies, the knowledge of their language is limited to a comparatively small group of people. This language, whether it is the Characteristica Universalis we were supposed to reach, is trapped and carried by people everyday, as a blackbox filling our our rooms and pockets.
Notes 1. A constructed language is a language (also known as a conlang, glossopoeia, artificial language, auxiliary language, and ideal language) that has been consciously created by an individual or group. 2. Gottfried W. Leibniz, Letter to Johan Friedrich von Hannover [1679].
interesting|&|/|curious facts I've bumped into
timeline
- 1629 René Descartes proposes an artificial language to categorize the elements of human imagination and to describe the actual “things” of the external world.
"Et si quelqu’un avait bien expliqué quelles sont les idées simples qui sont en l’imagination des hommes, desquelles se compose tout ce qu’ils pensent, et que cela fût reçu par tout le monde, j’oserais espérer ensuite une langue universelle, fort aisée à apprendre, à prononcer et à écrire."
- ~1670 Gottfried Leibniz imagines a language called Characteristica Universalis. He intend it as an ideographic language, following the principles of chinese characters. His goal is to create an alphabet of human thought, a universal symbolic language for science, mathematics and metaphisics.
- 1917 Charles F. Pidgin received a patent for an invention to allow "visible speech" to be added to (silent) motion pictures by means of "inflatable balloons being shown for carrying the words and for enabling them to be blown from the mouth of the characters."
- 1939 Bell Labs creates the first electronic speech-synthesizing device at the New York World's Fair. It is called Voder.
“It spoke like a creepy demon.”
Circuit
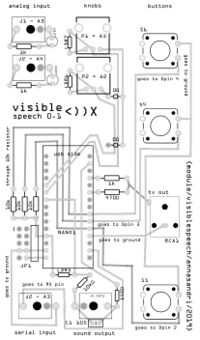
Parts needed for each module:
1x RCA plug (Lumberg Black Right Angle PCB Mount RCA Socket with Tin Plated Contacts, 2A);
2x Rotary potentiometers;
4x buttons;
1x Arduino Nano(+male/female headers);
2x LED;
4x mono jack outputs;
3x 1k resistors;
4x 10k resistors;
1x 150Ω resistor;
1x 470Ω resistor;
1× 0Ω resistor;
1x ceramic capacitor (same as meergranen);
blackheatshrink tube.
N.B. the module requires a screen equipped with a RCA connector.
How to build the module*
- Extract the module’s printed circuit board from the master;
- Place the heat shrink tube over the LDR and the LED. Heat the tube to keep them in place; Place and solder them in the assigned place on the back of the PCB;
- Place the female headers on the board and solder them on the back of the PCB. Solder the male headers to the back of the Arduino Nano. Insert them into the female headers;
- Place and solder the resistors in their assigned place on the PCB;
- Place and solder the ceramic capacitor in its assigned place on the PCB;
- Place and solder mono jack outputs, push buttons, rotary potentiometers and the RCA plug in their assigned place on the PCB;
- Place and solder the JP. Solder a bridge on the front side of the PCB between the two pins in the second row from the end (pin7, pin8).
How to Connect the module*
- Power the module by connecting the Arduino with a power source;
- Connect your screen with the RCA plug via a RCA cable.
Functions
How to interact with the module*
Rotary potentiometers 1-2
1:Voice Quality Symbols [AnalogRead A1]
Use the knob to play with VoQS.
2:Machine-Readable Speech [AnalogRead A2]
Use the knob to play with messages from other modules.
Push Buttons 1-2-3
Use the buttons to play with Pidgin’s Visible Speech System and other translations.
1:Lingua Franca [DigitalRead D4]
2:IPA International Phonetic Chart [DigitalRead D3]
3:Binary [DigitalRead D4]
Final Code
 #include <fontALL.h>
 #include <avr/pgmspace.h>
 #include <TVout.h>

 #include "mouthclosed.h"
 #include "mouthopen.h"
 #include "top.h"
 int knob1;
 int knob2;
 const int button1Pin = 4; //buttons constants
 const int button2Pin = 3;
 const int button3Pin = 2;
 int button1State = 0; //buttons variables
 int button2State = 0;
 int button3State = 0;
 int incomingByte = 0; //for serial communication

 TVout TV; //for the TVOUT mode
 char HELLO []= "hello!";
 char H []= "01101000";
 char E []= "01100101";
 char L []= "01101100";
 char O []= "01101111";
 char IPA []= "hɛˈləʊ";
 char third []= "{V}isModal_Voice";
 char fourth []= "{F}isFalsetto";
 char first []= "{W}isWhisper";
 char second []= "{C}isCreak";
 char neighbour [] = "neighbour[ˈneɪbər] says:";
 char noserial1 [] = "NO_NEW_MESSAGES";
 char noserial2 [] = "WAITING_TO_CONNECT((:())";
void setup() {
 Serial.begin (9600);
 TV.select_font(font6x8);
 TV.begin(PAL,120,96);
 pinMode ( button1Pin && button2Pin && button3Pin, INPUT_PULLUP);
}
void loop() {
 // put your main code here, to run repeatedly:

 button1State = digitalRead(button1Pin); //read the buttons state
 button2State = digitalRead(button2Pin);
 button3State = digitalRead(button3Pin);
 knob1 = analogRead(2);
 knob2 = analogRead(1);
Serial.println(knob2);
 if ( knob1> 1020 && knob2> 1020){ //2 frames face animation--
 //TV.clear_screen ();
 TV.bitmap (0,0,top);
 TV.bitmap (0,55,mouthclosed);
 TV.delay (500);
 TV.bitmap (0,55,mouthopen);
 TV.delay (500);
 Serial.println ("TVOUT");
 Serial.println(knob2);
 }
 if (button1State == HIGH) {
     Serial.print ("button1");
     TV.clear_screen ();
     //TV.draw_rect (70,10,45,80,WHITE,WHITE);
     TV.select_font(font8x8ext);
     //TV.fill (INVERT);
     TV.print(70,20,HELLO);
     TV.println(70,30,HELLO);
     TV.println(70,40,HELLO);
     TV.println(70,50,HELLO);
     TV.println(70,60,HELLO);
     TV.println(70,70,HELLO);
     }
 if (button2State == HIGH) {
     Serial.print ("button2");
     TV.clear_screen ();
     TV.select_font (font8x8ext);
     TV.println (70,20,"IPA:");
     TV.select_font(font4x6);
     TV.print(70,70,HELLO);
     TV.println(70,60,IPA);
     //delay (50);
     }
  if (button3State == HIGH) {
     Serial.print ("button3");
     TV.clear_screen ();
     //TV.fill(INVERT);
     TV.select_font (font8x8ext);
     TV.print (70,20,"BIN:");
     TV.select_font(font6x8);
     TV.print(70,30,H);
     TV.print(70,40,E);
     TV.print(70,50,L);
     TV.print(70,60,L);
     TV.print(70,70,O);
     //delay (50);
     }
    if (knob1>750 && knob1<1020){
      TV.select_font (font8x8ext);
      TV.clear_screen();
      TV.println(0,0,first);
      delay (1000);
      TV.draw_rect (0,70,10,10,WHITE,WHITE);
      delay (200);
      TV.clear_screen();
       }
    if (knob1>510 && knob1<750){
       TV.select_font (font8x8ext);
       TV.clear_screen();
       //TV.fill(INVERT);
       TV.println(0,20,second);
        //TV.fill(INVERT);
       TV.draw_rect (0,70,80,20,WHITE);
       delay (200);
       }
    if (knob1>255 && knob1<510){
       TV.select_font (font8x8ext);
       TV.clear_screen();
       TV.println(0,40,third);
       TV.draw_rect (40,70,30,30,WHITE,WHITE);
       delay (200);
       }
    if (knob1>0 && knob1<255){
       TV.clear_screen();
       TV.select_font (font8x8ext);
       TV.println(0,70,fourth);
       delay (1000);
       TV.draw_rect (0,0,30,30,WHITE);
       //TV.fill(INVERT);
       delay (200);
       }

         if (knob2< 1010) {
             //TV.clear_screen();

             TV.select_font (font8x8);
             Serial.println(neighbour);
             TV.print (70,10, "neigh");
             TV.print (70,20, "bour");
             TV.print (70,30, "says:");

         }
         if (knob2>700 && knob2<1010 && Serial.available() > 0) { //for serial communcation byte
             incomingByte = Serial.read();//read the incoming byte
             //TV.clear_screen();
             //TV.print (0,0, neighbour);
             Serial.println(incomingByte);
             TV.select_font (font8x8ext);
             TV.println (70,40,incomingByte);
             delay(500);
             Serial.println (knob2);
             }
         if (knob2>350 && knob2<700 && Serial.available() > 0) { //for serial communcation hex
             incomingByte = Serial.read();//read the incoming byte
             //TV.clear_screen();
             //TV.print (0,0, neighbour);
             TV.select_font (font8x8ext);
             TV.println (70,50, incomingByte, HEX);
             Serial.println (incomingByte, HEX);
             }
         if (knob2>0 && knob2<350 && Serial.available() > 0) { //for serial communcation bin
             incomingByte = Serial.read();//read the incoming byte
             //TV.clear_screen();
             //TV.print (0,0, neighbour);
             TV.select_font (font6x8);
             TV.println (70,60, incomingByte, BIN);
             Serial.println (incomingByte, BIN);
             }

         else if (knob2< 1020 && Serial.available() == 0) { //if there's no serial available
           //TV.clear_screen();
           TV.select_font (font8x8);
           delay(200);
           TV.print (70,70,"[...]");
           delay (200);
}
}
[Technical]Work in progress
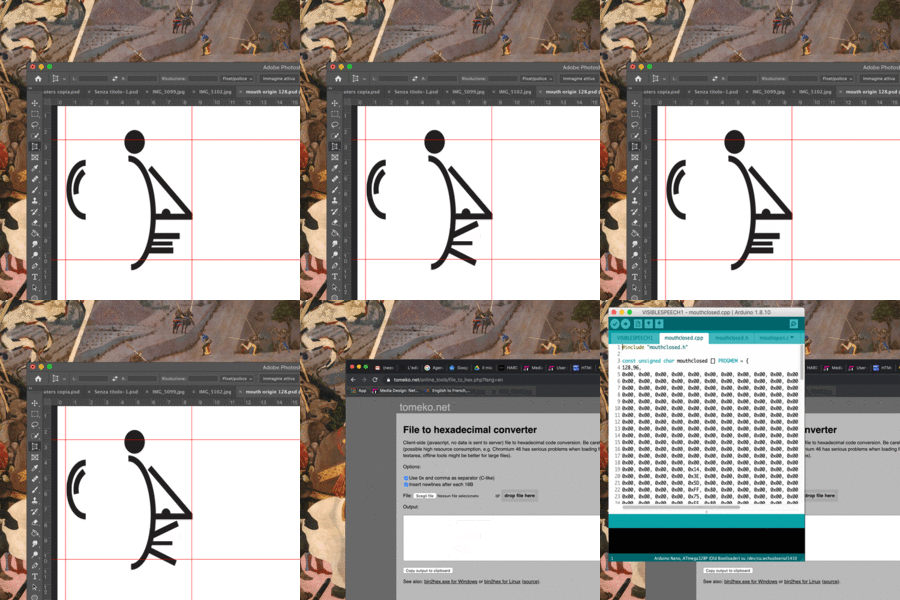
To convert images into HEX ( *and make a sort of animation):
1. I prepared a simple black and white image using illustrator\photoshop. I exported it as a bitmap file with a resolution compatible with the one used by the TV OUT mode (128x96px).
2. I used an online tool to convert the image into hexadecimal code. Not all of the options found in the internet are able to create an array compatible with the arduino code. These are the ones that worked better for me:
- https://tomeko.net/online_tools/file_to_hex.php?lang=en (It works with images of a 128x96 px size that means all the screen in the TVout mode. I don’t know why but when It creates the code it flips the image vertically [*!?] so I flipped it before doing the convertion;
- http://marlinfw.org/tools/u8glib/converter.html (It works also with smaller images, even in a jpg or png format).
3. I added in my Arduino code folder two file extensions (.cpp & .h) copied from the DEMOPAL example. Then I replaced the code of the previous image with the one that I generated with the converter tool:
(.cpp):
#include “filename”
const unsigned char filename [] PROGMEM  = {
128,96, // image size
hex code
};
(.h):
#include <avr/pgmspace.h>
#define FILENAME_H
extern const unsigned char filename [];
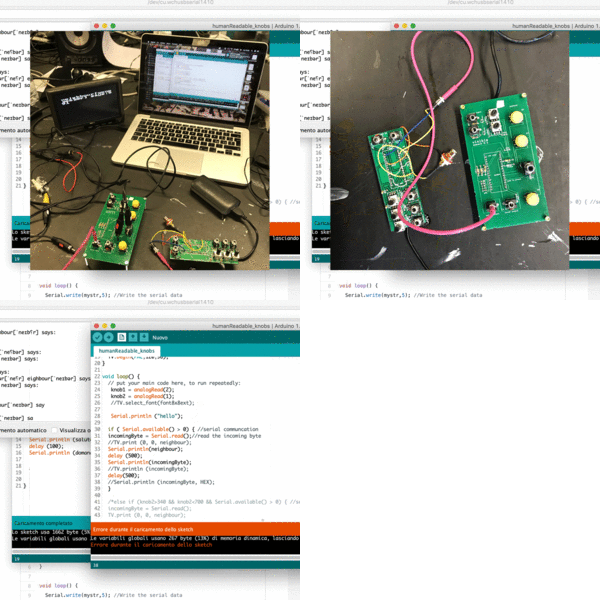
To send and receive messages from a module to another via serial communication
Arduinos can send messages to other boards by using serial communication. It is possible to do it by connecting the required pins directly on the board. In my case I decided to test it by making an hardware adjustment on each module. I added and soldered an extra mini jack input for each of them.
How to connect it
for the sender (TX)
- Solder a wire to the Arduino GND to the mini jack GND;
- Solder another wire from the Arduino TX pin to the mini jack.
for the receiver (RX)
- Solder a wire to the Arduino GND to the mini jack GND;
- Solder another wire from the Arduino TX pin to the mini jack.
Code
for the sender (TX)
void setup() {
Serial.begin(9600);
}
void loop() {
Serial.print (“message”);
}
for the receiver (RX)
I arranged the code to let the Arduino be able to output the message on the TV. It is also possible to “translate” the bytes received into HEX, BIN, DEC or OCT.
#include <fontALL.h>
#include <TVout.h>
int incomingByte = 0; //for serial communication
TVout TV;
void setup() {
Serial.begin (9600);
TV.begin(PAL,120,96);
void loop() {
if (Serial.available() > 0) { //for serial communcation byte
incomingByte = Serial.read();//read the incoming byte
Serial.println(incomingByte); //to output the message on the serial monitor be sure that the module is receiving
TV.println (incomingByte); //to output the message on the TV

