Vape Hacking: Difference between revisions
| (41 intermediate revisions by the same user not shown) | |||
| Line 1: | Line 1: | ||
<big font-style="bold">━─━─━━─━「ѵąքҽ հąçҟìղց」━━─━─━─━</big> | =<big font-style="bold">━─━─━━─━「ѵąքҽ հąçҟìղց」━━─━─━─━</big>= | ||
[[File:Vape-circuit.jpg|500px|thumb]] | |||
=safety precautions= | =safety precautions= | ||
warning ! working with batteries is fun but be aware : | '''<span style="color:red">warning ! working with batteries is fun but be aware</span>''' | ||
# Do not let the red and black wire touch each other, otherwise the battery will short circuit.<br> | |||
# The batteries are loaded with power, do not directly solder onto the battery - use insulation tape.<br> | |||
# Always be careful to charge and discharge the battery with the correct voltage and ampere. Lithium batteries can bloat or even explore when charged incorrectly (always use a li-ion protection circuit and voltage regulator as shown below).<br> | |||
# Wear gloves, the vape liquid is gross and sticky and smelly. | |||
# Keep an eye on them while they are charging for the first time. | |||
=step-by-step instructions= | |||
==opening the case== | |||
[[File:vape1.png|500px|thumb|left]] | |||
Most one-use vapes like elf-bars, crystal etc. are opened easily. There is a plug on the opposite end of the mouthpiece, that will come loose when pulled off with a plyer. Carefully pull out the insides without puncturing the battery. The entire circuit will slide out. | |||
<br><br><br><br><br><br><br><br><br> | |||
==extracting the battery== | |||
[[File:Vape battery.png|300px|thumb|left]] | |||
The circuit consists of a air-pressure sensor, 3.7 Lithium battery, coil and liquid container. | |||
Cut of the wires from the battery, making sure the red and black cables aren't touching at any point. | |||
Wipe the battery clean. It is now ready to rock for other projects. | |||
<br><br><br><br><br><br><br><br><br> | |||
==charging the battery== | |||
[[File:Li-ion charger.jpg|300px|thumb|left]] | |||
The battery specs are 3.7V 500mah | |||
''This means it has to be charged at 250-500mah to avoid overheating or damaging the battery. Most charger modules are set to 1000mah, which would overpower this type of battery. There is a way to change the ampere by making a modification to the module: https://www.youtube.com/watch?v=V-mpfoPU9Jo&ab_channel=LudicScience | |||
-> Adding a potentionmeter to a 1.2 kΩ resistor. Or just adding a 4k resistor to allow for 250mah charge current.'' | |||
[[File:Screenshot 2024-06-02 185225.png|300px|thumb|right]] | |||
Please be very careful when charging the battery. This is where things can go wrong. | |||
We are using a module that has a built in protection circuit for the battery. Also make sure to charge it only with a 5V usb-c charger. | |||
Simply solder wires onto the B- and B+ pins of the module and tape the other ends to the respective poles of the battery, making sure the metal is touching. Now you can plug in the USB-C charger. | |||
<br><br><br><br><br><br><br><br><br> | |||
==regulating the voltage== | |||
[[File:Voltage regulator.JPG|300px|thumb|left]] | |||
=regulating the voltage= | |||
Latest revision as of 11:41, 7 June 2024
━─━─━━─━「ѵąքҽ հąçҟìղց」━━─━─━─━
safety precautions
warning ! working with batteries is fun but be aware
- Do not let the red and black wire touch each other, otherwise the battery will short circuit.
- The batteries are loaded with power, do not directly solder onto the battery - use insulation tape.
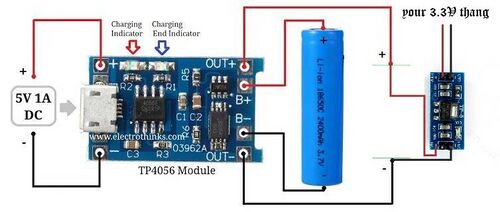
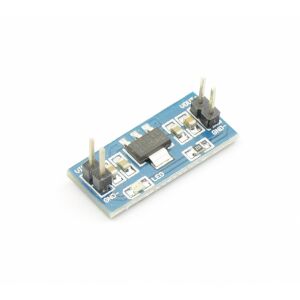
- Always be careful to charge and discharge the battery with the correct voltage and ampere. Lithium batteries can bloat or even explore when charged incorrectly (always use a li-ion protection circuit and voltage regulator as shown below).
- Wear gloves, the vape liquid is gross and sticky and smelly.
- Keep an eye on them while they are charging for the first time.
step-by-step instructions
opening the case
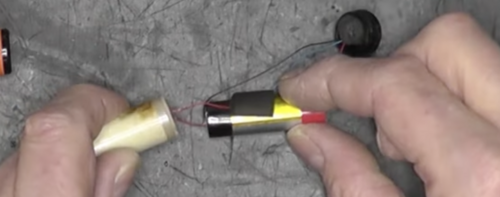
Most one-use vapes like elf-bars, crystal etc. are opened easily. There is a plug on the opposite end of the mouthpiece, that will come loose when pulled off with a plyer. Carefully pull out the insides without puncturing the battery. The entire circuit will slide out.
extracting the battery
The circuit consists of a air-pressure sensor, 3.7 Lithium battery, coil and liquid container.
Cut of the wires from the battery, making sure the red and black cables aren't touching at any point.
Wipe the battery clean. It is now ready to rock for other projects.
charging the battery
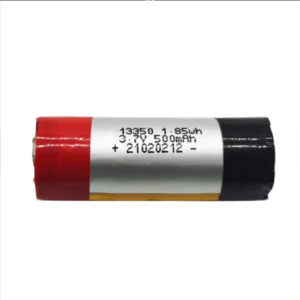
The battery specs are 3.7V 500mah
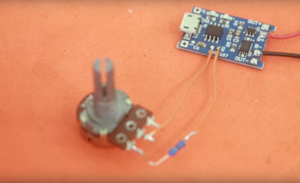
This means it has to be charged at 250-500mah to avoid overheating or damaging the battery. Most charger modules are set to 1000mah, which would overpower this type of battery. There is a way to change the ampere by making a modification to the module: https://www.youtube.com/watch?v=V-mpfoPU9Jo&ab_channel=LudicScience -> Adding a potentionmeter to a 1.2 kΩ resistor. Or just adding a 4k resistor to allow for 250mah charge current.
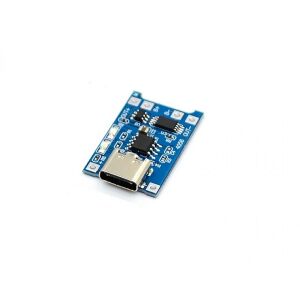
Please be very careful when charging the battery. This is where things can go wrong. We are using a module that has a built in protection circuit for the battery. Also make sure to charge it only with a 5V usb-c charger.
Simply solder wires onto the B- and B+ pins of the module and tape the other ends to the respective poles of the battery, making sure the metal is touching. Now you can plug in the USB-C charger.

