
User:Riviera/Special issue 23
Prototyping
January 16th 2024
Manetta stated that whilst taking part in algolit she encountered a video illustrating the workings of a ‘quick sort’ algorithm through the medium of an Hungarian folk dance. Inspired by this dance, Manetta guided us through a performative exercise in which we had to make pull and push requests to a git repository. Two actors were the git repository, the remaining actors were git users who were able to make push and pull requests to the git repository. I have chosen deliberately the term “user”. As Shusha Niederberger’s points out, ‘[d]espite their central position in data, users are considered only at the margins of the current critical discourses about the implications of data-driven environments’ (Niederberger 2023). Each git user was equipped with several, blank, paper cards approximately the size of an ISO/IEC 7810 ID-1 card. These were for writing git commit messages corresponding to individual changes made to “files”. These files were pieces of A4 paper with grid patterns printed on them. There were several aims to the game. The people playing the git repository had to keep track of the order in which the commits were received whilst responding to pull and push requests from the users. Users were able to write information in the files and commit their changes to the repository by sending push requests.
We engaged in two rounds with subtle changes to the rules in each round. The exercise presented an opportunity to think through software and imagine how software could be otherwise. During the exercise I had the chance to think like a git repository in the first round and like the user of a git repository in the second round. The movement from the former to the latter was interesting in itself. It was interesting to see how the git repositories implemented the logic of push and pull requests differently across the rounds.
Round One: Being a git repository with MariaX
In round one there were three files which the users were writing. These were called index.html, banana.jpeg and veryimportant.txt. I suggested to Maria that we keep track of the order in which we received the commits by adding timestamps to the commit messages. We did so, and when pull requests were made, one of us gave the cards we had available to the user making the pull request. With this system, the information about recent commits was always dispersed around the room. It was not possible to get a complete overview of all the commits. It was implicit that taking part in the performance effectively benefited from knowledge of how git works. However, it was simultaneously a learning opportunity and, as I mentioned earlier, the playful dimension encouraged imaginative thinking about how software such as git might function differently. Ultimately, the results spoke for themselves. There were some consistencies in the files, but there were also many discrepancies. Memorably, the question arose at to the issue of writing over one another. For example, during the exercise, one user drew a sheep in box 1,1 whilst another drew a cross in the same box. The effect of this was striking out the drawing of the sheep. Perhaps one reason for the differences between the files was partly attributable to the wide scope of possible drawings which could be placed in each box. These ranged from sheep to flowers, to crosses to block colours and there was some confusion amongst users about how to interpret the commit messages. However, I consider that much of the discrepancies were attributable to the way in which Maria and I served the git repository.
Round Two: Being the user of a git repository served by Senka and Victor
Senka and Victor handled pull and push requests in the second round. Simultaneously the rules were tightened up a bit such that only block colours could be placed in a given square on the file grid. Also, the users worked collectively on only one file.
Crop Tool
Sketch
These notes are concerned with a bash script I wrote recently, applied to ConTeXt and then translated to Python. The output of the script is a list of dimensions corresponding to a particular ratio. I would like it to extend it to a pdf-output. Interaction with the command line interface could be like this:
crop --ratio=2:3 --paper-size=A4 portrait.pdf
First two empty lists are declared
x = []
y = []
Subsequently, the variables of paper_height and paper_width are given.
paper_height = 297
paper_width = 210
The code could be improved by allowing the user to provide an argument. For example --papersize=A4, whereupon the dimensions of the A-series paper size could be retrieved from somewhere for use in the calculations. I’ll think about implementing this feature at a later point. Next up are two variables, step_x and step_y.
step_x = 3
step_y = 2
Let’s fill the list with some values
for n in range(step_x, paper_height, step_x):
    x += [n]

for n in range(step_y, paper_width, step_y):
    y += [n]
The lists, though of different lengths, are now full of numbers. These amount to two sequences of numbers within a particular range. When aligned, the relationship between the numbers in the lists are always in proportion to the ratio given by the user. Here is how the lists can be aligned:
i = 0
for n in range(0, len(x)):
    print(y[i], x[i])
    i += 1
Prototype
import argparse
import math
import pandas as pd
import numpy as np
from sklearn.preprocessing import MinMaxScaler
To set up a command line application the argparse module is used. Argparse allows for flags and positional arguments to be given to the script when executed at the command line. The values passed in by the user are stored in variables. Argparse also implements a help flag which offers information about available flags.
parser = argparse.ArgumentParser(description='Crop typesetting areas.')
Arguments are added. outfile is a positonal argument whereas the remaining arguments are flags. The flags will be looked at in more detail later on.
parser.add_argument('outfile',
                    metavar='OUTFILE',
                    nargs=1,
                    help="Write to a file")
parser.add_argument('--papersize',
                    metavar='PAPERSIZE',
                    nargs=1,
                    default='A4',
                    help="Provide a standard papersize")
parser.add_argument('--ratio',
                    metavar='RATIO',
                    nargs=1,
                    default='2:3',
                    help="Crop the paper to this proportion")
parser.add_argument('--orientation',
                    metavar='ORIENTATION',
                    nargs=1,
                    default='portrait',
                    help="Switch between portrait and landscape.")
parser.add_argument('--scale',
                    metavar='SCALE',
                    nargs=1,
                    default=[90.0],
                    help="Scale the size of the cropped page.")
_StoreAction(option_strings=['--scale'], dest='scale', nargs=1, const=None, default=[90.0], type=None, choices=None, required=False, help='Scale the size of the cropped page.', metavar='SCALE')
For the sake of example, let’s pass the following arguments to the script.
args = parser.parse_args(args=['--scale', '90',
                               '--ratio', '5:3',
                               '--papersize', 'A3',
                               '--orientation', 'landscape',
                               'main.tex'])
Wishlist
It would be interesting to add a --page-on-page flag which introduces variation in the output. When active, this flag would print the cropped page on the given page size at the given scale and ratio. This is the default behaviour at the moment. Implementing this flag would result in an alternative default behavior where the output is a page already cropped to size.
Papersize Dictionary
I drew up a dictionary of A-series papersizes based on information at papersizes.io. This way paper dimensions can be referenced by name.
portrait_paper_sizes = {
    # size width height (mm)
    "A0" : [841, 1189],
    "A1" : [594, 841],
    "A2" : [420, 594],
    "A3" : [297, 420],
    "A4" : [210, 297],
    "A5" : [148, 210],
    "A6" : [105, 148],
    "A7" : [74, 105],
    "A8" : [52, 74],
    "A9" : [37, 52],
    "A10": [26, 37],
    "A11": [18, 26],
    "A12": [13, 18],
    "A13": [9, 13],
    "2A0": [1189, 1682],
    "4A0": [1682, 2378],
    "A0+": [914, 1292],
    "A1+": [609, 914],
    "A3+": [329, 483]
}
Ratio
ratio = args.ratio[0].split(":")
ratio_x = int(ratio[0])
ratio_y = int(ratio[1])
print(f"Crop ratio: {ratio_x}:{ratio_y}")
Crop ratio: 5:3
The ratio is provided to the script with the --ratio flag. By default the ratio is 2:3. Some calculations need to be done so let’s initialise some variables.
possible_widths_list = []
possible_heights_list = []
w = ratio_x
h = ratio_y
In order to ascertain the size of the cropped page, I’m calculating a list of measurements. These measurements indicate towards the 2D area of the cropped page. The values are later used in the context of the scale feature. The following calculation checks the ratio against the dimensions of the page. A for loop is used to provide a limit to the length of the list which contains the measurements described above.
if (math.floor(paper_width / ratio_y)) > (math.floor(paper_height / ratio_x)):
    # If the paper is landscape
    for dimension in range(math.floor(paper_width / ratio_x)):
        possible_widths_list += [w]
        possible_heights_list += [h]
        w += ratio_x
        h += ratio_y
else:
    for dimension in range(math.floor(paper_height / ratio_y)):
        possible_widths_list += [w]
        possible_heights_list += [h]
        w += ratio_x
        h += ratio_y
Pandas, Numpy and SciKit Learn
At the beginning of the script, I imported (parts of) these modules into the python script. This was to enable python to make use of different mathematical functions. In particular, I’m going to use a pandas DataFrame, SciKit Learn’s MinMaxScaler and Numpy’s interp function. The purpose is to provide the user with the ability to scale the size of the cropped page in the output. In short, the values in possible_widths_list and possible_heights_list are adjusted to a percentage scale. That there can be more or less than 100 values in the possible_widths_list and possible_heights_list means that the value of the length of the list needs to represents 100%. To begin with, let’s create a DataFrame and a scaler. The code which appears below was adapted from this website.
df = pd.DataFrame({"widths": possible_widths_list, "heights": possible_heights_list})
scaler = MinMaxScaler()
Visualising the Dataframe
The dataframe resembles a table of widths and heights spanning a range of values.
print(df)
    widths  heights
0        5        3
1       10        6
2       15        9
3       20       12
4       25       15
..     ...      ...
79     400      240
80     405      243
81     410      246
82     415      249
83     420      252

[84 rows x 2 columns]
Adding scaled values to the dataframe
This code assigns a percentage-based value to each possible width and height.
tmp_widths = df.widths - df.widths.min()
tmp_heights = df.heights - df.heights.min()
scaled_widths = tmp_widths / tmp_widths.max() * 100
scaled_heights = tmp_heights / tmp_heights.max() * 100

df["scaled_widths"] = scaled_widths
df["scaled_heights"] = scaled_heights

print(df)
    widths  heights  scaled_widths  scaled_heights
0        5        3       0.000000        0.000000
1       10        6       1.204819        1.204819
2       15        9       2.409639        2.409639
3       20       12       3.614458        3.614458
4       25       15       4.819277        4.819277
..     ...      ...            ...             ...
79     400      240      95.180723       95.180723
80     405      243      96.385542       96.385542
81     410      246      97.590361       97.590361
82     415      249      98.795181       98.795181
83     420      252     100.000000      100.000000

[84 rows x 4 columns]
Interpolating the values
Next, the values are interpolated. To my understanding, this is like cross-referencing the values in one list against the values in another. It’s like creating an array with floating-point indexes. The values in between are interpolated and rounded to the nearest mm. The resulting values are consistently approximate.
scaled_paper_height = math.floor(np.interp(95.2, scaled_heights, possible_heights_list))
scaled_paper_width = math.floor(np.interp(95.2, scaled_widths, possible_widths_list))

print(scaled_paper_width)
print(scaled_paper_height)
400
240
Notice that the printed values correspond to the scaled values in the DataFrame. It’s best if the user can determine the scale to crop the paper to. So, the first argument to np.interp is replaced with args.scale[0].
scaled_paper_height = math.floor(np.interp(args.scale[0], scaled_heights, possible_heights_list))
scaled_paper_width = math.floor(np.interp(args.scale[0], scaled_widths, possible_widths_list))
Writing to a file
The output of the script is code which can be understood by the ConTeXt typesetting software. F-strings containing the values calculated by or provided to the script are used. The variables feature at key points in the ConTeXt code. The file is created. Then, a blank layout is defined and setup.
f = open(args.outfile[0], "w")
f.write("""\\definelayout[blank][
topspace=0mm,
backspace=0mm,
bottomspace=0mm,
width=fit,
height=fit,
header=0mm,
footer=0mm,
leftmargin=0mm,
rightmargin=0mm,
leftmargindistance=0mm,
rightmargindistance=0mm]
\\setuplayout[blank]""")
Then, having turned off page numbering, the f-string containing the values of scaled_paper_width and scaled_paper_height are passed to \definepapersize.
f.write(f"""\\definepapersize[scaled][width={scaled_paper_width}mm, height={scaled_paper_height}mm]
    \\setuppapersize[scaled]""")
The code takes landscape mode into account using an if statement
if "portrait" in args.orientation:
    f.write(f"[{args.papersize[0]}]")
else:
    f.write(f"[{args.papersize[0]}, landscape]")
Finally, the layout is setup, the frame is switched on and the text environment is invoked. Inside the text environment, a frame which fills the typesetting area is included to ensure there is content in the document.
f.write("""\\setuplayout[location=""" "{middle,middle}" """,marking=empty]
    \\showframe
    \\starttext
    \\startframedtext[width=\\textwidth,height=\\textheight]


    \\stopframedtext
    \\stoptext
    """)
f.close()
PDF Output
ConTeXt can be run on the output file, in this case main.tex, to produce a pdf.
Fix The Wi-fi
Fix the Wi-fi is a text adventure game which was written in collaboration with Anita and Mania. In Fix the Wi-fi the aim of the game is to turn the wi-fi on. The code for the game was based on the XPUB with rooms script which is (not publicly available) on chopchop. To make the game, maps and diagrams were drawn up to illustrate the world in which the game would take place. This was a constructive approach and working in a non-linear way enabled us to think through aspects of the game in tandem with one another. As we were unable to install the game on chopchop before the end of the prototyping session we met up the following day to finish it. This text discusses the code which feautres in the game, the process of making the game and offers a provocation for SI23. I hope that the changes I have made to the script may be useful in the context of SI23 if we decide to make a python text adventure.
Discussion of the Code
The code begins with the welcome message variable which is printed when the game starts. The current_room is also declared.
welcome_message = """
Oh no! The wifi is not working, try to fix it
You have to find the hidden router and re-start it in order to play more text-adventure games.
You are on the ground floor and look around, but the router is no where to be seen. You are in
a tall building, with three floors and an attic. You see some steep stairs leading to the
floor above, a closed lift and an emergency ladder out of the window.

        Do you want to:
        --> take the stairs and 'go upstairs'
        --> climb the ladder 'climb ladder'
        --> enter the lift 'enter lift'
        """
current_room = "ground_floor"
One or Several Dictionaries
Next, a lengthy dictionary was defined: a dictionary composed of dictionaries. This way of writing the algorithm is not the easiest to maintain. For brevity, I have not included the dictionary as it was, but have separated out the information into different dictionaries for better readability. Each room is turned into a variable which holds a dictionary. These dictionaries have the following keys which appear more or less consistently:name, short_description, long_description, figlet and hints.
attic = {
    "name": "the Attic",
    "figlet": r"""
   ___  _/_   _/_   `   ___
  /   `  |     |    | .'   `
 |    |  |     |    | |
 `.__/|  \__/  \__/ /  `._.'
    """,
    "short_description": "You are in the attic.",
    "long_description": """It's dusty here, a tiny mouse is running around. The
    light of the router flashing indicates you are in the right place! There is
    only one thing left to do. Try turning it off and on again.""",
}

floor_2 = {
    "name": "Floor Two",
    "figlet": r"""
 ,__   .                        ___
 /  `  |     __.    __.  .___  /   \
 |__   |   .'   \ .'   \ /   \   _-'
 |     |   |    | |    | |   '  /
 |    /\__  `._.'  `._.' /     /___,
 /
""",
    "short_description": "You reach the second floor.",
    "long_description": """The router is not here. Nothing is here except for a
    stick and a loop in the ceiling connected to a trapdoor.""",
    "hints": """
    --> open trapdoor
    --> go downstairs
    """
}

floor_1 = {
    "name": "Floor One",
    "figlet": r"""
 ,__   .                        .
 /  `  |     __.    __.  .___  /|
 |__   |   .'   \ .'   \ /   \  |
 |     |   |    | |    | |   '  |
 |    /\__  `._.'  `._.' /     _|_
 /
    """,
    "short_description": "You reach the first floor.",
    "long_description": """The router is not here. You see an angry teenager
    pacing quickly. Oh I can't believe the wifi is not working! I hate taking
    the stairs, did you check if the lift is working?
    """,
    "hints": """
    --> go upstairs
    --> go downstairs
    --> enter lift
    """
}

ground_floor = {
    "name": "the Ground Floor",
    "figlet": r"""
   ___. .___    __.  ,   . , __     ___/
 .'   ` /   \ .'   \ |   | |'  `.  /   |
 |    | |   ' |    | |   | |    | ,'   |
  `---| /      `._.' `._/| /    | `___,'
  \___/                                `
    """,
    "short_description": "You are on the ground floor.",
    "hints": """
    --> go upstairs
    --> enter lift
    --> climb ladder
    """
}

lift = {
    "name": "the Lift",
    "short_description": "You are in the lift.",
    "long_description": """To your left there is a panel with three buttons
    corresponding to the ground, first and second floors.""",
}
Let’s combine these dictionaries into a new dictionary like so.
rooms = dict(attic = attic,
             floor_1 = floor_1,
             floor_2 = floor_2,
             ground_floor = ground_floor,
             lift = lift)
Doors and go()
Doors haven’t been added yet. Previously, doors were stored as a dictionary inside the rooms dictionary. I suggest making a new dictionary called doors like so:
doors = {
    "upstairs": {
        # In a given room (key) this door leads_to (value)
        "floor_2": "attic",
        "floor_1": "floor_2",
        "ground_floor": "floor_1"
    },
    "downstairs": {
        "attic": "floor_2",
        "floor_2": "floor_1",
        "floor_1": "ground_floor",
    },
    "lift": {
        "floor_2": "lift",
        "floor_1": "lift",
        "ground_floor": "lift",
    },
    "ladder": {
        "attic": "ground_floor",
        "ground_floor": "attic"
    }
}
The structure of the dictionary has implications for the go() function which will now be implemented. In other words, the function should deduce whether it is possible to go in a given direction on the basis of the doors dictionary, not the rooms dictionary.
def go(direction, current_room):
    if direction in doors.keys() and current_room in doors[direction].keys():
        new_room = doors[direction][current_room]
        current_room = new_room
        message = f"You opened the door to { rooms[new_room]['name'] }..."
    else:
        message = f"Sorry, you can't go { direction }."
    return message, current_room
The adjusted go() function accomodates for three specific scenarios:
1. The door provided does not exist anywhere
2. The door provided does not exist in the current_room
3. The door provided exists in the current_room
If the first two scenarios are false then the door must exist in the current room. In this sense, the and clause in the if statment kills two birds with one stone.
Augusto Boal, an excursion
wifi_is_on = "broken"
In ‘’Games for Actors and Non-Actors’’ Augusto Boal opens his discussion of the ‘dialectical structure of the actor’s role’ by stating that:
The fundamental concept for the actor is not the ‘being’ of the character, but the ‘will’. One should not ask ‘who is this?’, but rather ‘what does he want?’ The first question can lead to the formation of static pools of emotion, while the second is essentially dynamic, dialectical, conflictual, and consequently theatrical.
According to Boal what determines the will is bound up with the core of the performance; what it endeavours to communicate to audiences. Boal offers several examples from Shakespearean tragedies to argue that ‘[o]nce chosen, the central idea of the work must be respected at all costs’ (p.41). From this perspective, it is obligatory that every will contributes to fleshing out the thing the play is about. In text adventure games you are the actor. What does it mean to transpose Boal’s thinking to text adventure games? How might this be done?
I speculate, in relation to Fix the Wi-fi and with Boal in mind, that the will of the actor is limited by the role played. Alternative modes of engagement with the software can therefore be ruled out insofar that these do not reflect the will of the actor. This is in part because it is FLOSS and modes of engagement are broad in scope. For example, it is not the will of the actor to extend the game through contributions to the code which makes it work. Nor is the actors’ will to read the code which makes the game function to understand how to proceed with the game. In the context of Fix the Wi-Fi, the will of the actor is to fix the wifi. There are several reasons to support the conclusion that the actor wants to fix the wifi. During our conversations, Me, Mania and Anita spoke about the lift only working when the wi-fi is enabled. I have not implemented a working lift as doing so is relatively challenging. Nevertheless, the actor may strive to fix the wi-fi because the lift is broken and needs to be fixed. Furthermore, residents are not angry when the wifi is working and they are able to connect to the internet. In other words, the aim of fixing the wi-fi can be understood as the crux of the game and this necessarily shapes the will of the actor.
This will can be instrumentalised through code in game-world mechanisms which consolidate and reify the will of the actor. However, it is simultaneously the case that the creation of in-game mechanisms is a result of the actors’ will. That is, it is a meshwork which supports the actor to realise the object of their will, because that is what is wanted by the actor. There is tension here. On the one hand, a will is imposed on the actor by code. On the other hand the will of the actor determines the code. Preserving agency is of importance in this dynamic. To illustrate this, let’s add some alternative descriptions to the rooms dictionary for when the wifi is working.
rooms['attic']['alt_description'] = """It's dusty here, a tiny mouse is running around. The
light on the router is solid green."""
rooms['floor_1']['alt_description'] = """The router is not here. Nobody is here. Did you
check if the lift is working?"""
look()
The look function plays into the will of the actor. The function returns a description of the room you are currently in. The state of the wifi only matters when there is an alt_description for the room. Otherwise long descriptions are used by default and, failing that, short descriptions. It also prints a figlet for the current room if there is one. The function retrieves this information for the current room from the rooms dictionary. The if statements provide flexibility insofar that not every room needs to have the same exact keys.
def look(current_room):
    if wifi_is_on == True and 'alt_description' in rooms[current_room].keys():
        desc = rooms[current_room]['alt_description']
    elif 'long_description' in rooms[current_room].keys():
        desc = rooms[current_room]['long_description']
    else:
        desc = rooms[current_room]['short_description']
    if 'figlet' in rooms[current_room].keys():
        figlet = rooms[current_room]['figlet']
    else:
        figlet = " "
    message = f"""
    { figlet }
    { desc }
    """
    return message
Static Objects
In Fix the Wifi we had one object: a trapdoor, which could be opened. I have not implemented the code for the trapdoor here. We speculated about including a router object which could be switched on and off. These objects were stored as dictionaries in the all-encompassing rooms dictionary which I have dismantled in this discussion. How might a router object be implemented in the game? I suggest making it into a dictionary which details its name, location and a list of possible ways of interacting with it.
router = {
    "name": "the router",
    "location":"attic",
    "actions":["enable", "disable"]
}
Let’s add it to a dictionary of objects and set the wifi to a broken state.
objects = dict(router = router)
Now two functions, enable and disable, are defined. Enabling the router will set the value of wifi_is_on to True and vice-versa. The wifi is broken so the game is not won yet. To win the game, the router needs to be reset by disabling and then enabling it. The if statements check three conditions: that the object exists in the objects dictionary, that the object is in the current room, and that the object can be enabled or disabled. Only if all of these are true does it check the value of wifi_is_on to conditionally execute more . The two functions work in much the same way. To some extent, at the moment, switching the wifi off and on again is somewhat inconsequential. However, it is the aim of the game! Accordingly, I’m going to introduce a point system into the game which prints a message that congratulates the player if it’s the first time they’ve turned the wifi on after turning it off.
game_points = 0

def disable(obj, current_room, wifi_is_on, game_points):
    if obj in objects.keys() and current_room in objects[obj]['location']:
        if 'disable' in objects[obj]['actions']:
            if wifi_is_on == "broken" or True:
                message = f"You switch {objects[obj]['name']} off"
                wifi_is_on = False
                game_points += 1
            else:
                message = f"You try to switch off {objects[obj]['name']} but it is already switched off"
        else:
            message = f"You can't disable {objects[obj]['name']}."
    else:
        message = "You can't disable that."
    return message, wifi_is_on, game_points
def enable(obj, current_room, wifi_is_on, game_points):
    if obj in objects.keys() and current_room in objects[obj]['location']:
        if 'enable' in objects[obj]['actions']:
            if wifi_is_on == True:
                message = f"You try to switch on {objects[obj]['name']} but it is already switched on"
            else:
                message = f"You switch {objects[obj]['name']} on"
                wifi_is_on = True
                game_points += 1
        else:
            message = f"You can't enable {objects[obj]['name']}."
    else:
        message = "You can't enable that."
    return message, wifi_is_on, game_points
While loop
The while loop is where the magic happens. It also offers an easy way of defining aliases for commands.
action = ""
obj = ""

print(welcome_message)
while True:
    # these next few lines could be a function
    reply = input()
    command = reply.split()
    if len(command) >= 1:
        action = command[0]
    if len(command) >= 2:
        obj = command[1]
    # exit and look
    if "exit" in action:
        break
    elif "look" in action:
        print(look(current_room))
    # enable and disable, only win the game once
    elif "enable" in action and game_points == 1:
        message, wifi_is_on, game_points = enable(obj, current_room, wifi_is_on, game_points)
        print(message)
        print("It worked! The wifi works again, congrats!!")
    elif "enable" in action:
        message, wifi_is_on, game_points = enable(obj, current_room, wifi_is_on, game_points)
        print(message)
    elif "disable" in action:
        message, wifi_is_on, game_points = disable(obj, current_room, wifi_is_on, game_points)
        print(message)
    # go and aliases
    elif "go" or "climb" or "ascend" or "descend" or "enter" in action:
        message, current_room = go(obj, current_room)
        print(message)
    else:
        print("Hmm, not sure what to do.")
Sample Output
Oh no! The wifi is not working, try to fix it
You have to find the hidden router and re-start it in order to play more text-adventure games.
You are on the ground floor and look around, but the router is no where to be seen. You are in
a tall building, with three floors and an attic. You see some steep stairs leading to the
floor above, a closed lift and an emergency ladder out of the window.

        Do you want to:
        --> take the stairs and 'go upstairs'
        --> climb the ladder 'climb ladder'
        --> enter the lift 'enter lift'


 go upstairs


You opened the door to Floor One...


 look


 ,__   .                        .
 /  `  |     __.    __.  .___  /|
 |__   |   .'   \ .'   \ /   \  |
 |     |   |    | |    | |   '  |
 |    /\__  `._.'  `._.' /     _|_
 /

    The router is not here. You see an angry teenager
    pacing quickly. Oh I can't believe the wifi is not working! I hate taking
    the stairs, did you check if the lift is working?


 go upstairs


You opened the door to Floor Two...


 go upstairs


You opened the door to the Attic...


 disable router


You switch the router off


 enable router


You switch the router on
It worked! The wifi works again, congrats!!


 climb ladder


You opened the door to the Ground Floor...


 go upstairs


You opened the door to Floor One...


 look


 ,__   .                        .
 /  `  |     __.    __.  .___  /|
 |__   |   .'   \ .'   \ /   \  |
 |     |   |    | |    | |   '  |
 |    /\__  `._.'  `._.' /     _|_
 /

    The router is not here. Nobody is here. Did you
check if the lift is working?


 exit
A Provocation: Cloud Computing and Fix the WIfi
In order to play Fix the Wifi, one can execute the following command:
$ python3 <(curl -s https://pad.xpub.nl/p/si23-prototyping-wifi/export/txt)
There are some differences between the code in the etherpad and the code above. I have discussed some of these already in seeking to improve aspects of the code to enhance readability and implement additional features. There is, however, in this one line of code, a relationship to a datacenter. Were Fix the Wifi to be installed on Chopchop in this way would it be more space-efficient? This could be debated in terms of how much space an etherpad takes up in contrast to a script. However, there are contingencies which might also be taken into account such as how much space there is avaiable on chopchop in proportion to at the datacenter.
Side Project: Chess Diary
February 5th 2024
Chess is a hobby of mine. I attend a chess club every week here in Rotterdam. In competitive chess games it is common to record the moves made during the game on a scoresheet. The other week I designed a chess diary using Simon’s Improved Layout Engine (SILE). The layout engine itself is TeX-inspired. It borrows some algorithms from TeX and uses a similar syntax. I’m familiar with ConTeXt which is a variant of TeX. I have a love-hate relationship with ConTeXt. On the one hand, it offers extreme microtypographical precision. On the other hand, the software is ideosyncratic and is not conducive to collaborative practice. Due to this ambivalence which I have about ConTeXt, I wanted to produce a publication using an alternative layout engine. In this case I chose SILE.
Inital Impressions of SILE
SILE is a layout engine for typesetting PDF documents. It reads code written in a format specific to
SILE and generates PDF output. SILE can read XML files, though the manual advises against hand-coding
such documents because the TeX-like syntax is simpler to write by hand. SILE is comprised of a selection
of packages which are written in Lua. One adds directives in ones SILE code to load particular packages.
This is necessary in order to utilise the macros which are defined in the package. For instance it is
not possible to call the \lorem macro unless one loads the lorem package beforehand. Thus
the following code will produce 20 words of lorem ipsum when processed by SILE.
\begin{sile}
\use[module=packages.lorem]
\lorem[words=20]
\end{sile}
In contrast to ConTeXt, SILE is refreshing because it has only one manual which covers much of what the
software can do. However, unlike ConTeXt, which offers many cohesive features, I found that SILE had
limited support for two-column layouts. Yes, the SILE manual offers an example of how to create a page
with a two-column layout. However, I did not want the columns to fill the entire text. Rather, I wanted
the two-column layout to begin after a five lines of single-column (full width) text. I could not figure
out a simple solution to this problem. Therefore, it was necessary to emulate a two column layout using
the \hfill and \hrulefill commands. To align the text in the columns it was a
matter of figuring out the ratio of \hfill to \hrulefill. These commands
insert stretchy horizontal whitespace and stretchy horizontal rules respectively. I designed the layout
for two lines and then utilised a for-loop to generate the same two lines 16 times. I repeated this
for-loop on the next page with 20 iterations. Once I was satisfied with the layout of the pages, I
utilised a third for-loop to generate fifty game-sheets, complete with page numbering. Estimating the
vertical whitespace between each line was a key aspect of ensuring the fifty pages would render as
intended.
An Afternoon with Roderick
Roderick also attends the Chess club. He trained as a graphic designer and has various pieces of book-binding equipment in his possession including a guillotine, a printer and a foil press. He suggested it might be nice to produce each 100-page chess diary in five signatures which could then be bound together. Each signature would be comprised of five A4 sheets folded in half to produce A5 pages. We also discussed the dimensions of the publication, given that it would probably be used by chess players whilst sitting at a table with a chess board between them. Roderick suggested that it might make sense to resize the pages so that they were of a non-standard dimension. However, I thought this would be impractical. In any case, we attempted to print the prototype I had designed with SILE using his laptop and printer. This resulted in a print error, however. Whereas we made little progress in producing a physical outcome together on Sunday, we intend to meet up again and make more headway soon. We are optimistic that the chess diary could be a meaningful piece of merchandise for club members.
February 17th 2024

The cover of the Chess Diary is not yet attached to the spine
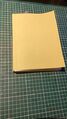
A blank cover for the chess diary
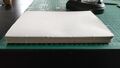
Sewn together signatures
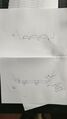
Roderick's diagram illustrating a technique to begin sewing signatures together
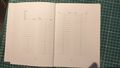
The content of the chess diary, not yet cut down to size


Roderick and I met up on the afternoon of February 17th. Roderick had been able to fix the printing issue we were having last time. Since our previous meeting some minor edits were made to the pdf. Roderick had printed five copies comprised of five signatures each. Changes to the PDF included the addition of a blank page at the beginning, a colophon at the end and some adjustments to the page numbering. The pages were printed with crop and fold marks because the printing space had been resized to smaller dimensions. The edits to the pdf were made using Adobe software by someone Roderick knows.
We proceeded to fold the signatures. This was tricky as we were going against the natural grain of the paper. Roderick demonstrated a technique for folding. One creates an L-shape with one hand. The thumb is placed at the outer, bottom corner of the paper whilst the index finger is placed somewhere along the outside edge. Then one uses a runs a folding tool up and down the inside edge at a 45 degree angle to create a sharp fold. Having folded each of the signatures, it's necessary to punch holes along the inside edge. Again, Roderick demonstrated to me a technique for this. First, a punching template is designed on a separate piece of paper using a compass. Sewing stations are indicated to by short lines placed at regularly patterned intervals along the inside edge on the outside of the paper. Next, the folded edge of a signature is placed over the edge of a table. One takes the punching template in one hand and a punching needle in the other. The punching template is placed face-up halfway through the signature. The hand which holds the punching needle presses down on the paper to prevent it from moving. Aiming towards the body, holes are carefully punched through the paper at a 45 degree angle. These holes are made at the intervals indicated to by the punching template. Having punched holes in the inside edges of the signatures it's time to sew the signatures tightly together. Roderick showed me some tricks for threading the sewing needle to prevent the string from becoming disconnected from the needle. We measured out a length of string six times the length of the spine, because we had five signatures. Then, starting from the outside the signatures were sewn together. Roderick emphasised the importance of keeping the thread tight but not so tight that the paper rips. He also stated it was important to stitch the signatures together by making loops which go from below to above.
We sewed the signatures together and then set about gluing them together. We ran PVA glue up and down the spine and placed weight on the books to press them shut. Roderick spoke a bit about fly-sheets. He also spoke about the ways in which different bindings can impact how flat the pages lie when the book is open. I decided to make a prototype without fly sheets and Roderick made his with these included. To create covers for the book, we moved on to discuss the cover design. We chose some linen and cut this to size based on the sum of the width of the pages and the width of the spine. Despite that we have plans to use a foil press to design a pattern on the spine, we decided to add creases to the spines. Initially, we glued the linen to pieces of paper and used a press to flatten them whilst the glue dried. We took the paper-linen out of the press and cut it down to the correct dimensions for the book. To illustrate where the spine would be and where we would glue it the collection of signatures, we creased the cover using a metal creasing tool.
Next time we meet we are going to create covers using the foil press and hopefully attach the covers to the books.