Interfacing the law research Zalan Szakacs
Research ideas
Research questions:
- How would be possible to set up a pirate library through steganography?
- Which technologies would be used?
- Where would be the books hidden? JPG, PDF, MP3, WAV, EXIF?
- Which books would be included?
- How do you link them?
- Which interface to use?
- Which cataloging system to use?
- How could layering (text, images, metadata) become the navigation element?
- How could be pirated & steganographed books brought back to the "official" library?
- How could the reader find those books in the library?
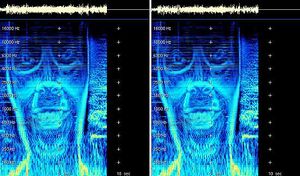
- How would it be possible to translate the texts into audio and while playing the audio the images would appear in frequency levels?
For my research I want to look into using several steganography tools through python to explore abusing file formats, such as hiding books in other books, texts in images, images in audio, etc. These experiments would create the foundation for programming the steganographed pirate library.
Research thought:
interest in hiding files in other files (imagine a PDF with an audio file?) A sound file has a whole library inside it. JPEG has free space inside it. (metadata ... EXIF data .... ) Steganography
hiding books in other books
censorship
books on the blacklist
read&seek
pirate library is pirating it’s own files
hiding pirated books in “official” library
What is the difference between Cryptography, Steganography and Digital Watermarking?
Cryptography
change the data so it is not readable. Adversary can see there is a data communicated but can’t understand it.
Steganography
hide the very existence of the data. Adversary doesn’t know of a secret communication.
Watermarking
either visible or invisible and used to identify ownership and copyright.
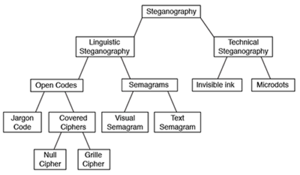
Brief history of Steganography
- 480 BC Wooden tablets and beeswax
- 494 BC Head tattoo
- 1558 Hidden messages in hard boiled eggs
- 1585 Beer barrel
- 1680 Musical notes
- 1800 Newspaper code
- 1915 Invisible ink
- 1941 Microdotes
- 1980's Thatcher's watermarking
- 1990 Digital steganography
- Steganography in image
- Least significant bit insertion
- Steganography in image
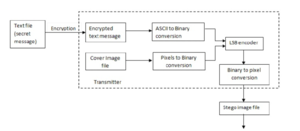
Least Significant Bit (LSB) insertion is most widely known algorithm for image steganography ,it involves the modification of LSB layer of image. In this technique,the message is stored in the LSB of the pixels which could be considered as random noise.Thus, altering them does not have any obvious effect to the image.
- Masking and filtering
Masking and filtering techniques work better with 24 bit and grey scale images. They hide info in a way similar to watermarks on actual paper and are sometimes used as digital watermarks. Masking the images changes the images. To ensure that changes cannot be detected make the changes in multiple small proportions. Compared to LSB masking is more robust and masked images passes cropping, compression and some image processing. Masking techniques embed information in significant areas so that the hidden message is more integral to the cover image than just hiding it in the "noise" level. This makes it more suitable than LSB with, for instance, lossy JPEG images.
- Redundant Pattern Encoding
Redundant pattern encoding is to some extent similar to spread spectrum technique. In this technique, the message is scattered through out the image based on algorithm. This technique makes the image ineffective for cropping and rotation. Multiple smaller images with redundancy increase the chance of recovering even when the stegano-image is manipulated.
- Encrypt and Scatter
Encrypt and Scatter techniques hides the message as white noise and White Noise Storm is an example which uses employs spread spectrum and frequency hopping. Previous window size and data channel are used to generate a random number.And with in this random number ,on all the eight channels message is scattered through out the message.Each channel rotates,swaps and interlaces with every other channel. Single channel represents one bit and as a result there are many unaffected bits in each channel. In this technique it is very complex to draw out the actual message from stegano-image. This technique is more secure compared to LSB as it needs both algorithm and key to decode the bit message from stegano-image. Some users prefer this methos for its security as it needs both algorithm and key despite the stegano image. This method like LSB lets image degradation in terms of image processing, and compression.
- Algorithms and transformations
LSB modification technique for images does hold good if any kind of compression is done on the resultant stego-image e.g. JPEG, GIF. JPEG images use the discrete cosine transform to achieve compression. DCT is a lossy compression transform because the cosine values cannot be calculated exactly, and repeated calculations using limited precision numbers introduce rounding errors into the final result. Variances between original data values and restored data values depend on the method used to calculate DCT
- Steganography in audio
This is a Poc (Proof of Concept) to create a file that can be seen as image (BMP) and played as sound (RAW PCM). So it's a kind of polyglot file. It's a bit comparable to steganography but here the sound doesn't need to be extracted first, the file can be just played as such, provided that you tell to the player what are the sound specs (sampling rate, channels, bit-depth).
- LSB coding
Using the least-significant bit is possible for audio, as modifications usually would not create recognizable changes to the sounds. Another method takes advantage of human limitations. It is possible to encode messages using frequencies that are indistinct to the human ear. Using frequencies above 20.000Hz, messages can be hidden inside sound files and can not be detected by human checks.
- Parity coding
Instead of breaking a signal down into individual samples, the parity coding method breaks a signal down into separate regions of samples and encodes each bit from the secret message in a sample region's parity bit. If the parity bit of a selected region does not match the secret bit to be encoded, the process flips the LSB of one of the samples in the region. Thus, the sender has more of a choice in encoding the secret bit, and the signal can be changed in a more unobtrusive fashion.
- Phase coding
Phase coding attends to the disadvantages of the noise inducing methods of audio Steganography. Phase coding uses the fact that the phase components of sound are not as audible to the human ear as noise is. Rather than introducing perturbations, this technique encodes the message bits as phase shifts in the phase spectrum of a digital signal, attaining an indistinct encoding in terms of signal-to-perceived noise ratio.
- Spread spectrum
In the context of audio Steganography, the basic spread spectrum (SS) method attempts to spread secret information across the audio signal's frequency spectrum as much as possible. This is comparable to a system using an implementation of the LSB coding that randomly spreads the message bits over the entire audio file. However, unlike LSB coding, the SS method spreads the secret message over the sound file's frequency spectrum, using a code that is independent of the actual signal. As a result, the final signal occupies a bandwidth in excess of what is actually required for broadcast.
- Echo hiding
In echo hiding, information is implanted in a sound file by introducing an echo into the separate signal. Like the spread spectrum method, it too provides advantages in that it allows for a high data transmission rate and provides superior strength when compared to the noise inducing methods. If only one echo was produced from the original signal, only one bit of information could be encoded. Therefore, the original signal is broken down into blocks before the encoding process begins. Once the encoding process is completed, the blocks are concatenated back together to create the final signal.
- Steganography in video
- Least Significant Bit Insertion
- Steganography in video
This is the most simple and popular approach for all types of steganography. In this method the digital video file is considered as separate frames and changes the displayed image of each video frame. LSB of 1 byte in the image is used to store the secret information. Effecting changes are too small to be recognized by human eye. This method enhances the capacity of the hidden message but compromises the security requirements such as data integrity.
- Real time video steganography
This kind of steganography involves hiding information on the output image on the device. This method considers each frame shown at any moment irrespective of whether it is image; text .The image is then divided into blocks. If pixel colors of the blocks are similar then changes color characteristics of number of these pixels to some extent. By labeling each frame with a sequence number it would even be easy to identify missing parts of information. To extract the information, the displayed image should be recorded first and relevant program is used then
- 3D steganography
- current VoIP steganography
3D Steganography
With the development of digital modeling and visualization techniques for 3D
objects, 3D models have been widely created and used for geometry representation,
such as the cultural heritage recording like Digital Michelangelo Project
CAD models, and structural data of biological macromolecules. As more
and more 3D models appear, polygonal meshes in particular, how to hide information
within them has received much attention for a variety of purposes,
ranging from copyright enforcement to authentication.
3D Steganography talk by Dennis de Bel
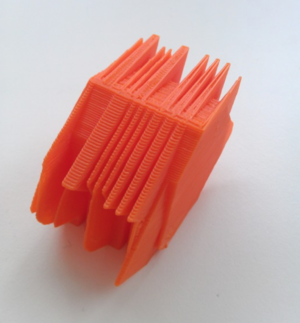
3D Steganography 3D printing project by Dennis de Bel
A High Capacity 3D Steganography Algorithm
A High-Capacity Data Hiding Method for Polygonal Meshes?
Object Steganography, Noah Feehan (2012)
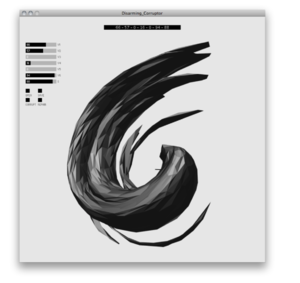
Disarming Corruptor
Steganography and Polyglots
Polyglot
In computing, a polyglot is a computer program or script written in a valid form of multiple programming languages, which performs the same operations or output independent of the programming language used to compile or interpret it
Stegospolit - Exploit Delivery With Steganography and Polyglots
Stegosploit creates a new way to encode "drive-by" browser exploits and deliver them through image files. These payloads are undetectable using current means. This talk discusses two broad underlying techniques used for image based exploit delivery - Steganography and Polyglots. Drive-by browser exploits are steganographically encoded into JPG and PNG images. The resultant image file is fused with HTML and Javascript decoder code, turning it into an HTML+Image polyglot. The polyglot looks and feels like an image, but is decoded and triggered in a victim's browser when loaded. The Stegosploit Toolkit v0.3, to be released with improvements upon existing v0.2, contains the tools necessary to test image based exploit delivery.
Research references
General Research
→ Funky File Formats
Binary tricks to evade identification, detection, to exploit encryption and hash collisions.
→Documentation of the Funky File Formats lecture
→ Steganography
Digital steganography, a set of algorithmic techniques for hiding data in files, is often used to hide text messages (or other digital content) within the bits of an image. In contrast to cryptography, steganography allows to hide the very fact that you are trying to hide something, an aspect that makes it really desirable for hidden communications or classified information leakage.
→ Javier Lloret - On opacity (2016)
→ Hiding in Plain Sight. Amy Suo Wu's The Kandinsky Collective
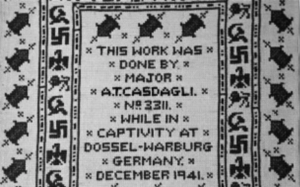
→ british pow uses morse code to stitch hidden message during wwii
Python Scripts Research
→ Introduction to Steganography
→ Using PIL → Hack This: Extract Image Metadata Using Python
→ ExifRead 2.1.2 Exif
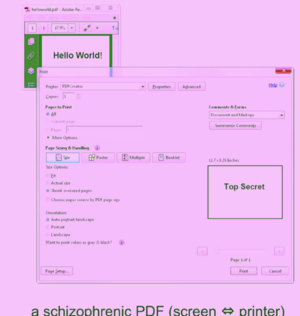
→ Using Steganography to hide messages inside PDF files
Bibliography
- Golden, K. (2015). The Nest Interface Is No Interface: The simple path to brilliant technology. New Riders.
- Steyerl, H. (2012). The Wretched of the Screen. SternbergPress.
- Fuller, M. (2013). Behind The Blip: Essays on the culture of software. Autonomedia.
Python experiments
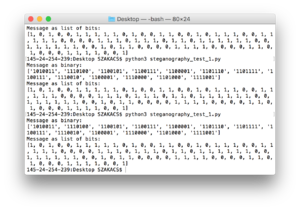
#1 experiment based on the script of steganography the art science of hiding things in other things part 1
# let's get our message set up

message = list('Steganography')

    # convert to binary representation

message = ['{:07b}'.format(ord(x)) for x in message]

print("Message as binary:")

print(message)

    # split the binary into bits

message = [[bit for bit in x] for x in message]

    # flatten it and convert to integers

message = [int(bit) for sublist in message for bit in sublist]

print("Message as list of bits:")

print(message)
#2 experiment based on the script of the art and science of hiding things in other things part 2
from PIL import Image, ImageFilter

import numpy as np

message ='Digital steganography, a set of algorithmic techniques for hiding data in files, is often used to hide text messages (or other digital content) within the bits of an image. In contrast to cryptography, steganography allows to hide the very fact that you are trying to hide something, an aspect that makes it really desirable for hidden communications or classified information leakage.'

    # first, open the original image

imgpath = 'steganography_test_1.bmp'

img = Image.open(imgpath)


    # we'll use simple repetition as a very rudimentary error correcting code to try to maintain integrity

    # each bit of the message will be repeated 9 times - the three least significant bits of the R,G, and B values of one pixel

imgArray = list(np.asarray(img))


""" given a value, which bit in the value to set, and the actual bit (0 or 1)
            to set, return the new value with the proper bit flipped """
def set_bit(val, bitNo, bit):

    mask = 1 << bitNo

    val &= ~mask

    if bit:

        val |= mask

    return val


msgIndex = 0

newImg = []

    # this part of the code sets the least significant 3 bits of the

    # R, G, and B values in each pixel to be one bit from our message

    # this means that each bit from our message is repeated 9

    # times - 3 each in R, G, and B. This is a waste, technically

    # speaking, but it's needed in case we lose some data in transit

    # using the last 3 bits instead of the last 2 means the image looks

    # a little worse, visually, but we can store more data in it - a tradeoff

    # the more significant the bits get, as well, the less likely they are to be

    # changed by compression - we could theoretically hide data in the

    # most significant bits of the message, and they would probably never

    # be changed by compression or etc., but it would look terrible, which

    # defeats the whole purpose

for row in imgArray:

    newRow = []

    for pixel in row:

        newPixel = []

        for val in pixel:

            # iterate through RGB values, one at a time

            if msgIndex >= len(message):

                    # if we've run out of message to put in the image, just add zeros

                setTo = 0

            else:

                    # get another bit from the message

                setTo = message[msgIndex]

                # set the last 3 bits of this R, G, or B pixel to be whatever we decided

            val = set_bit(val, 0, setTo)

            val = set_bit(val, 1, setTo)

            val = set_bit(val, 2, setTo)


                # continue to build up our new image (now with 100% more hidden message!)

            newPixel.append(val) # this adds an R, G, or B value to the pixel

            # start looking at the next bit in the message

        msgIndex += 1

        newRow.append(newPixel) # this adds a pixel to the row

newImg.append(newRow) # this adds a row to our image array


arr = np.array(newImg, np.uint8) # convert our new image to a numpy array

im = Image.fromarray(arr)
im.save("image_steg.bmp")


# open the image and extract our least significant bits to see if the message made it through


img = Image.open(imgpath)

imgArray = list(np.asarray(img))


    # note that message must still be set from the code block above

    # (or you can recreate it here)

origMessage = message[:20] # take the first 20 characters of the original message

    # we don't use the entire message here since we just want to make sure it made it through

print("Original message:")

print(origMessage)


message = []


for row in imgArray:

    for pixel in row:

            # we'll take a count of how many "0" or "1" values we see and then go with

            # the highest-voted result (hopefully we have enough repetition!)

        count = {"0": 0, "1": 0}

        for val in pixel:

                # iterate through RGB values of the pixel, one at a time

                # convert the R, G, or B value to a byte string

            byte = '{:08b}'.format(val)

                # then, for each of the least significant 3 bits in each value...

            for i in [-1, -2, -3]:

                    # try to get an actual 1 or 0 integer from it

                try:

                    bit = int(byte[i])

                except:

                        # if, somehow, the last part of the byte isn't an integer...?

                        # (this should never happen)

                    print(bin(val))

                    raise


                    # count up the bits we've seen

                if bit == 0:

                    count["0"] += 1

                elif bit == 1:

                    count["1"] += 1

                else:

                    print("WAT")


            # and once we've seen them all, decide which we should go with

            # hopefully if compression (or anything) flipped some of these bits,

            # it will flip few enough that the majority are still accurate

        if count["1"] > count["0"]:

            message.append(1)

        else:

            message.append(0)


    # even though we extracted the full message, we still only display the

    # first 20 characters just to make sure they match what we expect

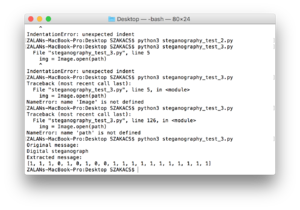
print("Extracted message:")

print(message[:20])
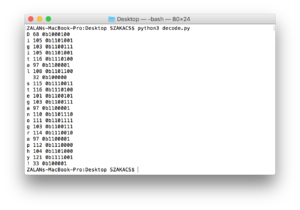
Encoding a text message based on the script of ASCII
for ch in "Digital steganography!":
    d = ord(ch)
    b = bin(d)
    print(ch, d, b)
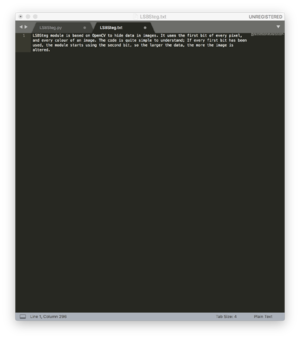
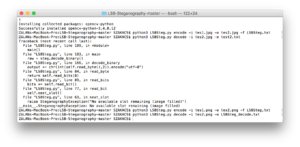
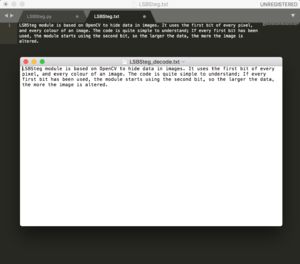
#4 experiment based on the script of https://github.com/RobinDavid/LSB-Steganography/LSB-Steganography]
#!/usr/bin/env python
# coding:UTF-8
"""LSBSteg.py

Usage:
  LSBSteg.py encode -i <input> -o <output> -f <file>
  LSBSteg.py decode -i <input> -o <output>

Options:
  -h, --help                Show this help
  --version                 Show the version
  -f,--file=<file>          File to hide
  -i,--in=<input>           Input image (carrier)
  -o,--out=<output>         Output image (or extracted file)
"""

import cv2
import docopt
import numpy as np


class SteganographyException(Exception):
    pass


class LSBSteg():
    def __init__(self, im):
        self.image = im
        self.height, self.width, self.nbchannels = im.shape
        self.size = self.width * self.height

        self.maskONEValues = [1,2,4,8,16,32,64,128]
        #Mask used to put one ex:1->00000001, 2->00000010 .. associated with OR bitwise
        self.maskONE = self.maskONEValues.pop(0) #Will be used to do bitwise operations

        self.maskZEROValues = [254,253,251,247,239,223,191,127]
        #Mak used to put zero ex:254->11111110, 253->11111101 .. associated with AND bitwise
        self.maskZERO = self.maskZEROValues.pop(0)

        self.curwidth = 0  # Current width position
        self.curheight = 0 # Current height position
        self.curchan = 0   # Current channel position

    def put_binary_value(self, bits): #Put the bits in the image
        for c in bits:
            val = list(self.image[self.curheight,self.curwidth]) #Get the pixel value as a list
            if int(c) == 1:
                val[self.curchan] = int(val[self.curchan]) | self.maskONE #OR with maskONE
            else:
                val[self.curchan] = int(val[self.curchan]) & self.maskZERO #AND with maskZERO

            self.image[self.curheight,self.curwidth] = tuple(val)
            self.next_slot() #Move "cursor" to the next space

    def next_slot(self):#Move to the next slot were information can be taken or put
        if self.curchan == self.nbchannels-1: #Next Space is the following channel
            self.curchan = 0
            if self.curwidth == self.width-1: #Or the first channel of the next pixel of the same line
                self.curwidth = 0
                if self.curheight == self.height-1:#Or the first channel of the first pixel of the next line
                    self.curheight = 0
                    if self.maskONE == 128: #Mask 1000000, so the last mask
                        raise SteganographyException("No available slot remaining (image filled)")
                    else: #Or instead of using the first bit start using the second and so on..
                        self.maskONE = self.maskONEValues.pop(0)
                        self.maskZERO = self.maskZEROValues.pop(0)
                else:
                    self.curheight +=1
            else:
                self.curwidth +=1
        else:
            self.curchan +=1

    def read_bit(self): #Read a single bit int the image
        val = self.image[self.curheight,self.curwidth][self.curchan]
        val = int(val) & self.maskONE
        self.next_slot()
        if val > 0:
            return "1"
        else:
            return "0"

    def read_byte(self):
        return self.read_bits(8)

    def read_bits(self, nb): #Read the given number of bits
        bits = ""
        for i in range(nb):
            bits += self.read_bit()
        return bits

    def byteValue(self, val):
        return self.binary_value(val, 8)

    def binary_value(self, val, bitsize): #Return the binary value of an int as a byte
        binval = bin(val)[2:]
        if len(binval) > bitsize:
            raise SteganographyException("binary value larger than the expected size")
        while len(binval) < bitsize:
            binval = "0"+binval
        return binval

    def encode_text(self, txt):
        l = len(txt)
        binl = self.binary_value(l, 16) #Length coded on 2 bytes so the text size can be up to 65536 bytes long
        self.put_binary_value(binl) #Put text length coded on 4 bytes
        for char in txt: #And put all the chars
            c = ord(char)
            self.put_binary_value(self.byteValue(c))
        return self.image

    def decode_text(self):
        ls = self.read_bits(16) #Read the text size in bytes
        l = int(ls,2)
        i = 0
        unhideTxt = ""
        while i < l: #Read all bytes of the text
            tmp = self.read_byte() #So one byte
            i += 1
            unhideTxt += chr(int(tmp,2)) #Every chars concatenated to str
        return unhideTxt

    def encode_image(self, imtohide):
        w = imtohide.width
        h = imtohide.height
        if self.width*self.height*self.nbchannels < w*h*imtohide.channels:
            raise SteganographyException("Carrier image not big enough to hold all the datas to steganography")
        binw = self.binary_value(w, 16) #Width coded on to byte so width up to 65536
        binh = self.binary_value(h, 16)
        self.put_binary_value(binw) #Put width
        self.put_binary_value(binh) #Put height
        for h in range(imtohide.height): #Iterate the hole image to put every pixel values
            for w in range(imtohide.width):
                for chan in range(imtohide.channels):
                    val = imtohide[h,w][chan]
                    self.put_binary_value(self.byteValue(int(val)))
        return self.image


    def decode_image(self):
        width = int(self.read_bits(16),2) #Read 16bits and convert it in int
        height = int(self.read_bits(16),2)
        unhideimg = np.zeros((width,height, 3), np.uint8) #Create an image in which we will put all the pixels read
        for h in range(height):
            for w in range(width):
                for chan in range(unhideimg.channels):
                    val = list(unhideimg[h,w])
                    val[chan] = int(self.read_byte(),2) #Read the value
                    unhideimg[h,w] = tuple(val)
        return unhideimg

    def encode_binary(self, data):
        l = len(data)
        if self.width*self.height*self.nbchannels < l+64:
            raise SteganographyException("Carrier image not big enough to hold all the datas to steganography")
        self.put_binary_value(self.binary_value(l, 64))
        for byte in data:
            byte = byte if isinstance(byte, int) else ord(byte) # Compat py2/py3
            self.put_binary_value(self.byteValue(byte))
        return self.image

    def decode_binary(self):
        l = int(self.read_bits(64), 2)
        output = b""
        for i in range(l):
            output += chr(int(self.read_byte(),2)).encode("utf-8")
        return output


def main():
    args = docopt.docopt(__doc__, version="0.2")
    in_f = args["--in"]
    out_f = args["--out"]
    in_img = cv2.imread(in_f)
    steg = LSBSteg(in_img)

    if args['encode']:
        data = open(args["--file"], "rb").read()
        res = steg.encode_binary(data)
        cv2.imwrite(out_f, res)

    elif args["decode"]:
        raw = steg.decode_binary()
        with open(out_f, "wb") as f:
            f.write(raw)


if __name__=="__main__":
    main()
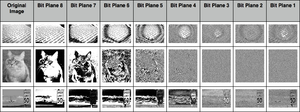
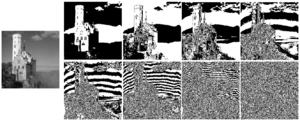
#5 experiment based on the script of bit plane slicing in python
Correction remark: So it seems that the resolution of the result needs to be the same, or at least close to the one of the original. Might be nice to automate this, by letting Python read the input image height and width and automatically take that into account.
import numpy as np
import cv2

#create a image array
img = cv2.imread("test_bitplain.jpg",cv2.IMREAD_GRAYSCALE)
row,col = img.shape
#convert each interger pixel value of given image to a bit pixel value of 8-
 #bits
def intToBitArray(img) :
    list = []

    for i in range(row):
        for j in range(col):
             list.append (np.binary_repr( img[i][j] ,width=8  ) )

    return list #the binary_repr() fucntion returns binary values but in
                #string
                #, not integer, which has it's own perk as you will notice

 #as variable name says ,it's list of pixel values in binary , but in 1
 #dimension
imgIn1D = intToBitArray(img)
#reshaping above 1D array to a matrix aka image
imgIn2D = np.reshape(imgIn1D , (638,953) )
#setting up the size of the image
def bitplane(bitImgVal , img1D ):


#this function extracts the specific bit out of each binary pixel values of
#the matrix
#for example , if bitImgVal = 3 , then , third bit of each pixel is extracted

#:param bitImgVal: specifies the position of bit to be extracted
#:param img1D: image which is to be compressed
#:return: now returns 1 dimensional list of bits'''
    bitList = [  int(   i[bitImgVal]  )    for i in img1D]

    return bitList
#i don't know why but the multiplication factor is : 2^(n-1) where n is the
#bit number
#example, if binary pixel value is 11001010 and n = 3 , factor = 2^(3-1)
#image represented by 8th bit plane
eightbitimg = np.array( bitplane(0, imgIn1D ) ) * 128

#image represented by 7th bit plane
sevenbitimg = np.array( bitplane(1,imgIn1D) ) * 64

#bitplane of 8th and 7th bit
combine = eightbitimg + sevenbitimg
comb = np.reshape(combine,(row,col))

#save combined plane image
cv2.imwrite("comb.jpeg",comb)

#save eight bit plane
eightbitimg = np.reshape(eightbitimg,(row,col))
cv2.imwrite("8bitvalue.jpg" , eightbitimg )

#save eight bit plane
sevenbitimg = np.reshape(sevenbitimg,(row,col))
cv2.imwrite("7bitvalue.jpg",sevenbitimg)

#grayscale version of original image
gray = cv2.imread("test_bitplain.jpg",cv2.IMREAD_GRAYSCALE)
cv2.imwrite("gray.jpeg",gray)

