
Pen plotters: Difference between revisions
| Line 75: | Line 75: | ||
$ cat myfile.hpgl > /dev/ttyUSB0 | $ cat myfile.hpgl > /dev/ttyUSB0 | ||
{{ Chiplotle }} | |||
==Inkscape== | ==Inkscape== | ||
Revision as of 12:05, 24 October 2023
HPGL
Hewlett-Packard Graphics Language
- There is a HPGL book in the studio/library!
- HP-GL Reference Guide
IN;IP0,0,4000,4000;SC0,100,0,100;
SP1;
PA0,0;
PD;
PA100,0;
PA100,100;
PA0,100;
PA0,0;
PU;
Plotters at XPUB
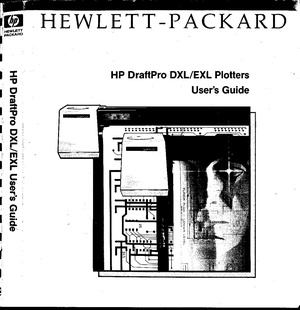

HP DraftPro EXL
A0+ pen plotter.
Currently borrowed from Varia. It was a gift from Gijs (OSP).
http://hpmuseum.net/display_item.php?hw=393
http://www.hpmuseum.net/document.php?hwfile=3232 (user manual) http://www.hpmuseum.net/collection_document.php (list of HP museum user manuals, in case the download link above does not work)
HP DraftPro EXL demo plot: press P1 + P2 simultaneously (the buttons with a small 1 and 2)
It speaks: HPGL (HP graphics language)
HP 7475A
A4/A3 plotter
https://www.hpmuseum.net/display_item.php?hw=74
https://archive.org/details/HP7475AInterfacingandProgrammingManual
demo plot: hold down the P1 + P2 keys and turn on the power
HP ColorPro
A4 plotter
http://hpmuseum.net/display_item.php?hw=80
CLI
Most plotters connect to this socket on a Linux machine:
/dev/ttyUSB0
Add your user to the dialout group first:
$ useradd USERNAME dialout
Then configure how your computer and the plotter communicate, these settings should work with most plotters:
$ stty 9600 parodd parenb ixon ixoff -F /dev/ttyUSB0
Then send a file with cat:
$ cat myfile.hpgl > /dev/ttyUSB0
Inkscape

The plot function is under: export > plot
Error: pySerial is not installed.
Please follow these steps:
- Download and extract (unzip) this file to your local harddisk: https://pypi.python.org/packages/source/p/pyserial/pyserial-2.7.tar.gz
- Copy the "serial" folder (Can be found inside the just extracted folder) into the following Inkscape folder:
/usr/???????? - Close and restart Inkscape
Make a vector file in Inkscape.
Save it as a HPGL file. See the image on the right for the settings.
For example: A3 landscape
Tip (!): landscape file = portrait plot. Make a landscape document, it plots in portrait orientation on the plotter (weird, but works)
Rasterize
Color Separation
This ColorSeparation tool from OSP: http://osp.kitchen/tools/pdfutils/
$ sh ColorSeparation FILENAME
Creates:
.
├── gunta-stoelzl-study-cmyk-page001(Black).jpg
├── gunta-stoelzl-study-cmyk-page001(Cyan).jpg
├── gunta-stoelzl-study-cmyk-page001(Magenta).jpg
└── gunta-stoelzl-study-cmyk-page001(Yellow).jpg
GIMP
filters > distorts > newsprint
spotfunction: lines
oversample: 1
cell size: 5
Inkscape
Bitmap tracing time!
However, it would be great to have a trace that does not create outlines of the lines, but renders them as single lines ... (also to speed up the final penplot!).
For this there must be an extention: center trace.
... But where?
Ah! install Inkscape 1.0 (or higher)! It comes with the newer version :).
(removed my inkscape and installed from backports!)
sudo apt remove inkscape
sudo apt -t buster-backports install "inkscape"
Pens
HP Fiber Tip Plotter Pens S Style Pens:
- $ 22 for 5: https://www.draftingsteals.com/catalog-plotters---plotter-supplies-plotter-pens-fiber-tip-plotter-pens.html
3d printable adapters for pens: