Mia/THE FOCAL CAMERA: Difference between revisions
No edit summary |
|||
| Line 81: | Line 81: | ||
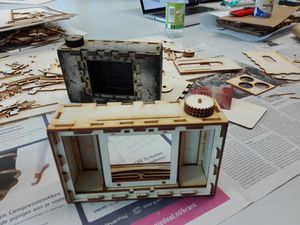
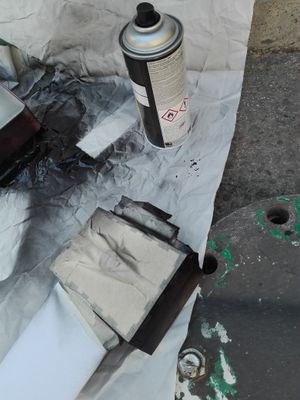
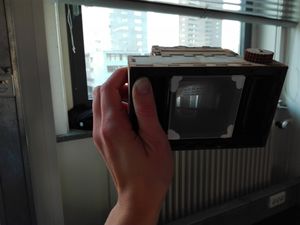
Making and building included laser cutting the pieces, gluing them together, spray painting the interior of the camera black (to prevent light bouncing around), testing to get the right focal distance and finally bringing all the pieces together. The next stage was to make the camera light tight - filling the gaps either with the mixture of acrylic and glue or taping the seams from the outside to prevent light leaks.[[File:Spray.jpg|thumbnail|right|spray paint ...]] | Making and building included laser cutting the pieces, gluing them together, spray painting the interior of the camera black (to prevent light bouncing around), testing to get the right focal distance and finally bringing all the pieces together. The next stage was to make the camera light tight - filling the gaps either with the mixture of acrylic and glue or taping the seams from the outside to prevent light leaks.[[File:Spray.jpg|thumbnail|right|spray paint ...]] | ||
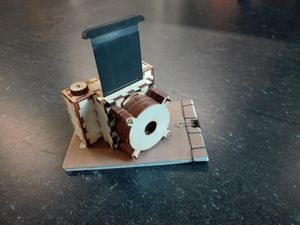
[[File:Almost done.jpg|thumbnail|left|Almost in final shape]] [[File:See the image.jpg|thumbnail|none|Testing the lens]] | [[File:Almost done.jpg|thumbnail|left|Almost in final shape]] [[File:See the image.jpg|thumbnail|none|Testing the lens]] | ||
=Final stages?= | =Final stages?= | ||
Revision as of 23:55, 19 October 2018
First, come up with something
I'd like to make ...
With my focal camera I would partly like to explore the relations photography-drawing (presupposed objectivity/subjectivity of the image) and photography-text (how one influences another and how meaning of an element depends on its surrounding meanings).
I would like my camera to produce images that are in fact photographs, merged with text or drawings directly in the making of a negative (not later in the development/enraging processes). Some sort of collage that happens already on the film in the camera. I wish to achieve the results that are rather unpredictable (that I cannot entirely know beforehand how will the image and text overlap etc.), in a way also playful (inspiration in DADA collages and cut out poems, surrealist game ‘Exquisite corpse drinks the new wine’ etc.).
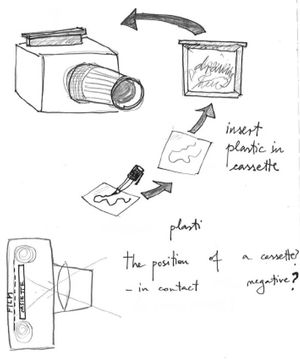
The best way I can think of to build this kind of camera would be changeable masks and/or filters. Those I imagine as removable ‘cassettes’. If possible, the camera would work with no mask inserted as well. So I wish to build a ‘normal’ camera that has an option to insert various masks (stencils) and filters with drawings/text that would then become part of the image. The idea is also to build a camera that can always be customised, depending on user’s goals.
If we manage to achieve that, it will already be beyond my expectations. In case we can make it even more complicated, I would like to see the object I photograph (as on a display or a viewfinder) and the drawing surface simultaneously and be able to draw directly on the visible image of the object. But this may be a step to think about next time, as an advanced version of the previous one. I don’t expect to realize this part if too complicated.
I imagine masks as wooden frames with plastic foil or thin plastic plates (would glass be better?) that I could draw on for instance with a permanent marker. That would enable me to draw on the site, insert the mask and take photos. So also drawings could be prepared beforehand or right at the spot. The whole set would consist of the camera and removable masks: (3 frames for instance) + plastic (or other) pieces to draw on. Then I could play with different pens as well. I remember few examples of the principle, but with the difference in the position of the mask (there it is placed in front of the lens or instead of the lens, while I wish to have the cassette behind the lenses, probably right in front of the film)... But the principle of inserted part is similar.
The process of making
According to the plan, Mathijs (the tutor of the workshop) suggested building a camera with the thin slits in the top and bottom of the camera back, right at the depth of the film. To make the drawn / written image appear sharp on the film, it needs to be in direct contact with it. The most tricky part of that is keeping the camera light-tight while inserting something so close to the film. So we chose to use the system, where I would insert a long strip of thin plastic foil in the strip and also glue some additional leather and rubber protection to avoid light coming in the camera through the gap where the foil enters it. This would allow me to draw on the plastic sheet and simply pull it down to place it in front of the film. Moreover, it was practical to experiment on the spot and draw on the sheet beforehand, and change it per-picture.
Making and building included laser cutting the pieces, gluing them together, spray painting the interior of the camera black (to prevent light bouncing around), testing to get the right focal distance and finally bringing all the pieces together. The next stage was to make the camera light tight - filling the gaps either with the mixture of acrylic and glue or taping the seams from the outside to prevent light leaks.
Final stages?
Review on the workshop
Miscelaneous
Useful pages and slideshow: Links by Mathijs
Interesting DIY tricks for equipment

