
Category:Prototypology: Difference between revisions
| Line 511: | Line 511: | ||
==Documentation Logs== | ==Documentation Logs== | ||
{{: | {{:Week 01}} | ||
{{: | {{:Week 02}} | ||
Revision as of 20:00, 20 April 2022
Microphonology
piezoelectric element
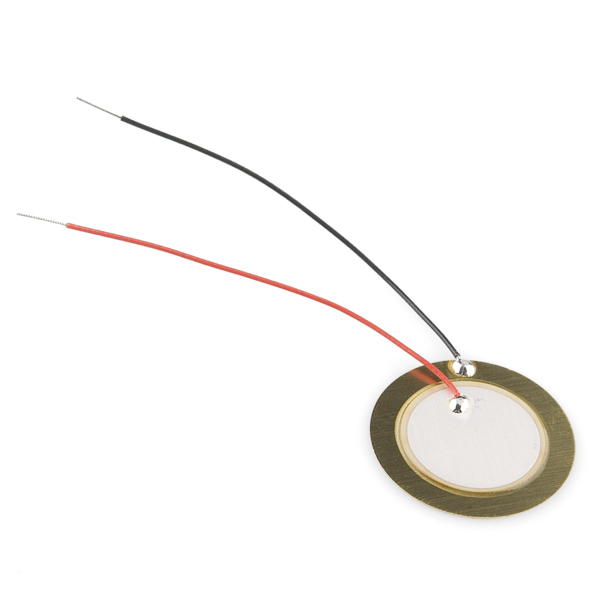
ceramic piece + metal piece. wires are solded ? on them
Also called a “contact microphone”.
Single coil

A coil of copper wires
Magnetic inputs are translated
We can listen to electric radiation.
ghost busters
There is a coil in the speaker, that creates membrane.
We listen to electricity when we put the coil near e. Devices
The membrane has electric coil inside, that start to pick up (?)
The
coil unit measure = Henry (H)
Why can’t we hear the things that the coil microphone picks up?
The coil is a spiral shaped thing… which creates a magnetic field. (made from which material?)
In an e-guitar, the string is moving in a certain frequency, and while doing that, it interrupt the magnetic field of the coil. And therefore, it creates an electric current.
This electric current needs to be amplified to be heard.
Henry unit: https://www.britannica.com/science/henry-unit-of-inductance
Electric current is not air vibrating.. instead it exists of magnetic waves.
The more coil, the more sensitive it is for magnetic waves.
It does not respond to air moving, but to magnetic waves.
You can speak into it though, as your voice will make the XXX move.
There are different terms used to refer to translating something into sound: “sonification” is a term being used to turn things into sound, and there is also the term “audibility” which acknowledges that things are already make sound, you need to translate it into something that we can hear.
in the field of electroacoustics
Coil picks up the vibration and starts to resonate with it.
Coils are used for amplifying, they are used pick up vibrations from the membrane.
EXAMPLE
When we put a coil mic on the power cable…:
- there is electricity in the power cable of 220 V, it vibrates on 50 hz (this is ⚡AC, alternating current, which means that it moves from +’s to -’s) (⚡DC direct current)
- we hear the AC, because the switching between +’s and -’s is influencing the current of the coil
- the mixer amplifies the signal
- the sound it send to the computer, where it is digitized: inside the computer there is an Analog to Digital CXXX (ADC)
bits
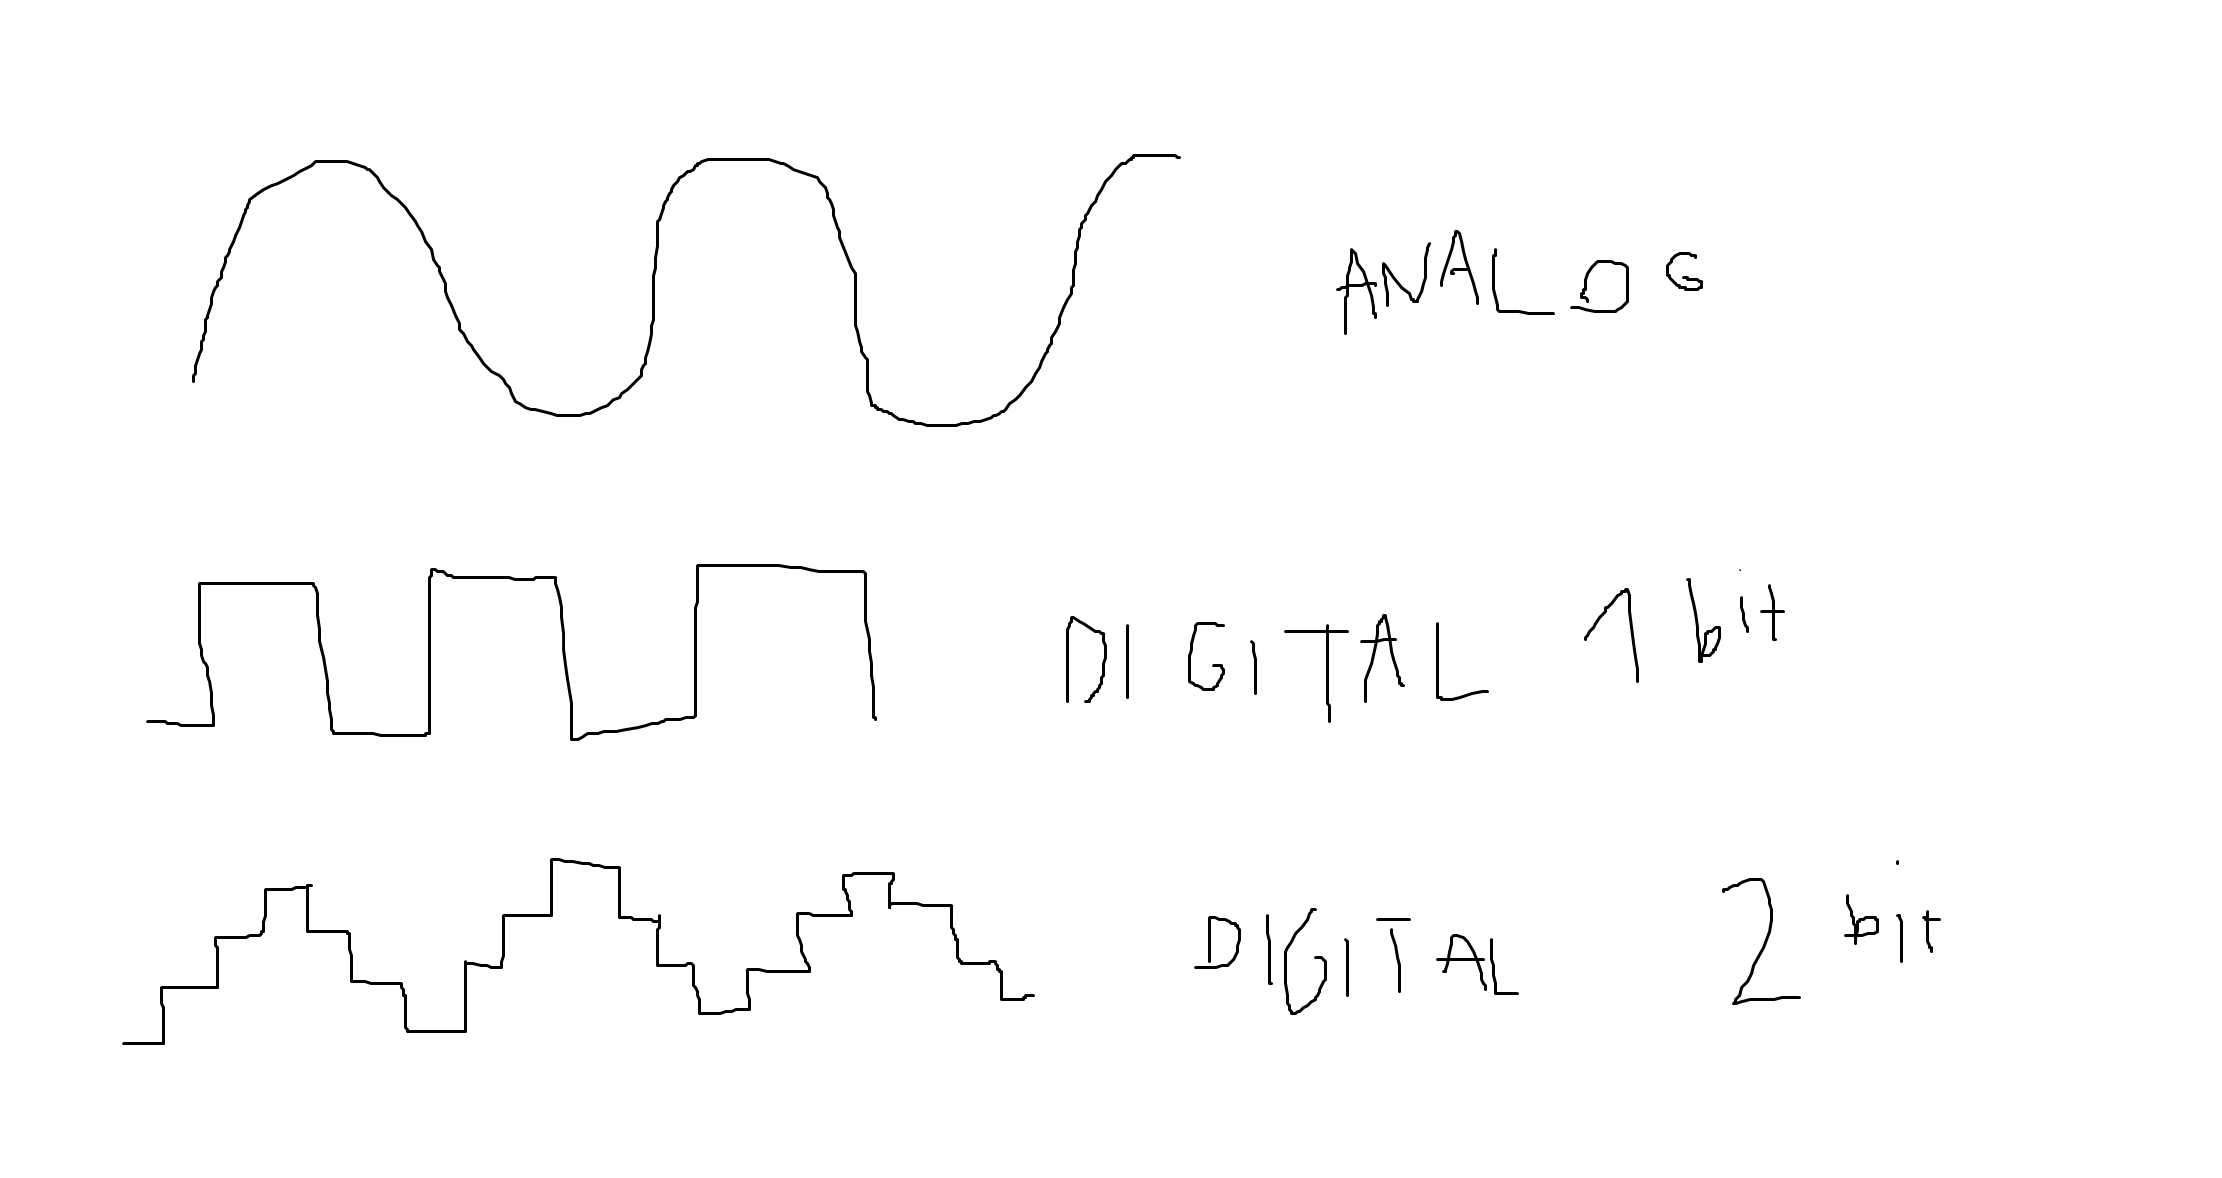
analog signal = wave (round formed wave)
ADC –> analog dicgital converter
digital signal = 0 1 (square formed wave) (bit is the resolution) (this is an one-bit signal)
1 bit = 2 steps
2 bit = 4 steps
4 bit = 16 steps
You express bits in khz.
For example: 48khz or 22 khz.
The more bits, the “better” the quality.
But this is relative, as some people really like 8-bit sounds for example.
hertz Hz
1 hz = one wave/second
15 hz = 15 hertz/second
frequency !
100 hz = 100 waves per second
this is a frequency of 100 hz
100 hz sounds lower
1000 hz sounds higher
the higher the frequency, the higher the tone
If you get older, you slowly cannot hear the higher part of the frequency spectrum anymore.
Everything over 10000 is harder for older generations to hear.
And generally you can hear from 100 hz/sec.
High frequencies are used as ringtones by younger people, as the teachers cannot hear them anymore.
High frequencies are also used as mosquito devices in the city (of Rotterdam) as a control device for public space.
dynamic microphones
The dynamic microphone (also known as the moving-coil microphone) works via electromagnetic induction. […] Dynamic microphones use the same dynamic principle as in a loudspeaker, only reversed. A small movable induction coil, positioned in the magnetic field of a permanent magnet, is attached to the diaphragm. When sound enters through the windscreen of the microphone, the sound wave moves the diaphragm. When the diaphragm vibrates, the coil moves in the magnetic field, producing a varying current in the coil through electromagnetic induction. A single dynamic membrane does not respond linearly to all audio frequencies. For this reason, some microphones utilize multiple membranes for the different parts of the audio spectrum and then combine the resulting signals. (Wikipedia)
SM58 microphone
Looks like a speaker, and it is actually a speaker.
With a microphone you get the current, with a speaker you give current.
If you speak, the membrane starts to vibrate, this creates a current in the coil, the coil then gets pre-amplified in the mixer and the audio output.
“the current in the coil”
This microphone is similar to the coil e-guitar microphone, as it is also based on coil.
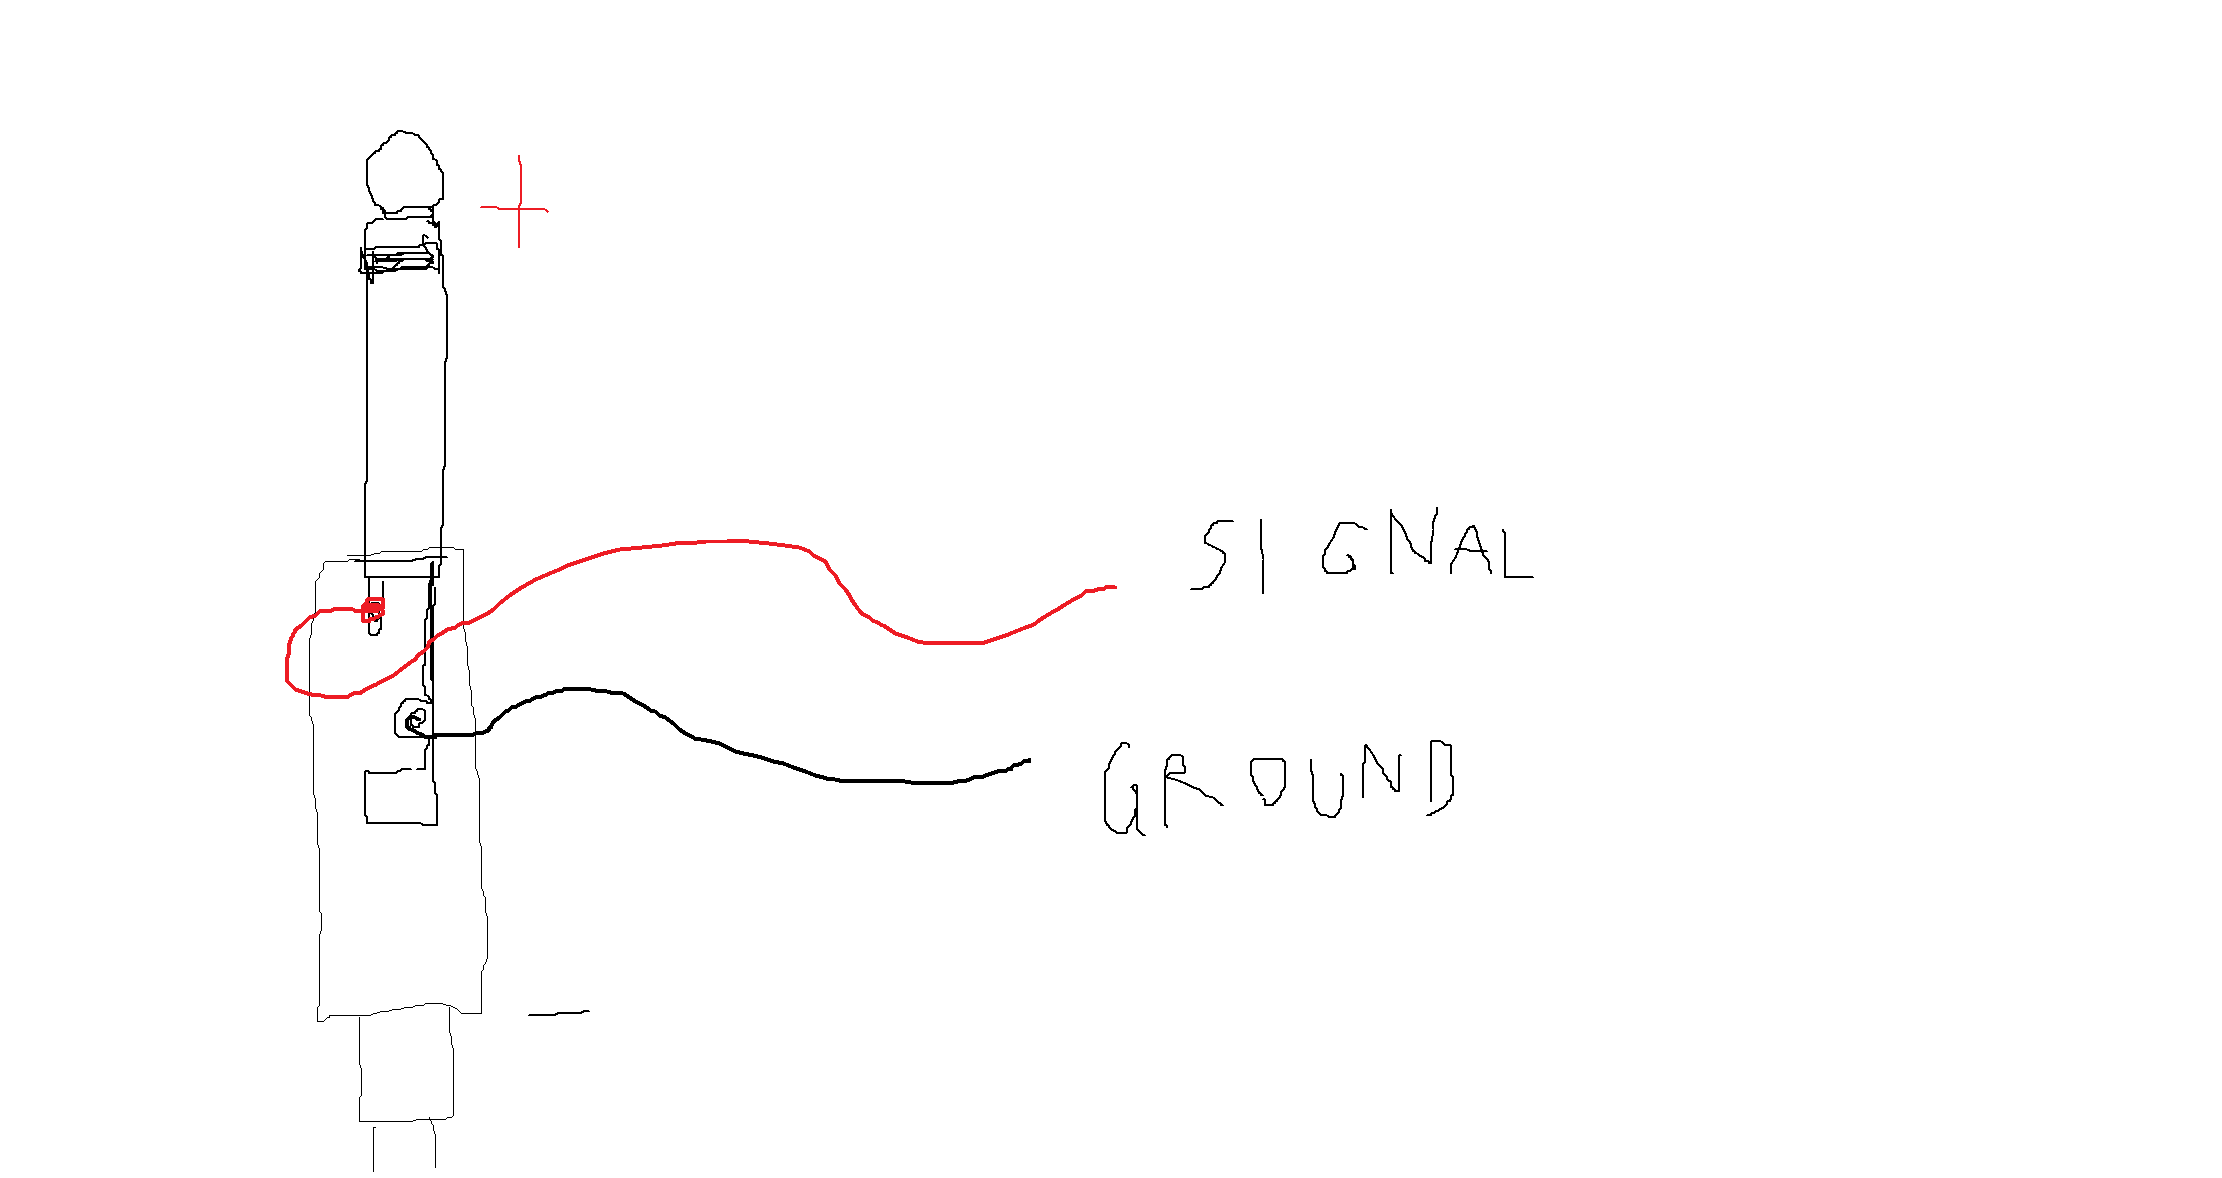
Jack connector
You can open it.
The “tip” picks up the signal.
The larger pipe is the “ground”.
When you solder the piezzo mic, you connect the black cable (the ground) to the ground of the jack connector.
What medium do you use to communicate?
Medium of air
Medium of electricity
microphone: vibrations into signal
Electrical signals are always about difference: you always need to measure the signal and the ground. You need the ground to understand what/where the signal is. It’s a point of reference.
Soldering
You can solder a piezoelectric or coil microphone.
You need: jack connector + microphone of choice + cable.
A cable is a set of wires with plastic around it. Two cables cannot touch each other. The plastic also protects the cable from picking up electromagnetic waves, to make sure you pick up a “poor” signal. This is called “interference”, which is the unwanted picked up signals, which people like theater producers strongly fear while working.
Step 1: strip your cable
Strip the (black) plastic from the end of your cable. It does not matter how much you take off, but 2 cm is useful.
They have a great tool downstairs in the interaction station, called a stripper, to take the plastic of the wires.
Once you opened it, you will find a blue and red cable.
Step 2: place the cable in the jack connector
There are two square parts on the end of the jack connector. In between, you can put the whole cable.
Take a tool (“knijptang” in Dutch) and push it together. This is just to hold it.
Step 3: isolate the red and blue cables
Isolate the red and the blue cable, this means: take a bit from the plastic from the ends of these cables.
Pick a small cutting tool, and take 5mm of the plastic from the ends of the red and blue cable. You can also do this with your finger nails, but make sure that the two cables (the red and the blue) do not touch each other!
Now you see the small wires.
Step 4: solder the cable to the jack connector
Take the solder material.
It melts at 320 Celsius degrees.
Just take a little of it, like 30 centimeters.
Take a third hand.
This is a device with little teeth that you can use to put your wires in.
Take the soldering iron.
You don’t have to use it like a pen, you just need to heat up the things you want to solder.
Don’t touch the tip of the soldering iron! It’s super hot.
The idea is that you heat up the wire, and once you place the soldering material to the wire, it will solder itself.
This is “tinning”: heating a piece of metal (the connection point), then touch it to the solder, and then it connects the two together.
Connect the red cable to the upper small hole (the one closest to the tip of the jack connector).
Connect the blue cable to the lower one (the one closest to the square holding piece at the bottom of the jack connector).
So, let’s solder!
First: Heat up the cable for 3 cm (tinning).
Then: Put the solder material to the cable.
Step 5: solder the cable to the microphone
Isolate the other side of the red and blue cable.
Cut 1 piece of** blue shrinking tube**, something like 2cm (the wider one).
Put it on the main cable.
Cut 2 pieces of white shrinking tube, 5mm each (the more narrow one).
Put one of the red and one on the blue cable.
Place the main (black) cable into the third hand.
Seperate the blue and the red cables, to make sure that they do not touch each other.
Heat the red and the blue cable and put some solder on it.
Heat one of legs of the microphone and put some solder on it.
Do it closely to the microphone itself, the legs are a bit too long.
Repeat this step for the other leg of the microphone.
So now, you have solder material on both cabled (red and blue) and on both legs of the microphone.
Because there is material already on both the cable and the leg of the mic, you only need to heat the solder material up a bit and it will connect the cable to the mic.
Now we are ready to solder the cable and mic together. Put the mic in the third hand, to make it easier to solder.
It does not matter which cable is connected to which microphone leg.
Heat the material on one of the legs a bit and connect one cable.
Repeat this for the other leg and cable.
Now put the white shrinking tube around the place where you connected the red cable with the mic.
Heat the shrinking tube by putting the soldering iron onto it, so it will shrink around the cable and protect the connection.
Repeat this for the blue cable.
Now first test your microphon!
Put it into the mixer.
To test a coil microphone, you can place it onto a phone, where it should pick up some electromagnetic waves.
To test a piezo microphone, you can place it on the table and knock, or place it to your neck and speak, to pick up vibration.
u
If it works, you can continue. If not, you can look at your soldering connections again to make sure they are connected well.
Now put the blue bigger piece of shrinking tube onto the part that you just soldered.
Heat it up with the soldering iron to shrink it.
Recordology + Audio-Editorology
We rented two ZOOM audio recorders from the WdKA rental for this week.
You can find the WdKA rental on the ground floor on the Wijnhaven side, and also see what they have here: https://rental.mywdka.nl/.
Where is the rental? Upon entry of Wijnhaven, keep left. Up the stone steps, through the corridor.
More information about the rental can be found here: https://static.mywdka.nl/facilities/rental-shop/wdka-rental/
One basic rule with recording: the level should not go above 0db, and a lit a bit under 0db; so you can see the levels going up and down.
echo echo echo echo echo
You can record in mono and stereo.
Spectogram
Maps time (horizontal) and frequencies (vertical); you see that the voices are happening on different frequencies at the same time. Looks like an abstract painting/tapestry.
Some composers draw images with spectograms, as a way to make sound. We will come back to this in the coming weeks.
An example: Venetian Shares - Look (from songs about my cats 2001).
https://www.youtube.com/watch?v=BHup81lEjqo
Another musician that did this was Aphex Twin: https://www.youtube.com/watch?v=M9xMuPWAZW8
Around 5khz the signal becomes almost white.
http://lesportraitsaudacieux.blogspot.com/p/on-en-parle.html
Equalizer
You can work with an equalizer.
to clean out the noise in a recording
equalization:
inside the equalizer you can see the different frequencies of the audio piece. you can use the equalization to filter frequencies that you don't want. or to isolate and improve the ones that you want.
Audacity
Audio editing
Simple audio editing software. It’s free software, you can install it on your computer, follow the instructions here: https://www.audacityteam.org/download/.
manuals for audacity https://archive.flossmanuals.net/audacity/
you can make glitched images with it
and look at the spectrogram of audio
When you record in Audacity, your recording is too loud when the blue waves touch the top and bottom.
Question: It is possible to add channels, voices etc, like the layers in photoshop? yes.
Question: How to blend multiple voices into one piece of sound? file > export> .wav format
wav: high res file format, uncompressed.
mp3: low res file format, suitable for the web as it is less big in terms of Mb’s; compressed file format
ogg: another low res file format, also suitable for the web; compressed file too
Small anecdote: Spotify only streams music in low res file formats, to not make it too heavy.
Save your audio to file
- export > wave .wav
- encoding: signed 16-bit PCM (this one is fine)
- #** the more bits, the more quality you have
- #** the pixels of the audio file
- save
Questions
Why can decibels be negative?
Why are the waves of the analog signals so organic? And the digital ones are square?
A 1 bit digital system only can save data in 2 states: 1 and 0.
A 16 bit system can save data in = 2^16 states = 65536 states in total.
How to record (maybe this part should go to recordology? for later):
- avoid to get to close to the microphone, otherwise you get the socalled pop effect. (you can see that the green line that signals the sound volume turns red (clipping)
- check your setting in your os: sometimes you get a square-ish wave in audacity, that means that your input level in your settings / system preferences is not balanced
- when recording in audacity, look at the horizontal scale on the top: the sound input should be close to 0 decibel but never actually reach 0 decibel (you will be in the orange-red-zone if you are too close) [the vertical scale of each sound wave (-1.0 to +1.0) shows the frequency (=amplitude per second?), which is not the same scale as the decibel]???? nope decibel db is the volume so to say and the frequency is in hertz Hz but the -1.0 +1.0 scale is neither decibel nor hertz right? i guess not, right thx I’m not sure but i though 1 and -1 has to do with the fact that waves are seen and drawn in graphics only between 1 and -1 in mathematics aaaaah so you see the shape of the wave but it’s frequency and the amplitude is mapped onto this range of -1 and 1.
- watch out when you add up multiple tracks in audacity (the same track multiplied twice and played simultaneously will duplicate the amplitude of the sound (volume)) why the microphone understands the power supply frequency??
there’s a mixer that converts AC into DC and it gets the 50hz freq
if the mixer lacks of a filter called (???) it might happen that you hear the electricity that gives power to it
to filter noise in the rec:
select a profile for the noise (literally select the part of the audio where there is a moment of silence and you can only hear the noice you wanna filter)

then goto >filter>noise reduction> get noise profile  then select the entire piece of audio and again >filter>noise reduction>ok
effects with audacity
loops
select a piece of audio, effects>repeat> …choose the n of repetitions you want
stretch
select a paulstretch from the effects menù
reverb
reverse
recording studio notes

XPUB PC
- password: opisop
- software: Audacity, Rack (synthesizer software)
Mixer
- XPUB/PC: the input coming from the computer
- the black L/R cables at top right: output to the speakers
- red knobs: the connection back to the computer (for recording with a microphone)
- orange nobs: the connection to the osciloscope
- black knobs: controlling the left and right
- MIC1: the left fader is to control the volume to the speakers
About recording with the microphone: currently you can only record mono. We are missing some cables at the moment. Maybe we can do some changes next week and allow for mono recording. Joak is ordering cables, Kamo can bring some that can be used in the meantime.
About the effects: the effects on the mixer make weird noises
Audio interface
The red box is Kamo's and can be used to mix multiple audio inputs at the same time.
Transcodology
transcoding = convert a digital file
for example from .wav to .mp3
.wav = very good quality, big file
.mp3 = less quality, smaller file
similar to converting images from .tif to .jpg
Using FFmpeg
Notebook with examples: https://hub.xpub.nl/soupboat/SI18/documentation/ffmpeg/
Also available on paper ;).
Before we start with this part
Upload your recording to the soupboat: shared/html/SI18/00/recordings/
Which you can see from the “outside” here: https://hub.xpub.nl/soupboat/SI18/00/recordings/
When doing ffprobe
Mp3’s can be compressed in different ways.
cpr
bpr
If the bitrate is very high, the filesize is more, and the quality will be better.
We can look in the upcoming weeks to look at very low bitrate, the lower the glitchier bit rates, to see what it does.
It is a way to learn about the Mp3 compression algorithm.
The visual sister of Mp3 is JPEG. Which is also a compressed image format.
What is the recommended bit rate for Mp3s?
128kb/s is normal, good quality. standard settings usually make tiny files but good quality
Does changing the frequency have an impact on the sound?
Depends. It can make it slower or faster.
How to change the bit rate?
add -b:a to the ffmpeg command
compression –> see notebook on the soupboat “transcodology”
Publishology
The issue website for SI18: https://issue.xpub.nl/18/
Upload the release to the soupboat in shared/html/SI18/00/: https://hub.xpub.nl/soupboat/SI18/00/
Update the issue webpage through git: https://git.xpub.nl/XPUB/SI18
Ghostology
https://www.youtube.com/playlist?list=OL+K5uy_kofB1UsJ_37_0e0WcY2kJKf68XIWBNSn8
Documentology
try to make a mini template for things we need
This is a guide, feel free to reply to the structure as you want.
title (eg.: Emma in a garden)
duration
description [one sentence summarise] (eg.: we want to record two parallel diaries of environmental sounds]
score [prompt, general overview] (eg.: we record diary entries)
input [raw material] (eg.: audio recordings)
tools [used but not seen/heard everything /from tools to softwares/ used to obtain the material and modify the material] (eg.: microphone, audacity)
process log [steps, process, curation] (eg.: 1. record audio 2. upload files on audacity 3. normalise effect on audacity; 4. export)
output [public outcome] (eg.: link to recording)
who? [the person/group that worked on it] (eg.: Emma and alex)
Documentation Logs
recording piece for week 1 release by emm and alex
identity card
title: "parallel recording diaries"
duration: 01.00-01.20 minutes x 7 files: around 08:00 minutes.
description: We made a parallel recording throughout the day: one of us is at home the other travelling, to create a contrasting experience. The purpose was oto create, through parallel field recordings, a feeling of displacement to the listener, that is positioned in one place and listening to what is happening in two other places at the same time.
score: We recorded, at the same moment of the day, the sounds around us, opening the recording with a documental description of when, where, and what was happening. Afterwards, the recordings have been mixed together: one comes from the right and one from the right, so that they could be listened to separately (two monos) or also merged (stereo), depending on the media used.
input [raw material]: field recordings
tools [used but not seen/heard everything /from tools to software/ used to obtain the material and modify the material]: two brains, a mini-microphone, a phone, Audacity.
process log [steps, process, curation]: 1. record the audio 2. upload the files on audacity 2. normalise, loudness normalisation, noise reduction effects on audacity 3. set alex on the right and emm on the left. 4. export .wav file
output [public outcome]: alexemm.mp3
who? [the person/group that worked on it]: Alex and Emm
the idea
idea explanation
make a parallel recording throughout the day one is at home the other travelling
"sit outside in a field and record the sounds I'm hearing // the other record the sounds in the house"
documentary: giving time date and place, eventually the action
set a time without a specific reason to leave things to go as they normally would.
contrasting experience
the result
it's happening exactly at the same time, but in a total different place
feeling of displacement
you are here and there
the listeners are in three different places at the same time (where they sit, alex position and emm position)
feedbacks
Sth that worked:
overlapping of voices
being in different places while listening (physically + mentally)
episodes format gives a lot of structure and at some point feel familiar
structure vs openness
it was clear from the start
contrast of situations
set the ground at the beginning to position the audience
layering worked well in the sounds mixing but not with voices that should be legible
liked the episode structure, was accessible
links to the environment worked
Sth that could still be worked on:
balance of sound of voices/volume of environmental sounds
moments of clarity/legibility of the approach
clear
timestamp (protocol) should be clearly presented
wished more confrontation between situations (could be because of cuts)
more listening between two contributions?
+
gives a rhythm to the whole piece

set the ground at the beginning with the introduction
the different tones of voice position in different mental places
two people in a different place, home-travelling, contrasting experiences
episode structure
-
audio levels
time and place need to be clearer to hear, voices are meant to be legible
add a unified piece at the beginning like "day one" to set the space for the audience
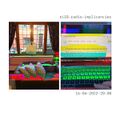
gallery
documentation images taken when recording a piece
glitched with audacity by alex

14.04.2022-16.30

14.04.2022-21.00

15.04.2022-10.00

15.04.2022-18.00

16.04.2022-15.00
16.04.2022-20.00
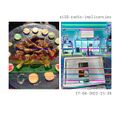
17.04.2022-15.30


On the topic of uneven patterns Miri & Em
Identity card
title: "Your personal guide to making sound"
duration: 03.08
description: We produced an instructional piece that does not follow the basic rules of the type of text: the instructions are broken down, disordered and messy, not linear, neither clear nor straight.
score: We wrote a text based on the [Prototypology] page, which contains lists of instructions, descriptions and information, already in an even way. We brought it to absurdity and produced a recording using a computer voice.
input [raw material]: a piece of instructional text
tools [used but not seen/heard everything /from tools to software/ used to obtain the material and modify the material]: two brains, a mini-microphone, Audacity, eSpeak.
process log [steps, process, curation]: 1. written the text 2. tried out multiple computer voices on different software 2. upload files on audacity 3. normalise effect on audacity; 4. tried out different effects in audacity 5. deleted useless silences 6. cut out errors 7. export .wav file
output: yourpersonalguidetomakingsound.mp3
who? [the person/group that worked on it]: Miri and Emm
Definitions
Def. uneven: 1) not level or flat 2) spasmodic or variable 3) not parallel, straight or horizontal 4) not fairly matched 5) not equal 6) unjust
Def. pattern:
A pattern is a regularity in the world, in human-made design, or in abstract ideas. As such, the elements of a pattern repeat in a predictable manner. A geometric pattern is a kind of pattern formed of geometric shapes and typically repeated like a wallpaper design. Any of the senses may directly observe patterns.
The piece
The pattern of instruction is uneven in this text. We are giving a list of instructions not following the basic rules of the type of text: they are broken down, disordered and messy, not linear, neither clear nor straight. It is related to the language pattern more than to a sound pattern. The computer voice gives a non emphatic interpretation of the text.
Idea construction
Instructions
Give instructions to do something but in an uneven way (overcomplicated, absurd). Maybe instructions on how to give instructions? "How to give kids effective instructions": https://childmind.org/article/how-to-give-kids-effective-instructions/ "A Guide to Giving Clear Instructions to Students": https://www.wgu.edu/heyteach/article/guide-giving-clear-instructions-students-that-they-will-actually-follow2001.html
WikiHow principle! Everything is based on instructions. https://www.wikihow.com/Main-Page "How to write clear instructions": https://www.wikihow.com/Write-Clear-Instructions
Instructions also remind me of GPS. Navigation voices? Voice generator: https://voicegenerator.io/
Nonsense instructions. Chris simpsons: https://www.instagram.com/chrissimpsonsartist/
Opening dialogue "Trainspotting": "Choose Life. Choose a job. Choose a career. Choose a family. Choose a fucking big television, choose washing machines, cars, compact disc players and electrical tin openers. Choose good health, low cholesterol, and dental insurance. Choose fixed interest mortgage repayments. Choose a starter home. Choose your friends. Choose leisurewear and matching luggage. Choose a three-piece suit on hire purchase in a range of fucking fabrics. Choose DIY and wondering who the fuck you are on Sunday morning. Choose sitting on that couch watching mind-numbing, spirit-crushing game shows, stuffing fucking junk food into your mouth. Choose rotting away at the end of it all, pissing your last in a miserable home, nothing more than an embarrassment to the selfish, fucked up brats you spawned to replace yourselves. Choose your future. Choose life... But why would I want to do a thing like that? I chose not to choose life. I chose somethin' else. And the reasons? There are no reasons. Who needs reasons when you've got heroin?"
Important questions in life How to find out... ...if you want to have kids ...if you chose the right studies ...if you're happy but then in a funny way. Like: "Put a silly hat on and stare at yourself in the mirror. Find out if it makes you happy."
not parallel, straight or horizontal: it doesn't follow the normal direction or way
how to record sound: uneven interpretation of https://pzwiki.wdka.nl/mediadesign/Category:Prototypology yell: "NEVER RECORD OVER 0!!!!!!!!!!" "put the thing into the thing" "Looks like a speaker, and it is actually a speaker."
How to complete tasks: Do the easiest task first "Should You Complete The Easiest or Difficult Task First?" https://productiveclub.com/easiest-toughest-task-first/
How to pay attention: https://www.wikihow.com/Pay-Attention
How to be popular: E.g. "Don't try to be popular.", "Be yourself", "Have a big heart"
How to become rich: Mix of neo-liberal advice and criticsm on patriarchy, e.g. "Always give one hundred percent. Never stop believing. Be white. Be a cis man."
Instructional Writing For Kids // English For Kids: https://www.youtube.com/watch?v=KYTAAMe9oTo
Instructional piece http://tattfoo.com/discovery/Instructional.html
2. Stories
Take a known story or fairytale and mix up the events. E.g. Little Red Ridinghood: https://americanliterature.com/childrens-stories/little-red-riding-hood ...but then like "The wolf ate the girl. The girl goes in the forest. The girl talks to her mother. The girl goes home. She meets the grandmother."
Experimenting
How to record sound
Untangle all the cables in front of you. Put the cable of your choice in the device of your choice. The cable is your friend. Let the cable do what the cable is meant to do. Take the thing and put it in the object. The object makes sound. You like the sound. Do a handstand. Let the blood descend into your head. Record the sound of blood.
It doesn't matter how much you take off, but the first layer is useful. In between, you can put the whole cable. You can also do this with your fingernails, but make sure that the two parts don't touch each other! Take a third hand. Isolate the two parts. Cut one piece and put it aside. Place the main part into the third hand. Heat one of the legs and add some material.
It doesn't matter which part is connected to which.
You can place it on the table and knock it, or on your neck to see if it moves.
The more bits, the “better” the quality. But this is relative, as some people really like 8-bit sounds for example
the higher the frequency, the higher the tone
If you get older, you slowly cannot hear the higher part of the frequency spectrum anymore. Everything over 10000 is harder for older generations to hear. High frequencies are used as ringtones by younger people, as the teachers cannot hear them anymore. High frequencies are also used as mosquito devices in the city (of Rotterdam) as a control device for public space.
dyamic microphones: Looks like a speaker, and it is actually a speaker. You can open it.
you always need to measure the signal and the ground. You need the ground to understand what/where the signal is. It’s a point of reference.
You need: a cat, two legs, material.
Step 3. Strip the cat. It doesn't matter how much you take off, but the first layer is useful. Once you opened it, you will find two legs. Step 234. place the cat on on the table. There are two square parts on the end of the cat. In between, you can put the whole cable. Step -5. isolate the cat. Take a bit of the cat. You can also do this with your finger nails, but make sure that the two parts don't touch each other! Now you can see the cat. Step 74. Take the cat, it melts at 320 celsius degrees. Just take a little of it. Take a third hand. The cat has little teeth you an use to put your wires in. Take the iron. You just need to heat up the cat. Step 1111. Isolate the two parts of the cat. Cut one piece and put it aside. Place the main part into the third hand. Heat one of the legs and add some material. Do it closely to the cat itself, the legs are a bit too long. Repeat this step for the other leg of the cat. So now you have the material on the cat and on the legs of the cat. Put the cat in the third hand to make it easier to hold. It doesn't matter which part is connected to which. Heat the material on one of the legs a bit and connect it with the cat. Repeat this for the other leg and part of the cat. Step 666. Now first test your cat! Put it into the mixer. You can place it into your phone where the cat should pick up some electromagnetic waves or on the table and knock it, or on your neck to see if it moves. If it works you can continue. If not, you can look at the connections again to make sure the legs are well-connected.
How to record:
       1. Get close to the microphone. You want to obtain the socalled POP effect. (put a pop song in a concert here)
       2. Check the waves and if they make a  balanced sound. (put a sea waves recording here)
       3. (yell) The sound should not be close to 0 decibel and always reach it.
To blow your nose:
   1. Select your best profile side (literally select the part of the face where you look better)
   2. Go to your drawer > open it > get a tissue >  put the tissue on your entire nose > blow your nose > done
Your Personal Guide To Making Sound
What you need before you start: - cables - wires - a friend - a DJ (this can be you) - lips for a soft kiss - objects - a gym - a third hand - a lot of time (but if you don't have a lot of time, you can also manage)
Take some wires in the length of the length the wire should have. If they don't have the right length, you need to cut them. It doesn't matter how much you take off, but the first layer is okay if you feel like it. Then, step 44, the wires need to be attached to the right spots. You can also do this with your finger nails, but make sure that the two parts don't touch each other. Make sure they are attached correctly. You will feel it when they are attached correctly. But if they are not attached correctly, step 834 it might also just work fine. Take some more wires from the spot where you got the other wires. Take a third hand and put the wires in the objects. In between, you can put the whole cable. You can use some force if it's needed. If you don't have any force, go to the gym. At step 2, make sure there are electromagnetic waves. The electromagnetic waves are very important for sound, if not even the most important thing. But they can also not be there. Also, you should know: The more bits, the “better” the quality. This the number one rule. But this is also relative. It's also matter of taste. Now, untangle all the cables in front of you. This might take time because there are a least 10 cables. Congratulations for concluding step -21. Put the cable of your choice in the device of your choice. Isolate the two parts. Cut one piece and put it aside. Place the main part into the third hand. If you cannot find the main part, put the less important part in the third hand mentioned at step -98. But remember that step. Then, heat one of the legs and add some material. It doesn't matter which part is connected to which. The cable is your friend. Let the cable do what the cable is meant to do. But don't put any pressure on the cable. The cable needs to consent to your action. Maybe you will hear a "beep"-sound. Step number 1'234'567: The sound will travel and you will notice: the higher the frequency, the higher the tone. And also, the drier the decency, the drier the stone. You need the ground to understand where the signal is. It's like hide and seek. To accomplish step 55 you must find the signal. But the signal will never find you. It's a one-sided relationship. After you have found the signal, you can continue. You can also stop, if you have an appointment with a friend. Or you can place it somewhere and then measure it with the right measurement unit. Write down the result so you can look at it later if you want to remember what you measured. But you can also not do that. For step number 64: Take the speaker that looks like a speaker and is actually also a speaker. You can open it. You can give it a soft kiss. It should pick up some electromagnetic waves. Knock it or place it on your neck to see if it moves. Concentrate. Go back to step number 23. Now you need to focus on the number zero. You will understand if you look at it. You should never go a lot above zero and you should never go a lot below zero. Check on your screen that you are following all rules. Attach some more cables to the holes. If the cables fall out, you must tape them on your computer. To tape it, you can use tape. If they don't fall out, you don't need tape but to go back to step 36. There is a red button you would like to press. You must avoid to press the red button at all costs. The red button stands for emergency. In case of a fire, call the firefighters. Now put everything into the mixer. You need to push some buttons. If you don't do this, it will work or not. You might feel like a DJ. Take that feeling and put it into your sound. Step number 82: Make sure the legs are well-connected. This is it. You made sound.
Pages in category "Prototypology"
This category contains only the following page.