Lost in Narration: Difference between revisions
| (5 intermediate revisions by the same user not shown) | |||
| Line 38: | Line 38: | ||
<li style="font-style: italic;">obviously connect the thermal printer to the laptop and turn it on</li> | <li style="font-style: italic;">obviously connect the thermal printer to the laptop and turn it on</li> | ||
<li>install [https://github.com/walac/pyusb?tab=readme-ov-file pyusb] with <code>pip install pysub</code> and download the libusb-win32 packages [https://sourceforge.net/projects/libusb-win32/ here]</li> | <li>install [https://github.com/walac/pyusb?tab=readme-ov-file pyusb] with <code>pip install pysub</code> and download the libusb-win32 packages [https://sourceforge.net/projects/libusb-win32/ here]</li> | ||
<li>install lib-usb and all the drivers through [https://zadig.akeo.ie/ Zadig]: in Options select ''List All Devices'' and from the dropdown select the printer device. Then, go through the list of drivers with the arrows and install the WCID Driver for each. '''IMPORTANT''': Replace the printer's driver with the <code>libusb-win32</code> driver, this is what allows the connection. Zadig will also give you the printer's id, which are needed in the <code>script.py</code> file we're creating later.</li></ul> | <li>install lib-usb and all the drivers through [https://zadig.akeo.ie/ Zadig]: in Options select ''List All Devices'' and from the dropdown select the printer device. Then, go through the list of drivers with the arrows and install the WCID Driver for each. '''IMPORTANT''': Replace the printer's driver with the <code>libusb-win32</code> driver, this is what allows the connection. Zadig will also give you the printer's id, which are needed in the <code>script.py</code> file we're creating later.</li></ul></ul> | ||
<gallery class="li-gallery" widths="350" style="text-align: center;" mode="nolines"> | <gallery class="li-gallery" widths="350" style="text-align: center;" mode="nolines"> | ||
File:Zadig-og.png | File:Zadig-og.png | ||
| Line 45: | Line 45: | ||
File:Zadig-param-og.png | File:Zadig-param-og.png | ||
</gallery> | </gallery> | ||
<ul> | <ul><ul> | ||
<li>install ESC/POS with <code>pip install python-escpos</code></li> | <li>install ESC/POS with <code>pip install python-escpos</code></li> | ||
<li>create a new .py file in your folder, via the code editor, call it <code>script.py</code> and put the code below, don't forget to change the ids in the parenthesis. Now you can run <code>python script.py</code> to see the magic happening! | <li>create a new .py file in your folder, via the code editor, call it <code>script.py</code> and put the code below, don't forget to change the ids in the parenthesis. Now you can run <code>python script.py</code> to see the magic happening!</li> | ||
< | </ul></ul> | ||
from escpos.printer import Usb | from escpos.printer import Usb | ||
iprinter = Usb(0x0483, 0x811E, in_ep=0x81, out_ep=0x02) #here you replace 0483 and 811E with the ids provided by Zadig | iprinter = Usb(0x0483, 0x811E, in_ep=0x81, out_ep=0x02) #here you replace 0483 and 811E with the ids provided by Zadig | ||
iprinter.text("hello world") | iprinter.text("hello world") | ||
iprinter.qr("https://xpub.nl") | iprinter.qr("https://xpub.nl") | ||
Okay. We have the sounddevice recording, and the printer printing. Now, we want to have the printer printing what the microphone is getting. | Okay. We have the sounddevice recording, and the printer printing. Now, we want to have the printer printing what the microphone is getting. | ||
*How to merge the scripts | *How to merge the scripts | ||
**Ask ChatGPT (not proud about this one...) to merge <code>test_microphone.py</code> and <code>script.py</code> | **Ask ChatGPT (not proud about this one...) to merge <code>test_microphone.py</code> and <code>script.py</code> | ||
<p style="background-color: pink; font-size: 24pt; padding: 0 5px; width: fit-content; font-weight: bold; font-style: italic;">M A G I C</p><gallery mode="packed-hover" widths="200" heights="400"> | <p class="invisible" style="background-color: pink; font-size: 24pt; padding: 0 5px; width: fit-content; font-weight: bold; font-style: italic;">M A G I C</p> | ||
<gallery mode="packed-hover" widths="200" heights="400"> | |||
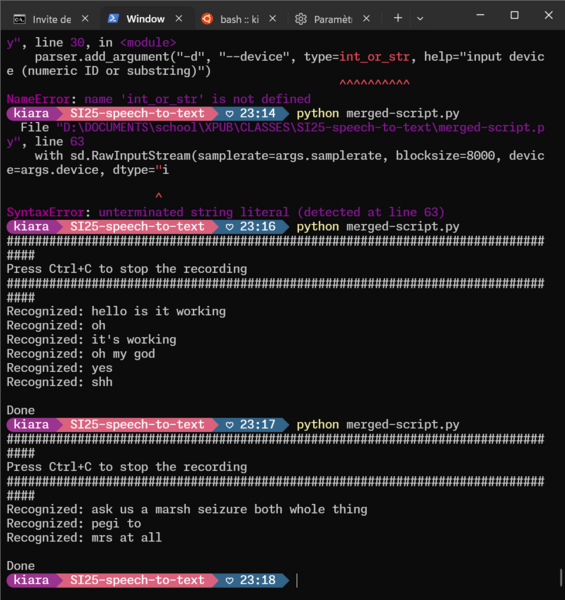
File:Try01 speakFrench.png|On the first try of the script working, I tried speaking French to it, not working but amusing. | File:Try01 speakFrench.png|On the first try of the script working, I tried speaking French to it, not working but amusing. | ||
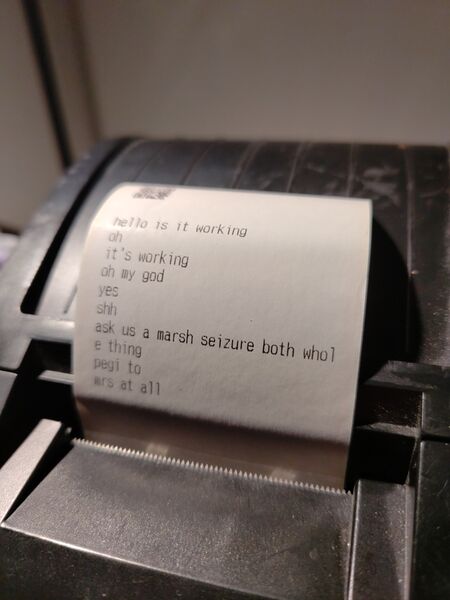
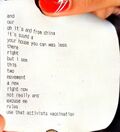
File:Try01 print.jpg|The print!!!! | File:Try01 print.jpg|The print!!!! | ||
| Line 71: | Line 72: | ||
;Lost in translation (movie) | ;Lost in translation (movie) | ||
;[https://youtu.be/atcqMWqB3hw?si=t7vMCGAfetBS-0Qx curl -v https://google.com] | ;[https://youtu.be/atcqMWqB3hw?si=t7vMCGAfetBS-0Qx curl -v https://google.com] | ||
*Bunch of links for the python process (Kiara) | *Bunch of links for the python process (Kiara) | ||
| Line 83: | Line 83: | ||
:;[https://stackoverflow.com/questions/69709241/how-can-i-get-the-full-instance-id-using-a-substring-of-the-deviceid That too] | :;[https://stackoverflow.com/questions/69709241/how-can-i-get-the-full-instance-id-using-a-substring-of-the-deviceid That too] | ||
:;[https://pypi.org/project/python-escpos/ Python ECP/POS official page] | :;[https://pypi.org/project/python-escpos/ Python ECP/POS official page] | ||
==Event Rider== | ==Event Rider== | ||
| Line 123: | Line 121: | ||
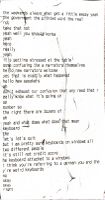
===Thermal Printer Receipts=== | ===Thermal Printer Receipts=== | ||
<gallery mode="nolines" heights="200"> | <gallery class="si25-receipts" mode="nolines" heights="200"> | ||
File:Signal-2024-11-25-144201 011.jpeg | File:Signal-2024-11-25-144201 011.jpeg | ||
File:Signal-2024-11-25-144201 007.jpeg | File:Signal-2024-11-25-144201 007.jpeg | ||
Latest revision as of 12:13, 6 January 2025
Short description
"Language refracts meaning as it moves across mediums. In this performance, a live script flows through multiple phases of narration and musical transformation, each filter subtly altering the narrative before it's turned into a fixed, printed record. Viewers are invited to experience the tension, misinterpretation, and elasticity of language as the narrative shifts and the original is forgotten."
Cookbook
[Meeting-01] 08/11/2024
https://pad.xpub.nl/p/Speech_to_project_
Thinking about the structure of the performance, timetable and spacing.
Now Zuhui is writing the first draft of the description.
[Meeting-02] 11/11/2024
Actually deciding on the floor plan, material needed and description on the project.
Handing the info over to Logistics
Recipe for the Python script
First step was to make the sounddevice python library work through [vosk].
- How to install and run the speech recognition (windows recipe)
- create a dedicated folder on the computer, where you want to store the scripts and written files
- install souddevice with
pip install sounddevice - install vosk with
pip install vosk - download this file and put it in the folder
- cd in your folder through the terminal
- run
python test_microphone.py
You can now see the text being printed in the console while you speak!!! The program is stopped withCTRL+C. - (optional) you can go modify the
test_microphone.pyby commenting lines 80 and 81. This prevents the program to print the partial result of it trying to recognise what's being said - if you want to print the content being recorder into a text file, run
python test_microphone.py ›› stderrout.txt. The››means that it will append the new data in the file if you stop the program. If you want to overwrite everytime, simply use›.
Printing in a file makes the terminal output invisible
This is now working, and we can choose to either stop there or print the result with the thermal printer The aim being to send it to the thermal printer, let's try to do this.
- How to install the thermal printer
- obviously connect the thermal printer to the laptop and turn it on
- install pyusb with
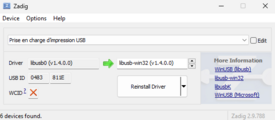
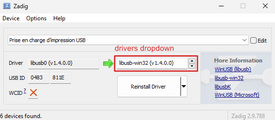
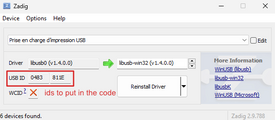
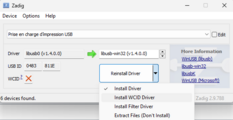
pip install pysuband download the libusb-win32 packages here - install lib-usb and all the drivers through Zadig: in Options select List All Devices and from the dropdown select the printer device. Then, go through the list of drivers with the arrows and install the WCID Driver for each. IMPORTANT: Replace the printer's driver with the
libusb-win32driver, this is what allows the connection. Zadig will also give you the printer's id, which are needed in thescript.pyfile we're creating later.
- install ESC/POS with
pip install python-escpos - create a new .py file in your folder, via the code editor, call it
script.pyand put the code below, don't forget to change the ids in the parenthesis. Now you can runpython script.pyto see the magic happening!
from escpos.printer import Usb
iprinter = Usb(0x0483, 0x811E, in_ep=0x81, out_ep=0x02) #here you replace 0483 and 811E with the ids provided by Zadig
iprinter.text("hello world")
iprinter.qr("https://xpub.nl")
Okay. We have the sounddevice recording, and the printer printing. Now, we want to have the printer printing what the microphone is getting.
- How to merge the scripts
- Ask ChatGPT (not proud about this one...) to merge
test_microphone.pyandscript.py
- Ask ChatGPT (not proud about this one...) to merge
M A G I C
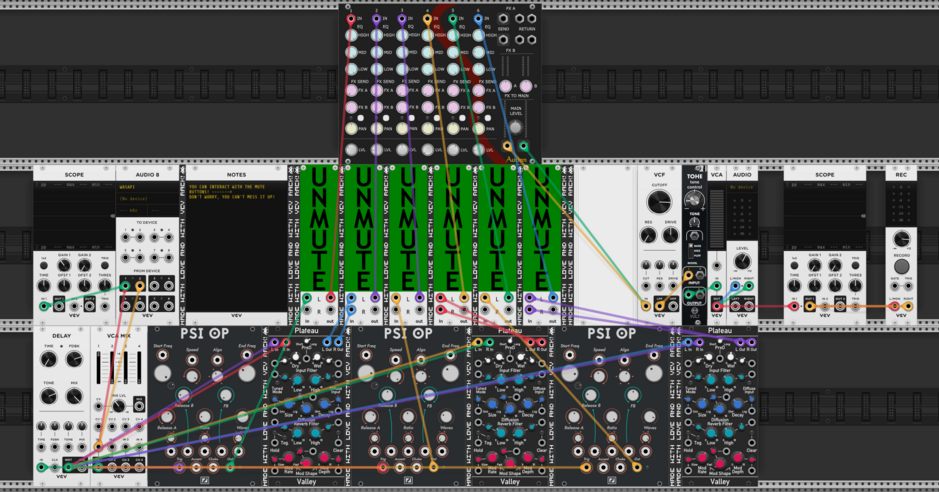
VCV config
Refs and resources
- Stranger than fiction (movie)
- Lost in translation (movie)
- curl -v https://google.com
- Bunch of links for the python process (Kiara)
Event Rider
Items
- Laptop x3 (kiara, eleni, zuhui)
- big screen with stand (from xpub).
- Microphone PA50 PZI-FA (from xpub)
- Microphone SHURE SM58 (from xpub)
- Thermal printer EPSON M267E + USB (from xpub)
- Less-toxic paper rolls (to fetch on our own)
- Mixer BEHRINGER XENYX1204FX (from xpub)
- Logilink UA0053 soundcard (from xpub)
- kiara's + xpub usb soundcard
- Jack 2x (input computer to mixer from xpub)
- Speakers MS40 (from xpub)
- Tables x1 (2x1 from WORM)
- Chairs x5 (from WORM)
UPDATE
- one more table 75h 75l 125w
Space
- X x Xm
- Internet needed
- Power plugs - at least 2 or 3
Time
start at 3pm and run the whole day (not constant), people relaying
Sound output is working live and also after
(After 30 minutes to an hour into the performance, audience is invited to approach the microphone and read the script aloud.)
Floor plan
A piece of wall is needed to sit the two livescripters.
Performance material
Writers' Protocol
▲ A small handbook (folded a4 paper) will be placed at the event for both writers and visitors
Thermal Printer Receipts
Recordings

