
JavaScriptClub/04: Difference between revisions
Wang ziheng (talk | contribs) m (→Step2: Sliders) |
Wang ziheng (talk | contribs) |
||
| (32 intermediate revisions by the same user not shown) | |||
| Line 5: | Line 5: | ||
=Step1: Introduce= | =Step1: Introduce= | ||
==Tone.js== | ==Tone.js== | ||
Tone.js is a very basic tool for creating an oscillator sound or synths sound like FM synth, AM synth and Noise synth. | |||
You can modify most of their values, such as Attack, Decay, Sustain, and Release. | |||
For pitches, you can easily define them by inputting the specific scales you want, like C4, E4, or any other notes. | |||
https://tonejs.github.io/<br> | https://tonejs.github.io/<br> | ||
| Line 10: | Line 16: | ||
<img src="https://pzwiki.wdka.nl/mw-mediadesign/images/e/ee/BeerRobber.gif" width="700px"> | <img src="https://pzwiki.wdka.nl/mw-mediadesign/images/e/ee/BeerRobber.gif" width="700px"> | ||
{{#Widget:Video|mp4=https://pzwiki.wdka.nl/mw-mediadesign/images/4/4d/BeerRobberV.mp4|style=width:700px;}} | |||
<div>{{#Widget:Video|mp4=https://pzwiki.wdka.nl/mw-mediadesign/images/4/4d/BeerRobberV.mp4|style=width:700px;}}</div> | |||
<br> | <br> | ||
By using the Gamepad API, you can also control the helicopter with a gamepad. | By using the Gamepad API, you can also control the helicopter with a gamepad. | ||
| Line 16: | Line 23: | ||
==Pizzicato.js== | ==Pizzicato.js== | ||
https://alemangui.github.io/pizzicato/<br> | https://alemangui.github.io/pizzicato/<br> | ||
For Making a Sequencer, or writing a specific rhythm, the Tone.js is a great choice. | |||
But if you want to make more crazy experimental sound effects, | |||
Tone.js may have a lot limitations, but there is another Javascript library called Pizzicato.js, which offers more effects like Ping pong delay, Fuzz, Flanger, tremolo, and Ring Modulation. | |||
When I first used it I was so excited so I made a html and added all the effects in it, which has a lot sliders inside. | |||
https://hub.xpub.nl/chopchop/~wang/__lab__/files/public_html/pizz.html?_xsrf=2%7Cdbb6309c%7C075a8a7528ffa95fedfb16f18b50c349%7C1728479915 | https://hub.xpub.nl/chopchop/~wang/__lab__/files/public_html/pizz.html?_xsrf=2%7Cdbb6309c%7C075a8a7528ffa95fedfb16f18b50c349%7C1728479915 | ||
=Step2: Sliders= | =Step2: Sliders= | ||
You can simply by using CSS to modify the slider to experiment. | |||
# | #slider1{ | ||
position: fixed; | |||
top:30%; | |||
left: 45%; | |||
width: 100px; | |||
height: 100px; | |||
transform: rotate(90deg); | transform: rotate(90deg); | ||
transform-origin: left bottom; | transform-origin: left bottom; | ||
background: rgba(0, 0, 0, 0); | |||
border: 1px solid black; | |||
-webkit-appearance: none; | -webkit-appearance: none; | ||
appearance: none; | appearance: none; | ||
outline: none; | outline: none; | ||
} | } | ||
# | #slider1::-webkit-slider-thumb { | ||
width: 10px; | |||
height: 100px; | |||
background: rgb(0, 0, 0); | |||
border: 1px solid black; | |||
border-radius: 0; | border-radius: 0; | ||
cursor: pointer; | |||
-webkit-appearance: none; | -webkit-appearance: none; | ||
appearance: none; | appearance: none; | ||
} | |||
https://hub.xpub.nl/chopchop/~wang/__lab__/files/public_html/sliderExample.html?_xsrf=2%7Cdbb6309c%7C075a8a7528ffa95fedfb16f18b50c349%7C1728479915 | https://hub.xpub.nl/chopchop/~wang/__lab__/files/public_html/sliderExample.html?_xsrf=2%7Cdbb6309c%7C075a8a7528ffa95fedfb16f18b50c349%7C1728479915<br> | ||
You could experiment more with the slider by adding an image on it. | |||
background: url('xxx.png/gif/jpg') no-repeat center; | background: url('xxx.png/gif/jpg') no-repeat center; | ||
background-size: contain; | background-size: contain; | ||
| Line 40: | Line 66: | ||
==Sound Quilt== | ==Sound Quilt== | ||
I thought it could be more interesting to let user control all these sliders in a puzzle way. | |||
I made a sound quilt with different structures, I removed the effect names or guidelines, let the users only interact with the patterns to get sound reaction. | |||
====Test1==== | ====Test1==== | ||
<div style="border-style: solid; display: inline-block;"> | <div style="border-style: solid; display: inline-block;"> | ||
| Line 83: | Line 113: | ||
==Brick== | ==Brick== | ||
<img src="https://pzwiki.wdka.nl/mw-mediadesign/images/f/f1/Bricks.gif" width="700px"> | |||
=Step3: Midi control= | =Step3: Midi control= | ||
==Combining MIDI and HTML for Live Performance== | ==Combining MIDI and HTML for Live Performance== | ||
I also used this way for a performance by making an HTML, | |||
I added different image on each slider, | |||
Each brick represents a frequency, you could also turn on different bricks at one time to overlap the pitches. | |||
The html actually has a lot potential because you could also using midi controller to experiment, for example, I used a midi controller maped to different bricks, it has the holding function toggle the bricks, or a sequencer. So this combination saves a lot effort, you could separate the function, you don’t have to make sequencer on the HTML, but let a physical device to control it. | |||
==Expansion== | ==Expansion== | ||
It using the MIDI API to interact, it could be very interesting if you using a music function to control visual elements on the HTML as well, for example the Typographic. Which Micheal showed me last time. | |||
https://sites.antoningallon.xyz/almanach/Almanach.html#debut<br> | |||
https://sites.antoningallon.xyz/testBaskerccampagne/ | |||
=Step4: Examination= | =Step4: Examination= | ||
[[File:VerySmartPen3.jpg|thumb|left|Using a Cheat code to make experiment]] | |||
If you feel less confident about writing the code, please use the "very smart pen".<br> | |||
At the end of the workshop, with a form of “Examination”, I gave out a zine hidden inside a pen called Script Partner. Each zine included unique code snippets for creating instruments or sound effects. | |||
[[File:VerySmartPen1.jpg|623px]][[File:VerySmartPen2.jpg|315px]] | |||
Latest revision as of 01:45, 14 November 2024

Step1: Introduce
Tone.js
Tone.js is a very basic tool for creating an oscillator sound or synths sound like FM synth, AM synth and Noise synth. You can modify most of their values, such as Attack, Decay, Sustain, and Release. For pitches, you can easily define them by inputting the specific scales you want, like C4, E4, or any other notes.
https://tonejs.github.io/
https://tonejs.github.io/examples/
By using the Gamepad API, you can also control the helicopter with a gamepad.
Pizzicato.js
https://alemangui.github.io/pizzicato/
For Making a Sequencer, or writing a specific rhythm, the Tone.js is a great choice.
But if you want to make more crazy experimental sound effects, Tone.js may have a lot limitations, but there is another Javascript library called Pizzicato.js, which offers more effects like Ping pong delay, Fuzz, Flanger, tremolo, and Ring Modulation.
When I first used it I was so excited so I made a html and added all the effects in it, which has a lot sliders inside. https://hub.xpub.nl/chopchop/~wang/__lab__/files/public_html/pizz.html?_xsrf=2%7Cdbb6309c%7C075a8a7528ffa95fedfb16f18b50c349%7C1728479915
Step2: Sliders
You can simply by using CSS to modify the slider to experiment.
 #slider1{
   position: fixed;
   top:30%;
   left: 45%;
   width: 100px;
   height: 100px;
   transform: rotate(90deg);
   transform-origin: left bottom;
   background: rgba(0, 0, 0, 0);
   border: 1px solid black;
   -webkit-appearance: none;
   appearance: none;
   outline: none;
   }
 #slider1::-webkit-slider-thumb {
   width: 10px;
   height: 100px;
   background: rgb(0, 0, 0);
   border: 1px solid black;
   border-radius: 0;
   cursor: pointer;
   -webkit-appearance: none;
   appearance: none;
 }
You could experiment more with the slider by adding an image on it.
 background: url('xxx.png/gif/jpg') no-repeat center;
 background-size: contain;
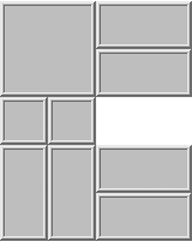
Sound Quilt
I thought it could be more interesting to let user control all these sliders in a puzzle way. I made a sound quilt with different structures, I removed the effect names or guidelines, let the users only interact with the patterns to get sound reaction.
Test1
As a deconstructionism slider map:https://hub.xpub.nl/chopchop/~wang/__lab__/files/public_html/SliderRe5%20add%20sound.html?_xsrf=2%7Cdbb6309c%7C075a8a7528ffa95fedfb16f18b50c349%7C1728479915
Test2

As a 16 square puzzle : https://hub.xpub.nl/chopchop/~wang/__lab__/files/public_html/SliderRe1add%20sound.html?_xsrf=2%7Cdbb6309c%7C075a8a7528ffa95fedfb16f18b50c349%7C1728479915
Test3
A version that incorporates guidelines using the grid system, allows user to hide or show the effect names by dragging movements. It also maps to the slider to control the effect values:https://hub.xpub.nl/chopchop/~wang/__lab__/files/public_html/SliderRe2.html?_xsrf=2%7Cdbb6309c%7C075a8a7528ffa95fedfb16f18b50c349%7C1728479915
Test4

With the multiple pitches and frequencies, this 4 square version allows user to create overlapping sounds by different combinations:https://hub.xpub.nl/chopchop/~wang/__lab__/files/public_html/SliderRe3Demo.html?_xsrf=2%7Cdbb6309c%7C075a8a7528ffa95fedfb16f18b50c349%7C1728479915
Test5
When I was trying to combine the minimalism and the block game as a way to interact, this remind me of the block puzzle game-The Huarong Path(a Klotski puzzle game/sliding block puzzle game), in the game the blocks can only be moved horizontally or vertically, Players must use spatial thinking to slide the blocks around the board, often having to move other blocks out of the way to clear a path for the larger block to exit.

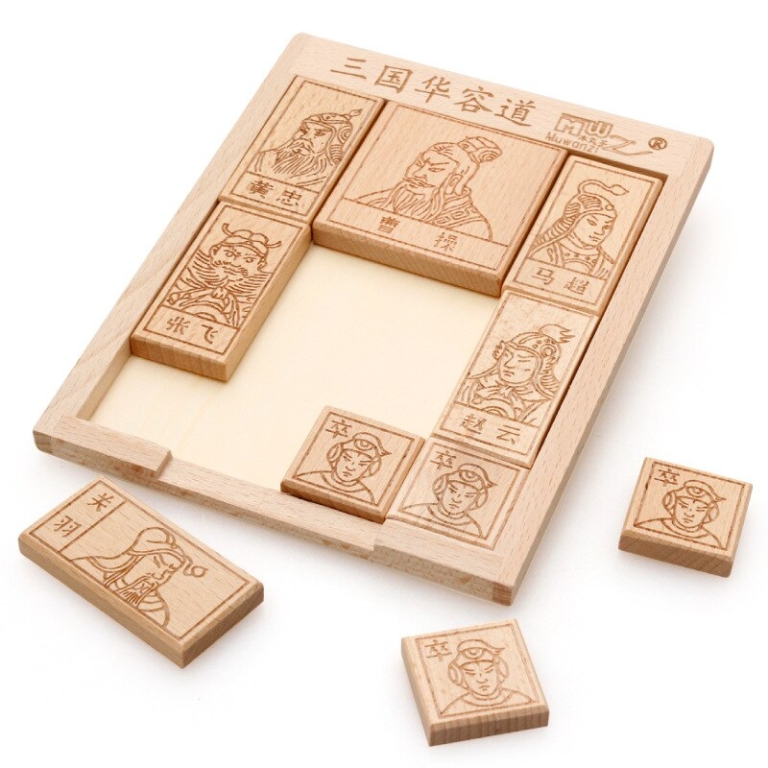
Based on the slider block game and combine with the 4 square with multiple pitches and frequencies:https://hub.xpub.nl/chopchop/~wang/__lab__/files/public_html/SliderRe3.html?_xsrf=2%7Cdbb6309c%7C075a8a7528ffa95fedfb16f18b50c349%7C1728479915
Brick
Step3: Midi control
Combining MIDI and HTML for Live Performance
I also used this way for a performance by making an HTML, I added different image on each slider, Each brick represents a frequency, you could also turn on different bricks at one time to overlap the pitches.
The html actually has a lot potential because you could also using midi controller to experiment, for example, I used a midi controller maped to different bricks, it has the holding function toggle the bricks, or a sequencer. So this combination saves a lot effort, you could separate the function, you don’t have to make sequencer on the HTML, but let a physical device to control it.
Expansion
It using the MIDI API to interact, it could be very interesting if you using a music function to control visual elements on the HTML as well, for example the Typographic. Which Micheal showed me last time.
https://sites.antoningallon.xyz/almanach/Almanach.html#debut
https://sites.antoningallon.xyz/testBaskerccampagne/
Step4: Examination

If you feel less confident about writing the code, please use the "very smart pen".
At the end of the workshop, with a form of “Examination”, I gave out a zine hidden inside a pen called Script Partner. Each zine included unique code snippets for creating instruments or sound effects.

