User:AvitalB/special issue: Difference between revisions
No edit summary |
|||
| (67 intermediate revisions by the same user not shown) | |||
| Line 1: | Line 1: | ||
<div style="width: 100%; background-color: white; text-align: | <div style="width: 100%; background-color: white; text-align: left; padding-top: 10px; padding-bottom: 10px;"> | ||
<span style="display: inline; position: relative; font: | <span style="display: inline; position: relative; font: 85px monospace, Sans-Serif; font-weight: normal; letter-spacing: 20px; color: rgba(96,96,96,0.8); cursor:progress;">Special issue X</span> | ||
</div> | </div> | ||
| Line 30: | Line 30: | ||
=Session 3= | =Session 3= | ||
The Arduino environment is pretty limited because every module can do a limit amount of actions. The coding language commands a lot of the time contain a lot of command inside. | |||
'''Simpler way to upload a sample''' | '''Simpler way to upload a sample''' | ||
| Line 58: | Line 58: | ||
*[http://pzwiki.wdka.nl/mediadesign/Arduino101 Link to Arduino 101] | *[http://pzwiki.wdka.nl/mediadesign/Arduino101 Link to Arduino 101] | ||
*[http://pzwiki.wdka.nl/mediadesign/Arduino101-LFE Link to Arduino 101-LFP] | *[http://pzwiki.wdka.nl/mediadesign/Arduino101-LFE Link to Arduino 101-LFP] | ||
[[File:Arduino.JPG|300px|thumbnail|none|Arduino101]] | |||
=Session 4= | =Session 4= | ||
[https://pad.xpub.nl/p/xpub1temp2 Monday+Friday sessions] | [https://pad.xpub.nl/p/xpub1temp2 Monday+Friday sessions] | ||
The Friday session really helped with some deeper understanding regarding how to work with the module. | The Friday session really helped with some deeper understanding regarding how to work with the module. | ||
| Line 74: | Line 76: | ||
'''References for visuals using Arduino-Processing connection ''' | '''References for visuals using Arduino-Processing connection ''' | ||
{{youtube|-yTRgr_Z58Y}} | {{youtube|-yTRgr_Z58Y}} {{youtube|i8iETqm7k_I}} | ||
{{youtube|i8iETqm7k_I}} | |||
=These are the links I used= | =These are the links I used= | ||
| Line 82: | Line 82: | ||
'''General- connecting between Arduino and Processing''' | '''General- connecting between Arduino and Processing''' | ||
*[https://processing.org/tutorials/electronics/ Explanation about working | *[https://processing.org/tutorials/electronics/ Explanation about working with electronics and processing] | ||
*[https://learn.sparkfun.com/tutorials/connecting-arduino-to-processing/all Example for transferring info from the Arduino port] | *[https://learn.sparkfun.com/tutorials/connecting-arduino-to-processing/all Example for transferring info from the Arduino port] | ||
*[https://www.arduino.cc/reference/en/language/functions/communication/serial/read/ About the command Serial.read] | *[https://www.arduino.cc/reference/en/language/functions/communication/serial/read/ About the command Serial.read] | ||
| Line 109: | Line 109: | ||
The problem that I have right now is that my code doesn't know how to get different inputs from the Arduino (A0, A1, A2). I think this video will help me: | The problem that I have right now is that my code doesn't know how to get different inputs from the Arduino (A0, A1, A2). I think this video will help me: | ||
{{youtube|BnjMIPOn8IQ}} | {{youtube|BnjMIPOn8IQ}} | ||
=Session 5= | |||
Workshop at De Player with Olli. | |||
'''Concepts''' | |||
* How do we explain modules? There is so much backend output and input that no one is seeing- what if we make it be seen and heard? | |||
* Regarding my reading in methods- in Matthew Fuller book there is a critic regarding not giving enough significance to the components of the software and just to general concept and philosophy of it. | |||
* Visual ways of representing sound- what can be new? or visual ways to represent the "backend" | |||
* Regarding the manual- what if every manual look differently? like the output of the Arduino or something | |||
* Giving a sound an image- 1+1+1 (sound+hex+space= shape) | |||
'''Visuals, video art and other crazy ideas''' | |||
My wish is for my module to be more on the visual side of things. I would like the module users to generate some kind of image with the module input and for the process of input to output to be somehow represented in the visual- | |||
References: | |||
{{vimeo|103488483}} | |||
[http://www.soundandvision.cc Artist Christine Sciulli] | |||
=IMPAKT Festival= | |||
My favourite session from the festival was '''FROM GUI TO NO UI''' by [https://nishantshah.online/ Nishant Shah]. | |||
'''Key ideas and references from the session:''' | |||
* [http://web.media.mit.edu/~monster/blendie/ Artist Kelly Dobson challenges the interface] | |||
* interacting physically and not through the gui | |||
* People are the non gui interfaces | |||
* Micro worker | |||
* IOT- physical computational networks | |||
* We are rebuilding our entire planet with computer- we can consume our planet | |||
* Computer used to be women | |||
* Rebutting the human species | |||
* Hacker privilege | |||
* [https://en.wikipedia.org/wiki/Is_Anyone_Up%3F Isanyoneup.com] | |||
* The cloud is a nice name | |||
* [https://www.uowblogs.com/frn/ The feminist research network] | |||
* If you can code you have the choice to code differently | |||
* The fact that the data is not our is a choice that has been made by the Silicon Valley bro culture | |||
* Redesign the sequence | |||
* Not taking the scripts that was already made | |||
* I don't want to fight the existing i want to invent it | |||
* Data is not the same of information- data can be sorted | |||
* If we build an economy based on information and not data | |||
* Fingerprints in India- the biometric system is not compatible for places with a lot of manual labor work. | |||
* This is me even if you cant have my data | |||
* Cybernet work loop | |||
* Recalibrating what is human not cyber human | |||
=Working on the module= | |||
We were given a restriction that we can't use a computer with our module. So I can't use processing. | |||
Aymeric, Dennis and Michael figured out a way to use the Arduino library TV.out which allows to output video signal. | |||
'''TV.out tests''' | |||
So this library is pretty old so not a lot of info about it online but you can find some. | |||
First I try drawing pixels across the screen using two loop that draw pixels across the screen using the X and Y axis. | |||
The knobs control the number of pixels that are drawn at the moment and the speed that the pixels across the screen. | |||
{{youtube|XlY4Gq3XqHc}} | |||
<pre> | |||
#include <TVout.h> | |||
#include <fontALL.h> | |||
TVout TV; | |||
unsigned char x,y,z,pixel_num,d_num; | |||
void setup() { | |||
x=0; | |||
y=0; | |||
z=0; | |||
pixel_num=0; | |||
d_num=0; | |||
Serial.begin(9600); | |||
TV.begin(PAL); //for devices with only 1k sram(m168) use TV.begin(_NTSC,128,56) | |||
TV.select_font(font6x8); | |||
Serial.println(TV.vres()); | |||
Serial.println(TV.hres()); | |||
} | |||
void loop() { | |||
TV.clear_screen(); | |||
pixel_num=0; | |||
d_num=0; | |||
for(x=0;x<TV.hres();x++){ | |||
z=random(TV.vres()); | |||
if(analogRead(A1)<340){ | |||
pixel_num=1; | |||
d_num=1000; | |||
} | |||
if(analogRead(A1)>340 && analogRead(A1)<680){ | |||
pixel_num=2; | |||
d_num=400; | |||
} | |||
if(analogRead(A1)>680){ | |||
pixel_num=4; | |||
d_num=0; | |||
} | |||
for(y=0;y<TV.vres();y++){ | |||
if(analogRead(A0)<205){ | |||
TV.set_pixel(x+random(TV.hres()/12),random(z,TV.vres()/4-z),pixel_num); | |||
} | |||
if(analogRead(A0)>205 && analogRead(A0)<410){ | |||
TV.set_pixel(x+random(TV.hres()/10),random(z,TV.vres()/2.3-z),pixel_num); | |||
} | |||
if(analogRead(A0)>410 && analogRead(A0)<615){ | |||
TV.set_pixel(x+random(TV.hres()/8),random(z,TV.vres()/2-z),pixel_num); | |||
} | |||
if(analogRead(A0)>615 && analogRead(A0)<820){ | |||
TV.set_pixel(x+random(TV.hres()/6),random(z,TV.vres()/1.2-z),pixel_num); | |||
} | |||
if(analogRead(A0)>820){ | |||
TV.set_pixel(x+random(TV.hres()/4),random(z,TV.vres()-z),pixel_num); | |||
} | |||
//TV.set_pixel(x+random(50),y+random(y,y*5),analogRead(A0)/10); | |||
//TV.delay(1000); | |||
} | |||
TV.delay(d_num); | |||
} | |||
} | |||
</pre> | |||
Then I try to use Bitmap. I used a software called [https://forum.allaboutcircuits.com/threads/lcd-creator-for-mac-osx.98440/ ''LCD Creator''] to get the hex value of some images I drew in photoshop. | |||
The conversion made the images a bit wired (not exactly as I wanted it to be) but I kind of like this outcome even more (nice bug). | |||
{{youtube|EXWj5i71hxs}} | |||
<pre> | |||
#include <TVout.h> | |||
#include "car.h" | |||
#include "image2.h" | |||
TVout TV; | |||
void setup() { | |||
TV.begin(PAL); | |||
Serial.begin(9600); | |||
} | |||
void loop() { | |||
TV.clear_screen(); | |||
int val= map(analogRead(A0), 0, 1023, 10, 128); | |||
int val2 = map(analogRead(A1), 0, 1023, 10, 60); | |||
Serial.println(val); | |||
Serial.println(val2); | |||
TV.bitmap(val,val2/2,car); | |||
TV.bitmap(val2,0,image2); | |||
//TV.bitmap(val2/50,val/70,image2); | |||
//delay(100); | |||
//TV.clear_screen(); | |||
} | |||
</pre> | |||
I tried another one the pixels when you can control the X location of the pixels that are drawn. | |||
The knobs control the value of X and the number of pixels. | |||
{{youtube|YC_yUObKtl0}} | |||
<pre> | |||
#include <TVout.h> | |||
#include "car.h" | |||
TVout TV; | |||
unsigned char x,y,z,pixel_num,d_num; | |||
void setup() { | |||
x=0; | |||
y=0; | |||
z=0; | |||
pixel_num=0; | |||
d_num=0; | |||
Serial.begin(9600); | |||
TV.begin(PAL); | |||
} | |||
void loop() { | |||
//TV.clear_screen(); | |||
pixel_num=0; | |||
d_num=0; | |||
for(x=0;x<TV.hres();x++){ | |||
z=random(TV.vres()); | |||
int val1= map(analogRead(A0),0,1023, 0, 128); | |||
int val2= map(analogRead(A1),0,1023, 0, 96); | |||
int val3= map(analogRead(A2),0,1023, 0, 255); | |||
int val4= map(analogRead(A0),0,1023, 0, 50); | |||
//TV.bitmap(val3,0,car); | |||
TV.draw_circle(10,10,20,WHITE,INVERT); | |||
Serial.println(val1); | |||
if(analogRead(A1)<340){ | |||
pixel_num=1; | |||
d_num=1000; | |||
} | |||
if(analogRead(A1)>340 && analogRead(A1)<680){ | |||
pixel_num=2; | |||
d_num=400; | |||
} | |||
if(analogRead(A1)>680){ | |||
pixel_num=4; | |||
d_num=0; | |||
} | |||
for(y=0;y<TV.vres();y++){ | |||
if(analogRead(A0)<205){ | |||
TV.set_pixel(val1,random(z,val2-z),1); | |||
} | |||
if(analogRead(A0)>205 && analogRead(A0)<410){ | |||
TV.set_pixel(val1,random(z,val2-z),2); | |||
} | |||
if(analogRead(A0)>410 && analogRead(A0)<615){ | |||
TV.set_pixel(val1,random(z,val2-z),3); | |||
} | |||
if(analogRead(A0)>615 && analogRead(A0)<820){ | |||
TV.set_pixel(val1,random(z,val2-z),4); | |||
} | |||
if(analogRead(A0)>820){ | |||
TV.set_pixel(val1,random(z,val2-z),5); | |||
} | |||
} | |||
TV.delay(d_num); | |||
} | |||
} | |||
</pre> | |||
Then I combined the pixels and BMP and found that some pixels override each other and distort the image. | |||
{{youtube|Ul9GCBaRx50}} | |||
From my experiments I realised that I would like the user of the module to have more control over the image that is being made and decided to go with an "etch a sketch" approach. | |||
{{youtube|Pd3p8n0A2aM}} | |||
<div style="width: 100%; background-color: white; padding-top: 10px; padding-bottom: 10px;"> | |||
=Visual Identity= | |||
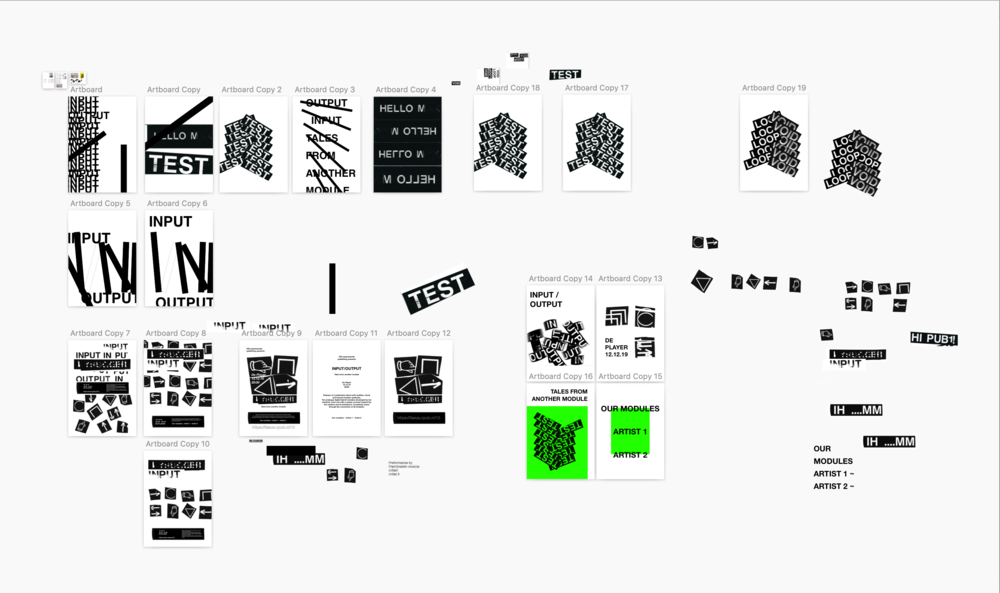
We collaborated on creating a visuals for the publication and the event. We wanted to enhance the analog aspect of the project by using an old label printer (provided by Mark). | |||
[[File:Postersprocess.png|1000px]] | |||
=Special Issue Website= | |||
https://issue.xpub.nl/10/index.html#SPIX | |||
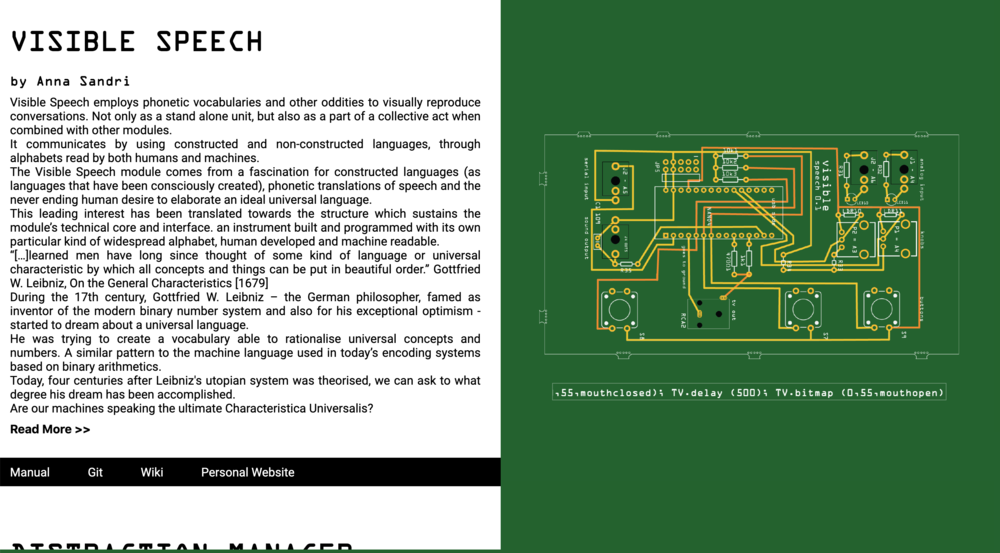
Mika, Sandra and myself built the website with the help of Andre. We wanted it to be playful and interactive while giving an overall view of the experience we created with the modules. | |||
[[File:10website1.png|1000px]] | |||
[[File:10website2.png|1000px]] | |||
[[File:10website3.png|1000px]] | |||
=Input/Output= | |||
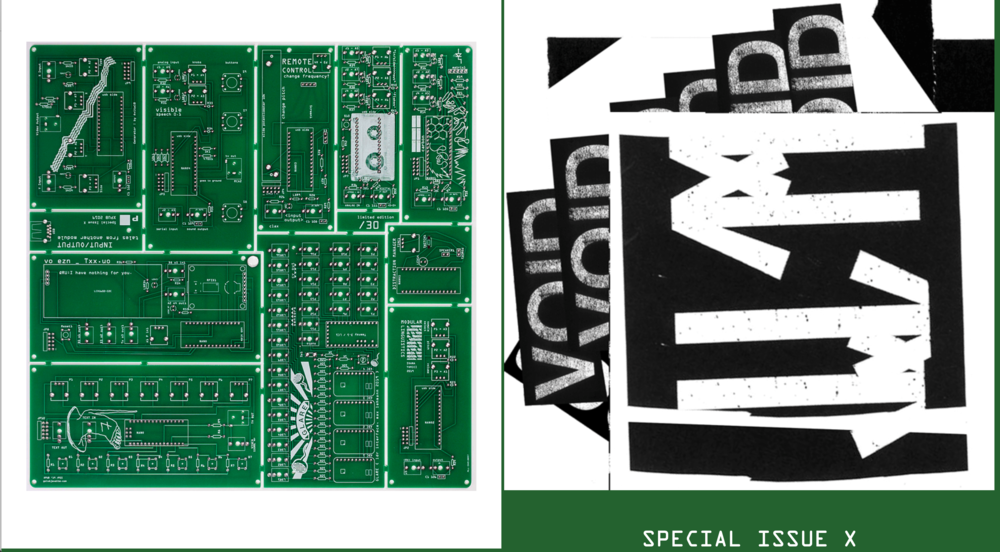
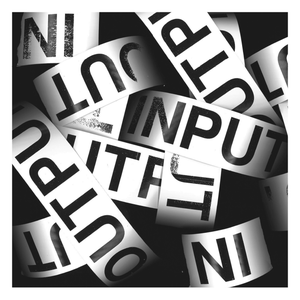
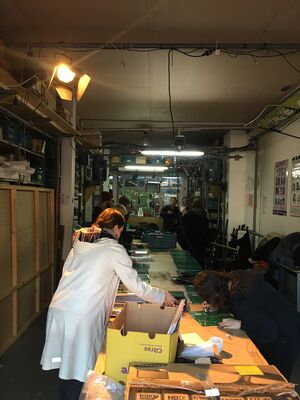
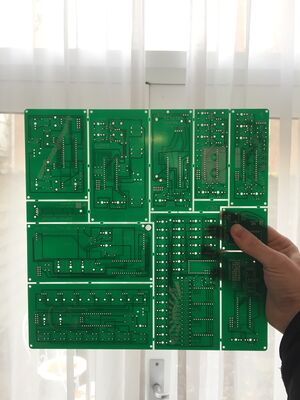
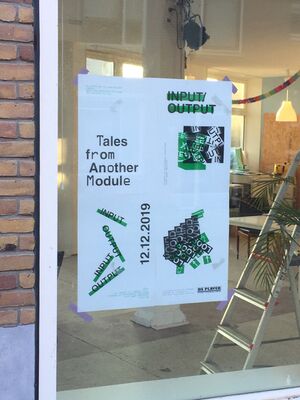
At the night of Dec 12th we gathered at [https://www.deplayer.nl/ De Player] to show the public our modules and the work we done. We presented our work individually in the space but also connected all our modules together to show how they impact each other. | |||
[[File:Input-Output.png|300px]] [[File:Input-Output2.JPG|300px]] [[File:PCB.JPG|300px]] | |||
[[File:Input-Output3.JPG|300px]] [[File:Generator3.JPG|300px]] [[File:Input-Output4.jpeg|300px]] | |||
=Generator= | |||
[[File:Generator4.jpg|400px|right]] | |||
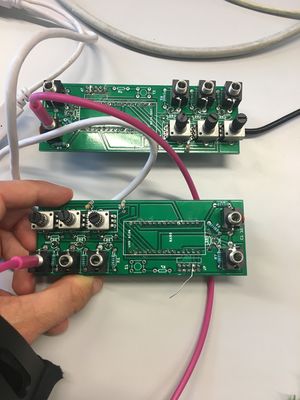
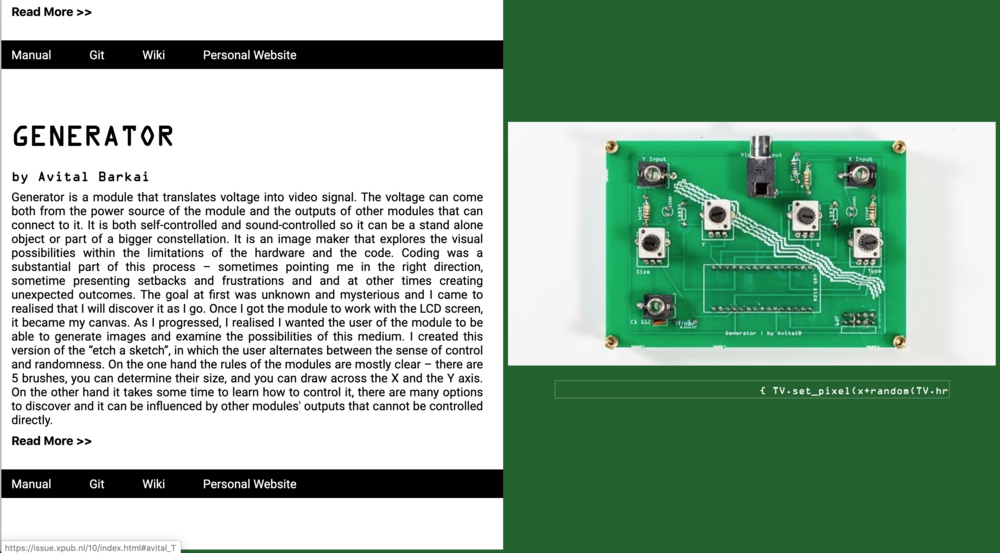
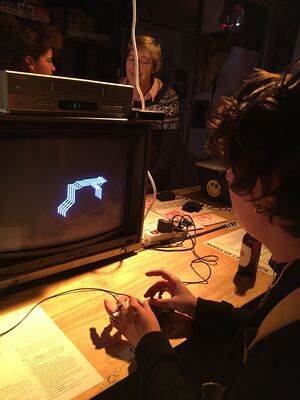
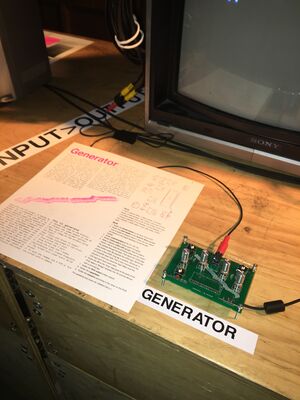
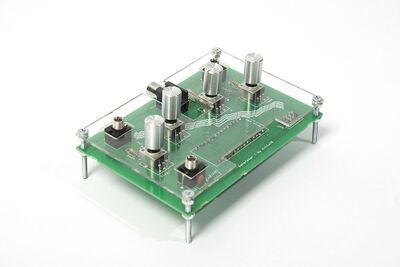
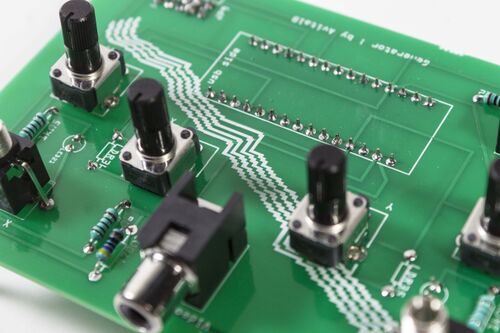
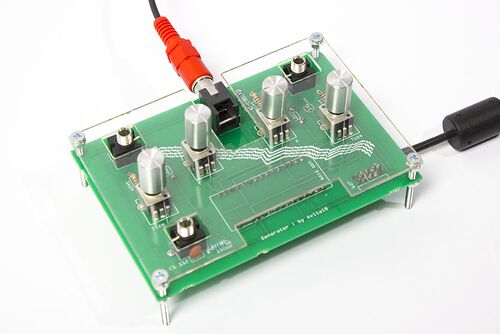
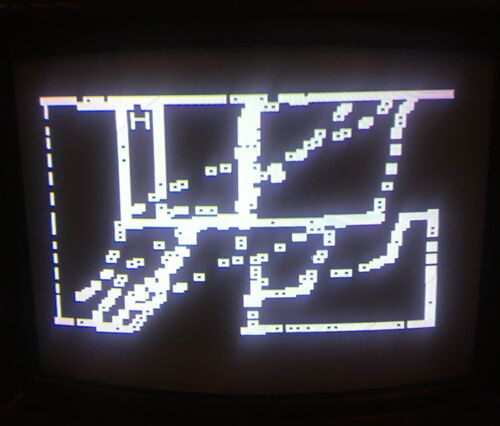
Generator is a module that translates voltage into video signal. The voltage can come both from the power source of the module and the outputs of other modules that can connect to it. It is both self-controlled and sound-controlled so it can be a stand alone object or part of a bigger constellation. It is an image maker that explores the visual possibilities within the limitations of the hardware and the code. Coding was a substantial part of this process – sometimes pointing me in the right direction, sometime presenting setbacks and frustrations and and at other times creating unexpected outcomes. The goal at first was unknown and mysterious and I came to realised that I will discover it as I go. Once I got the module to work with the LCD screen, it became my canvas. As I progressed, I realised I wanted the user of the module to be able to generate images and examine the possibilities of this medium. I created this version of the “etch a sketch”, in which the user alternates between the sense of control and randomness. On the one hand the rules of the modules are mostly clear – there are 5 brushes, you can determine their size, and you can draw across the X and the Y axis. On the other hand it takes some time to learn how to control it, there are many options to discover and it can be influenced by other modules' outputs that cannot be controlled directly. Finally, the screen clears every 10-12 seconds so you have a limited time to draw your image. The act of refreshing the screen seemed natural because every image we make is unique. It is almost impossible to make exactly the same image, so each one created is one of a kind but also temporary and fleeting, soon to be replaced by another image. All of these combined reference the experience of creative coding. There is a magic in randomness, producing while exploring and getting unexpected outcomes. My wish was to embed a personal perspective– happy “mistakes”, making adjustments while working and viewing the tools that we use as partners of the process and not just a means to an end. I encourage whoever builds this module to explore the coding and try to see where she/he can take it, what can happen while playing with code. | |||
[[File:LFP deplayer 18.jpg|500px]] | |||
==Manual== | |||
[[File:Manualfront3.jpg|500px]]. [[File:Manualback3.jpg|500px]] | |||
<pre> | |||
#include <TVout.h> | |||
#include <fontALL.h> | |||
#include "image.h" | |||
#include "image2.h" | |||
TVout TV; | |||
void setup() { | |||
TV.begin(PAL,120,96); | |||
Serial.begin(9600); | |||
} | |||
void loop() { | |||
TV.clear_screen(); | |||
for (int i=0 ; i<TV.hres()/2 ; i++){ | |||
for (int z=0 ; z<TV.vres()/2 ; z++){ | |||
//unsigned char valx= map(analogRead(A0),0,1023, 0, 128); | |||
unsigned char valx= map(analogRead(A1),0,1023, 0, 120); | |||
//unsigned char valfre= map(analogRead(A1),0,1023, 100, 1000); | |||
unsigned char valy= map(analogRead(A2),0,1023, 5, 96); | |||
//unsigned char valtone2= map(analogRead(A2),0,1023, 0, 200); | |||
unsigned char val0= map(analogRead(A0),0,1023, 0, 100); | |||
//unsigned char val1= map(analogRead(A1),0,1023, 0, 50); | |||
unsigned char val4= map(analogRead(A3),0,1023, 6, 20); | |||
//unsigned char pix= map(analogRead(A4),0,1023, 0, 5); | |||
//Serial.println(analogRead(A1)); | |||
Serial.println(analogRead(A2)); | |||
//Serial.println(analogRead(A3)); | |||
if(val0<20){ | |||
if(val4<=6){ | |||
TV.set_pixel(valx+1,valy+1,1); | |||
} | |||
if(val4>6 && val4<=10){ | |||
TV.set_pixel(valx+1,valy+1,1); | |||
TV.set_pixel(valx-1,valy-1,1); | |||
} | |||
if(val4>10 && val4<=15){ | |||
TV.set_pixel(valx+1,valy+1,1); | |||
TV.set_pixel(valx-1,valy-1,1); | |||
TV.set_pixel(valx-3,valy-3,1); | |||
} | |||
if(val4>15){ | |||
TV.set_pixel(valx+1,valy+1,1); | |||
TV.set_pixel(valx-1,valy-1,1); | |||
TV.set_pixel(valx-3,valy-3,1); | |||
TV.set_pixel(valx-5,valy-5,1); | |||
} | |||
} | |||
if (val0>20 && val0<40){ | |||
TV.draw_line(valx,valy,valx+val4,valy+val4,INVERT); | |||
//TV.tone(valfre); | |||
} | |||
if (val0>40 && val0<60){ | |||
if(val4<=8){ | |||
TV.draw_rect(valx,valy,val4-1,3,WHITE); | |||
TV.draw_circle(valx+1,valy+1,2,INVERT); | |||
} | |||
if(val4>8 && val4<12){ | |||
TV.draw_rect(valx,valy,val4-2,6,WHITE); | |||
TV.draw_circle(valx+2,valy+2,4,INVERT); | |||
} | |||
if(val4>12){ | |||
TV.draw_rect(valx-4,valy-4,val4/2,val4/2,INVERT); | |||
TV.draw_circle(valx+2,valy+2,5,WHITE,INVERT); | |||
} | |||
} | |||
if (val0>60 && val0<80){ | |||
if(val4<=8){ | |||
//TV.bitmap(valx,valy,image); | |||
TV.draw_rect(valx-4,valy-4,2,2,WHITE); | |||
} | |||
if(val4>8 && val4<12){ | |||
TV.draw_rect(valx-4,valy-4,2,2,WHITE); | |||
TV.draw_rect(valx-2,valy-2,2,2,WHITE); | |||
} | |||
if(val4>12){ | |||
TV.bitmap(valx,valy,image); | |||
} | |||
} | |||
if (val0>80){ | |||
if(val4<=6){ | |||
TV.select_font(font6x8); | |||
TV.print(valx,valy,"W"); | |||
} | |||
if(val4>6 && val4<=10){ | |||
TV.select_font(font6x8); | |||
TV.print(valx,valy,"H"); | |||
} | |||
if(val4>10 && val4<=15){ | |||
TV.select_font(font6x8); | |||
TV.print(valx,valy,"0"); | |||
} | |||
if(val4>15){ | |||
TV.select_font(font6x8); | |||
TV.print(valx,valy,"?"); | |||
} | |||
} | |||
} | |||
} | |||
} | |||
</pr> | |||
</div> | |||
=Documentation= | |||
[[File:Manualclose.jpg|500px]]. [[File:Generator1.jpg|500px]]. | |||
[[File:Genrerator5.jpg|500px]]. [[File:Generator6.jpg|500px]]. | |||
[[Category:LFP]] | [[Category:LFP]] | ||
Latest revision as of 15:10, 13 March 2021
Special issue X
Session 1
With Denis de Bel. Quick link to wiki
Building a module
We built a synth that can receive samples
My samples
(Israeli prime minister Bibi in his after election speech)
Session 2
Workshop at De Player with Olli Aarni and this is pad
My random notes
- Open string phenomenon: Something that seems to have limited options but actually has more (one hand on the string and one hand on the pitch)
- When you don't control your instrument, how can you still effect it (like the raindrops falling on tin- you don't control the rain but you can control the material it lands on for example)
- Natural generators (example: the lava lamps next to each other, each with different number of bubbles)
- A thought- what make a certain sound iconic? like the kindergarden sound- kids screaming+running on the ground+the voice of the teacher= the kindergarden sound. Like a recipe, all these sound together create a complete other sound and they can function on their own as well.
- A name- a short sound that you were trained to respond to.
- In language- sound that are toward the inside (me) and sounds that are toward the outside (you, he, she)
- I want to expand on- structure of languages.
Links
Session 3
The Arduino environment is pretty limited because every module can do a limit amount of actions. The coding language commands a lot of the time contain a lot of command inside.
Simpler way to upload a sample
In terminal:
- go to the folder where the files are
- pull from git if needed
- use sox with this command: ./<name of sh file> <name of wav file> (this runs this code on the sound file)
- this create a sample.h from the sound file
- Now you have a new sample.h file
Arduino environment
serial.begin(9600)- the number is number of symbols in a sec.
serial.print- will show the output
void loop(){ everything inside that will loop
delay(1000)- will give a delay of 1 sec
In class
- We reviewed some loop commands in the code
- We tried to affect each other's modules with a code in this files:
Session 4
Monday+Friday sessions The Friday session really helped with some deeper understanding regarding how to work with the module.
At home
Recommended set for deep thinking by Helene Rickhard
I tried to do some visual stuff connecting my module to processing through the computer (because Processing is a more "visual" coding environment). The main issue was transferring the information we are getting from the Arduino to Processing.
References for visuals using Arduino-Processing connection
These are the links I used
General- connecting between Arduino and Processing
- Explanation about working with electronics and processing
- Example for transferring info from the Arduino port
- About the command Serial.read
Serial port
In the Processing code you need to be "on" the same serial port that the Arduino is running on
In the Processing code you need to chose the port number in this line-Serial.list[number-of-port] myPort = new Serial(this, Serial.list()[11], 9600);
Adding this line println(Serial.list()); to the processing code will show the lists of port and than you can find out which one you should be on.
Converting text input to number value (int)
- Turning a string from Arduino to an Int(converting the text you get to an actual number)
- Turning a string from Arduino to an Int 2
- Transferring the data using Bytes (I didn't really get it)
- This worked best for me regarding making ints from Arduino
Multiple inputs
The problem that I have right now is that my code doesn't know how to get different inputs from the Arduino (A0, A1, A2). I think this video will help me:
Session 5
Workshop at De Player with Olli.
Concepts
- How do we explain modules? There is so much backend output and input that no one is seeing- what if we make it be seen and heard?
- Regarding my reading in methods- in Matthew Fuller book there is a critic regarding not giving enough significance to the components of the software and just to general concept and philosophy of it.
- Visual ways of representing sound- what can be new? or visual ways to represent the "backend"
- Regarding the manual- what if every manual look differently? like the output of the Arduino or something
- Giving a sound an image- 1+1+1 (sound+hex+space= shape)
Visuals, video art and other crazy ideas My wish is for my module to be more on the visual side of things. I would like the module users to generate some kind of image with the module input and for the process of input to output to be somehow represented in the visual-
References:
IMPAKT Festival
My favourite session from the festival was FROM GUI TO NO UI by Nishant Shah.
Key ideas and references from the session:
- Artist Kelly Dobson challenges the interface
- interacting physically and not through the gui
- People are the non gui interfaces
- Micro worker
- IOT- physical computational networks
- We are rebuilding our entire planet with computer- we can consume our planet
- Computer used to be women
- Rebutting the human species
- Hacker privilege
- Isanyoneup.com
- The cloud is a nice name
- The feminist research network
- If you can code you have the choice to code differently
- The fact that the data is not our is a choice that has been made by the Silicon Valley bro culture
- Redesign the sequence
- Not taking the scripts that was already made
- I don't want to fight the existing i want to invent it
- Data is not the same of information- data can be sorted
- If we build an economy based on information and not data
- Fingerprints in India- the biometric system is not compatible for places with a lot of manual labor work.
- This is me even if you cant have my data
- Cybernet work loop
- Recalibrating what is human not cyber human
Working on the module
We were given a restriction that we can't use a computer with our module. So I can't use processing. Aymeric, Dennis and Michael figured out a way to use the Arduino library TV.out which allows to output video signal.
TV.out tests
So this library is pretty old so not a lot of info about it online but you can find some.
First I try drawing pixels across the screen using two loop that draw pixels across the screen using the X and Y axis.
The knobs control the number of pixels that are drawn at the moment and the speed that the pixels across the screen.
#include <TVout.h>
#include <fontALL.h>


TVout TV;
unsigned char x,y,z,pixel_num,d_num;
void setup()  {
  x=0;
  y=0;
  z=0;
  pixel_num=0;
  d_num=0;
  Serial.begin(9600);
  TV.begin(PAL);  //for devices with only 1k sram(m168) use TV.begin(_NTSC,128,56)
  TV.select_font(font6x8);
  Serial.println(TV.vres());
  Serial.println(TV.hres());

}

void loop() {
  TV.clear_screen();
  pixel_num=0;
  d_num=0;
  for(x=0;x<TV.hres();x++){
    z=random(TV.vres());
    if(analogRead(A1)<340){
      pixel_num=1;
      d_num=1000;
    }
    if(analogRead(A1)>340 && analogRead(A1)<680){
      pixel_num=2;
      d_num=400;
    }
    if(analogRead(A1)>680){
      pixel_num=4;
      d_num=0;
    }
    for(y=0;y<TV.vres();y++){
      if(analogRead(A0)<205){
      TV.set_pixel(x+random(TV.hres()/12),random(z,TV.vres()/4-z),pixel_num);
      }
      if(analogRead(A0)>205 && analogRead(A0)<410){
      TV.set_pixel(x+random(TV.hres()/10),random(z,TV.vres()/2.3-z),pixel_num);
      }
      if(analogRead(A0)>410 && analogRead(A0)<615){
      TV.set_pixel(x+random(TV.hres()/8),random(z,TV.vres()/2-z),pixel_num);
      }
      if(analogRead(A0)>615 && analogRead(A0)<820){
      TV.set_pixel(x+random(TV.hres()/6),random(z,TV.vres()/1.2-z),pixel_num);
      }
       if(analogRead(A0)>820){
      TV.set_pixel(x+random(TV.hres()/4),random(z,TV.vres()-z),pixel_num);
      }
      //TV.set_pixel(x+random(50),y+random(y,y*5),analogRead(A0)/10);
      //TV.delay(1000);
    }
     TV.delay(d_num);
  }
}
Then I try to use Bitmap. I used a software called LCD Creator to get the hex value of some images I drew in photoshop.
The conversion made the images a bit wired (not exactly as I wanted it to be) but I kind of like this outcome even more (nice bug).
#include <TVout.h>
#include "car.h"
#include "image2.h"

TVout TV;

void setup() {
  TV.begin(PAL);
  Serial.begin(9600);
}

void loop() {
  TV.clear_screen();
  int val= map(analogRead(A0), 0, 1023, 10, 128);
  int val2 = map(analogRead(A1), 0, 1023, 10, 60);
  Serial.println(val);
  Serial.println(val2);
  TV.bitmap(val,val2/2,car);
  TV.bitmap(val2,0,image2);
  //TV.bitmap(val2/50,val/70,image2);
  //delay(100);
  //TV.clear_screen();
}
I tried another one the pixels when you can control the X location of the pixels that are drawn.
The knobs control the value of X and the number of pixels.
#include <TVout.h>
#include "car.h"

TVout TV;
unsigned char x,y,z,pixel_num,d_num;
void setup()  {
  x=0;
  y=0;
  z=0;
  pixel_num=0;
  d_num=0;
  Serial.begin(9600);
  TV.begin(PAL);
}

void loop() {
  //TV.clear_screen();
  pixel_num=0;
  d_num=0;

  for(x=0;x<TV.hres();x++){
  z=random(TV.vres());
  int val1= map(analogRead(A0),0,1023, 0, 128);
  int val2= map(analogRead(A1),0,1023, 0, 96);
  int val3= map(analogRead(A2),0,1023, 0, 255);
  int val4= map(analogRead(A0),0,1023, 0, 50);

  //TV.bitmap(val3,0,car);
  TV.draw_circle(10,10,20,WHITE,INVERT);
  Serial.println(val1);
    if(analogRead(A1)<340){
      pixel_num=1;
      d_num=1000;
    }
    if(analogRead(A1)>340 && analogRead(A1)<680){
      pixel_num=2;
      d_num=400;
    }
    if(analogRead(A1)>680){
      pixel_num=4;
      d_num=0;
    }
    for(y=0;y<TV.vres();y++){
      if(analogRead(A0)<205){
      TV.set_pixel(val1,random(z,val2-z),1);
      }
      if(analogRead(A0)>205 && analogRead(A0)<410){
      TV.set_pixel(val1,random(z,val2-z),2);
      }
      if(analogRead(A0)>410 && analogRead(A0)<615){
      TV.set_pixel(val1,random(z,val2-z),3);
      }
      if(analogRead(A0)>615 && analogRead(A0)<820){
      TV.set_pixel(val1,random(z,val2-z),4);
      }
       if(analogRead(A0)>820){
      TV.set_pixel(val1,random(z,val2-z),5);
      }
    }
     TV.delay(d_num);
  }
}
Then I combined the pixels and BMP and found that some pixels override each other and distort the image.
From my experiments I realised that I would like the user of the module to have more control over the image that is being made and decided to go with an "etch a sketch" approach.
Visual Identity
We collaborated on creating a visuals for the publication and the event. We wanted to enhance the analog aspect of the project by using an old label printer (provided by Mark).
Special Issue Website
https://issue.xpub.nl/10/index.html#SPIX
Mika, Sandra and myself built the website with the help of Andre. We wanted it to be playful and interactive while giving an overall view of the experience we created with the modules.
Input/Output
At the night of Dec 12th we gathered at De Player to show the public our modules and the work we done. We presented our work individually in the space but also connected all our modules together to show how they impact each other.
Generator
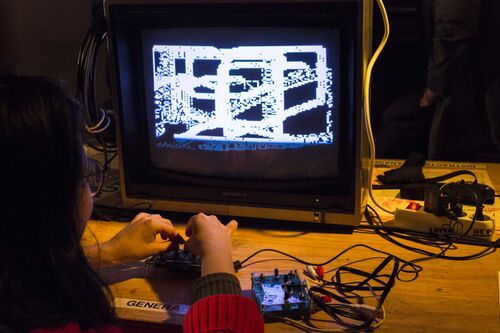
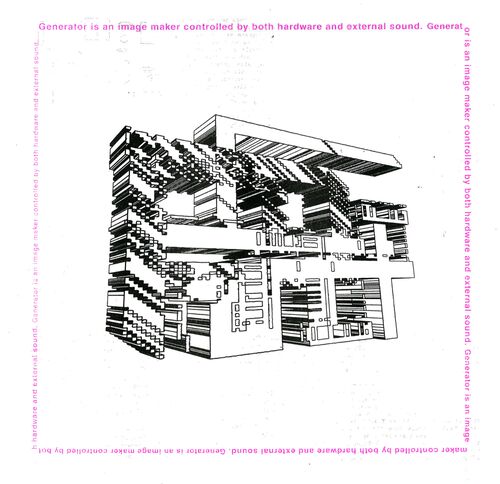
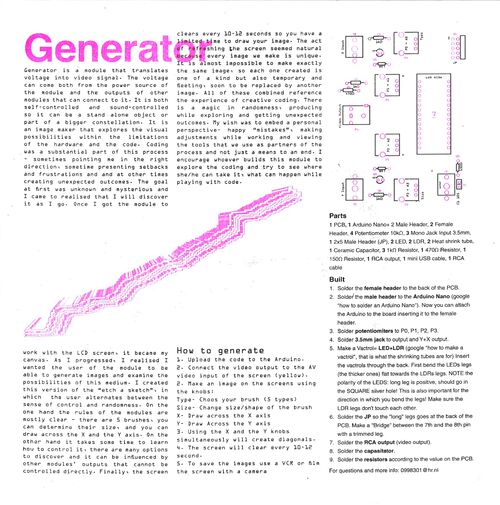
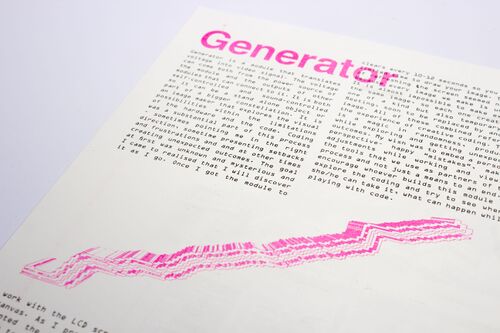
Generator is a module that translates voltage into video signal. The voltage can come both from the power source of the module and the outputs of other modules that can connect to it. It is both self-controlled and sound-controlled so it can be a stand alone object or part of a bigger constellation. It is an image maker that explores the visual possibilities within the limitations of the hardware and the code. Coding was a substantial part of this process – sometimes pointing me in the right direction, sometime presenting setbacks and frustrations and and at other times creating unexpected outcomes. The goal at first was unknown and mysterious and I came to realised that I will discover it as I go. Once I got the module to work with the LCD screen, it became my canvas. As I progressed, I realised I wanted the user of the module to be able to generate images and examine the possibilities of this medium. I created this version of the “etch a sketch”, in which the user alternates between the sense of control and randomness. On the one hand the rules of the modules are mostly clear – there are 5 brushes, you can determine their size, and you can draw across the X and the Y axis. On the other hand it takes some time to learn how to control it, there are many options to discover and it can be influenced by other modules' outputs that cannot be controlled directly. Finally, the screen clears every 10-12 seconds so you have a limited time to draw your image. The act of refreshing the screen seemed natural because every image we make is unique. It is almost impossible to make exactly the same image, so each one created is one of a kind but also temporary and fleeting, soon to be replaced by another image. All of these combined reference the experience of creative coding. There is a magic in randomness, producing while exploring and getting unexpected outcomes. My wish was to embed a personal perspective– happy “mistakes”, making adjustments while working and viewing the tools that we use as partners of the process and not just a means to an end. I encourage whoever builds this module to explore the coding and try to see where she/he can take it, what can happen while playing with code.
Manual
#include <TVout.h>
#include <fontALL.h>
#include "image.h"
#include "image2.h"

TVout TV;
void setup() {
  TV.begin(PAL,120,96);
  Serial.begin(9600);
}

void loop() {
  TV.clear_screen();

  for (int i=0 ; i<TV.hres()/2 ; i++){
    for (int z=0 ; z<TV.vres()/2 ; z++){
    //unsigned char valx= map(analogRead(A0),0,1023, 0, 128);
    unsigned char valx= map(analogRead(A1),0,1023, 0, 120);
    //unsigned char valfre= map(analogRead(A1),0,1023, 100, 1000);
    unsigned char valy= map(analogRead(A2),0,1023, 5, 96);
    //unsigned char valtone2= map(analogRead(A2),0,1023, 0, 200);
    unsigned char val0= map(analogRead(A0),0,1023, 0, 100);
    //unsigned char val1= map(analogRead(A1),0,1023, 0, 50);
    unsigned char val4= map(analogRead(A3),0,1023, 6, 20);
    //unsigned char pix= map(analogRead(A4),0,1023, 0, 5);
    //Serial.println(analogRead(A1));
    Serial.println(analogRead(A2));
    //Serial.println(analogRead(A3));

    if(val0<20){
        if(val4<=6){
           TV.set_pixel(valx+1,valy+1,1);
           }
        if(val4>6 && val4<=10){
          TV.set_pixel(valx+1,valy+1,1);
          TV.set_pixel(valx-1,valy-1,1);
           }
        if(val4>10 && val4<=15){
          TV.set_pixel(valx+1,valy+1,1);
          TV.set_pixel(valx-1,valy-1,1);
          TV.set_pixel(valx-3,valy-3,1);
           }

        if(val4>15){
          TV.set_pixel(valx+1,valy+1,1);
          TV.set_pixel(valx-1,valy-1,1);
          TV.set_pixel(valx-3,valy-3,1);
          TV.set_pixel(valx-5,valy-5,1);
           }
    }


    if (val0>20 && val0<40){
       TV.draw_line(valx,valy,valx+val4,valy+val4,INVERT);
       //TV.tone(valfre);
    }

    if (val0>40 && val0<60){

       if(val4<=8){
        TV.draw_rect(valx,valy,val4-1,3,WHITE);
        TV.draw_circle(valx+1,valy+1,2,INVERT);
        }

       if(val4>8 && val4<12){
        TV.draw_rect(valx,valy,val4-2,6,WHITE);
        TV.draw_circle(valx+2,valy+2,4,INVERT);
        }

       if(val4>12){
        TV.draw_rect(valx-4,valy-4,val4/2,val4/2,INVERT);
        TV.draw_circle(valx+2,valy+2,5,WHITE,INVERT);
        }

    }

    if (val0>60 && val0<80){
      if(val4<=8){
       //TV.bitmap(valx,valy,image);
       TV.draw_rect(valx-4,valy-4,2,2,WHITE);
      }
      if(val4>8 && val4<12){
       TV.draw_rect(valx-4,valy-4,2,2,WHITE);
       TV.draw_rect(valx-2,valy-2,2,2,WHITE);
      }
      if(val4>12){
       TV.bitmap(valx,valy,image);
      }

    }

     if (val0>80){
      if(val4<=6){
      TV.select_font(font6x8);
      TV.print(valx,valy,"W");
      }
      if(val4>6 && val4<=10){
      TV.select_font(font6x8);
      TV.print(valx,valy,"H");
      }
      if(val4>10 && val4<=15){
      TV.select_font(font6x8);
      TV.print(valx,valy,"0");
      }
      if(val4>15){
      TV.select_font(font6x8);
      TV.print(valx,valy,"?");
      }

    }
    }
  }
}
</pr>

