User:Tamas Bates/NetProto/WebGL/ShaderFun: Difference between revisions
Tamas Bates (talk | contribs) |
Tamas Bates (talk | contribs) |
||
| Line 134: | Line 134: | ||
==A More Complete Raymarching Example== | ==A More Complete Raymarching Example== | ||
Added support for texturing, better lighting, multiple materials, and a few small tweaks which should hopefully boost performance on some machines. May take a few seconds to load, and will render with flat colors in place of textures until the texture images have been downloaded. This is largely just a somewhat messy extension of the marching code above. | Added support for texturing, better lighting, multiple materials, and a few small tweaks which should hopefully boost performance on some machines. May take a few seconds to load, and will render with flat colors in place of textures until the texture images have been downloaded. This is largely just a somewhat messy extension of the marching code above, and could use some more work to reduce a lot of the equations used for shading (too much trigonometry happening there, right now). | ||
<big>'''http://noirbear.com/toys/marching/melty.html'''</big> | <big>'''http://noirbear.com/toys/marching/melty.html'''</big> | ||
Latest revision as of 15:56, 3 February 2014
Simple Mesh Deformation and Shading
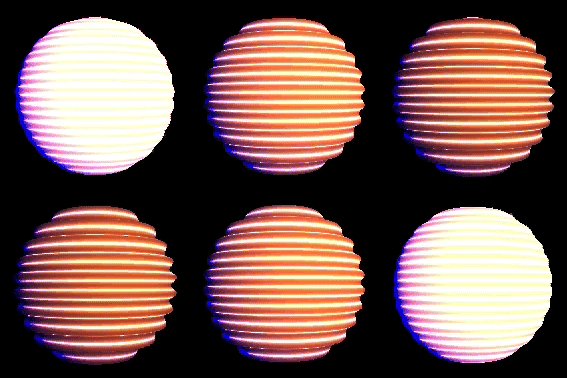
Deforming a sphere and coloring it based on its difference from a normal sphere. Requires LOTS of polygons to make this kind of transformation look smooth, but runs fine as long as there are no other objects in the scene...
Vertex Shader:
    uniform float amplitude; // time-varying value used to increase/decrease overall deformation
    uniform float time;
    varying vec3 vNormal;    // normal vector at this vertex; just passed on to fragment shader
    varying float dist;      // distance of this vertex from its original position (sent to fragment shader for coloring)

    void main(void) {
        vNormal = normal; // pass thru normal

        vec3 newPos = position + normal * vec3(sin(0.5*position.y + 10.0*time) * amplitude );
        dist = distance(position, newPos); // distance of new point from surface
        gl_Position = projectionMatrix * modelViewMatrix * vec4(newPos, 1.0);
    }
Fragment Shader:
    varying vec3 vNormal;
    varying float dist;

    void main(void) {
	vec3 light = vec3(0.5, 0.2, 1.0); // fake a light
        light = normalize(light);
        float dprod = max(0.0, dot(vNormal, light));
        float j = 2.0 / dist;
	gl_FragColor = vec4(dprod * j, j*0.4*dprod, 0.2*j, 1.0);
    }
Super Simple Raymarching
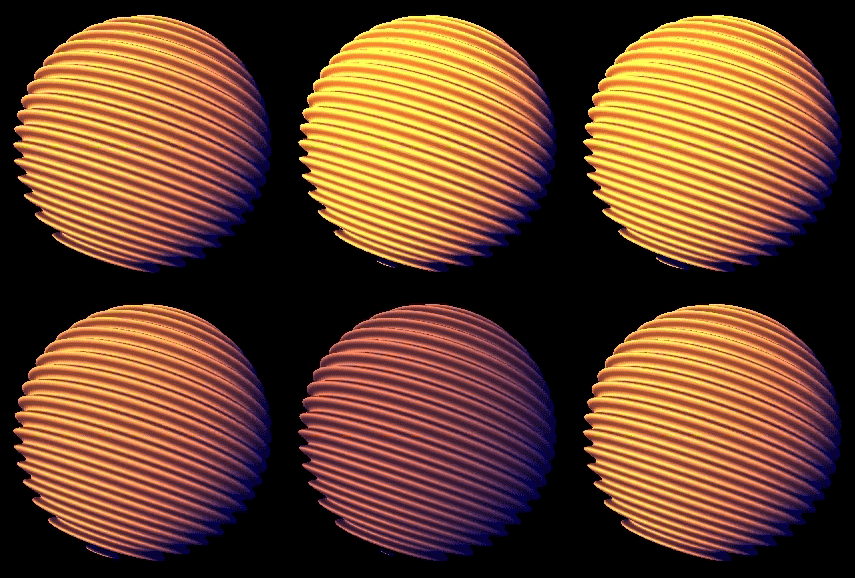
All the smoothness! None of the polygons! A similar result to the one above was produced using only a fragment shader, requiring a grand total of 2 polygons (to render the shader's output on). Over 3x as many lines of code, though, so that's a little inconvenient. The actual raymarching only takes up about a third of the code, though, so extending this to more complex scenes shouldn't require much more code than extending the polygon-based example above (and depending on the scene may require less). HUGE and neverending thanks to IQ for his helpful articles on the topic.
    precision mediump float;
    uniform float time;        // not required to be actual time, just needs to monotonically increase/decrease for the waves to flow correctly
    uniform vec2 uResolution;  // width/height of rendering surface

    const float maxDepth = 64.0;
    const int maxIterations = 64;
    const float epsilon = 0.001;
    const float radius = 0.55; // radius of sphere

    float sphere(vec3 p, float s)
    {
        return (length(p)-s);
    }

    float wigglesphere(vec3 p, float s)
    {
        return 0.02*sin(-100.0*p.z + 10.*time) + sphere(p, s);
    }

    float dist(in vec3 p)
    {
        return wigglesphere(p, radius);
    }

    float castRay( in vec3 ro, in vec3 rd, in float maxd )
    {
        float h=epsilon*2.0; // step size
        float t = 0.0;	// distance travelled

        for( int i=0; i<maxIterations; i++ )
        {
            if( abs(h)<epsilon||t>maxd ) continue;//break;
            t += h;
            h = dist(ro+rd*t);
        }

        return t;
    }

    vec3 calcNormal( in vec3 pos )
    {
        vec3 eps = vec3( 0.001, 0.0, 0.0 );
        vec3 normal = vec3(
            dist(pos+eps.xyy) - dist(pos-eps.xyy),
            dist(pos+eps.yxy) - dist(pos-eps.yxy),
            dist(pos+eps.yyx) - dist(pos-eps.yyx) );
        return normalize(normal);
    }

    vec3 render( in vec3 ro, in vec3 rd )
    {
        vec3 col = vec3(0.0);
        float t = castRay(ro,rd,maxDepth);

        if( t < maxDepth ) // raymarch converged after t steps
        {
            vec3 pos = ro + t*rd; // end position = ray origin + distance traveled in ray direction
            vec3 normal = calcNormal( pos );
            float dif = sqrt(wigglesphere(pos, radius)-sphere(pos, radius)); // used to adjust color values based on distance this point is from a normal sphere

            vec3 light = normalize( vec3(0.5, 1.2, 0.1) );
            float diffuse = (10.0*sin(2.*time)+20.0)*clamp(dot(normal, light), 0.0, 1.0); // change brightness of the light over time

            col = vec3(0.8*diffuse * dif, 0.4*dif*diffuse, 2.5*dif);
        }

        return vec3(clamp(col,0.0,1.0));
    }

    void main(void)
    {
        vec2 q = gl_FragCoord.xy/uResolution.xy;
        vec2 p = -1.0+2.0*q;
        p.x *= uResolution.x/uResolution.y;

        // camera
        vec3 rorigin = vec3(1.5, 1.0, 0.3);
        vec3 cw = normalize(-rorigin);
        vec3 cp = vec3(0.5, 1.0, -1.5);
        vec3 cu = normalize(cross(cw,cp));
        vec3 cv = normalize(cross(cu,cw));
        vec3 rdir = normalize(p.x*cu + p.y*cv + 2.5*cw);  // ray direction

        vec3 color = render(rorigin, rdir); // <--- Action happens here

        gl_FragColor=vec4(color, 1.0);
    }
A More Complete Raymarching Example
Added support for texturing, better lighting, multiple materials, and a few small tweaks which should hopefully boost performance on some machines. May take a few seconds to load, and will render with flat colors in place of textures until the texture images have been downloaded. This is largely just a somewhat messy extension of the marching code above, and could use some more work to reduce a lot of the equations used for shading (too much trigonometry happening there, right now).


