Pen plotters/Pen Hacking: Difference between revisions
(Add pushing and cutting techniques) |
m (Change pen cutting photos to gallery view) |
||
| (7 intermediate revisions by the same user not shown) | |||
| Line 1: | Line 1: | ||
Page dedicated to the modification of Pen Plotter Pens | Page dedicated to the modification of Pen Plotter Pens | ||
__TOC__ | |||
==Pushing Technique== | ==Pushing Technique== | ||
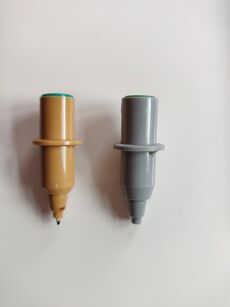
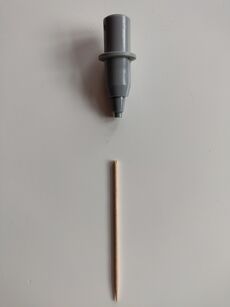
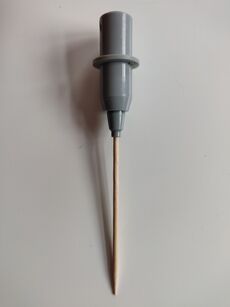
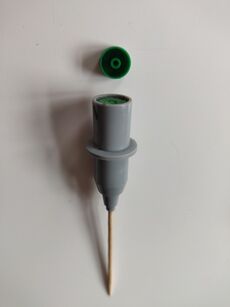
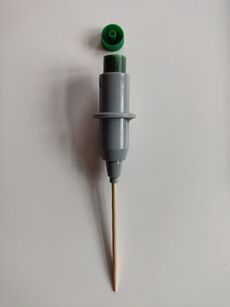
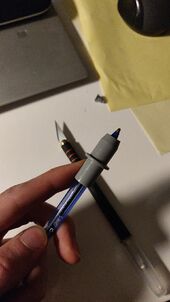
If you're lucky, you have a pen lying around without head. If you're luckier still, the top of the pen will pop right off. A toothpick is the perfect tool. | If you're lucky, you have a pen lying around without head. If you're luckier still, the top of the pen will pop right off. A toothpick is the perfect tool. | ||
[[File: | {|style="margin: 0 auto;" | ||
[[File: | |[[File:Pen_hacking_1.jpg|thumb|upright=0.75|A broken pen (right)]] | ||
[[File: | |[[File:Pen_hacking_2.jpg|thumb|upright=0.75|Take a toothpick]] | ||
[[File: | |[[File:Pen_hacking_3.jpg|thumb|upright=0.75|Push the toothpick]] | ||
[[File: | |- | ||
[[File: | |[[File:Pen_hacking_4.jpg|thumb|upright=0.75|Push harder with the toothpic]] | ||
|[[File:Pen_hacking_5.jpg|thumb|upright=0.75|Keep pushing]] | |||
|[[File:Pen_hacking_6.jpeg|thumb|upright=0.55|You might need help from a knife]] | |||
|} | |||
[[File:Pen hacking 7.jpg|thumb|center|Tadaa!]] | [[File:Pen hacking 7.jpg|thumb|center|Tadaa!]] | ||
| Line 16: | Line 21: | ||
* Cosider pulling the pen-intestants out from the head of the pen (easy after the top has been cut off). This will allow you to more easily push out the top of the pen. | * Cosider pulling the pen-intestants out from the head of the pen (easy after the top has been cut off). This will allow you to more easily push out the top of the pen. | ||
* Be careful! | * Be careful! | ||
==3D printing Technique== | |||
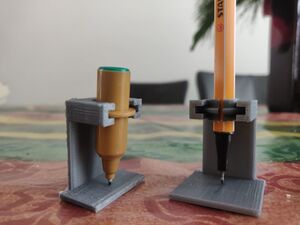
You can also 3D print custom holders. This is a reliable way of obtaining a large number of holders, which has the benefit of being able to have one holder per pen, so that you don't have to align them each time you switch pens. | |||
* [https://github.com/juliendorra/3D-printable-plotter-adapters-for-pens-and-refills This] is a GitHub repo with many stl files. The one I have tried did not work for me, however (too slim for the pen specified, or not aligned properly). | |||
* I have made my own (specifically for stabillo 68 / 88 pens), the stl files for which can be found [https://git.xpub.nl/thijsoid/PenPlotterPenHolders here on Gitea]. | |||
[[File:Pen-test-rig-print-2.jpg|thumb|right|3d printed rig for vertical alginment of custom pens]] | |||
==Pen Alignment== | |||
When using a custom pen, you want to make sure the pen is placed properly in the holder. This includes: | |||
* The pen is properly aligned height wise: the tip of the pen just touches the paper when the plotter holds the pen down. | |||
* The pen is secured, so that it won't loosen or move during plotting. | |||
The former, in particular, can be tricky. You can hold your custom pen next to a regular pen plotter pen and compare the heigts. To make life easier, a [[User:Thijshijsijsjss/Pen_Plotting_Panache#Testing_Rig|vertical alignment rig]] has been made. It can be found [https://git.xpub.nl/thijsoid/PenPlotterPenHolders here on Gitea]. | |||
Latest revision as of 15:09, 9 February 2024
Page dedicated to the modification of Pen Plotter Pens
Pushing Technique
If you're lucky, you have a pen lying around without head. If you're luckier still, the top of the pen will pop right off. A toothpick is the perfect tool.
Cutting Technique
When you're not so lucky, you might need to use a knife immediately. A few notes:
- Not all pens are created equal, some plastics seems to be softer than others
- Cosider pulling the pen-intestants out from the head of the pen (easy after the top has been cut off). This will allow you to more easily push out the top of the pen.
- Be careful!
3D printing Technique
You can also 3D print custom holders. This is a reliable way of obtaining a large number of holders, which has the benefit of being able to have one holder per pen, so that you don't have to align them each time you switch pens.
- This is a GitHub repo with many stl files. The one I have tried did not work for me, however (too slim for the pen specified, or not aligned properly).
- I have made my own (specifically for stabillo 68 / 88 pens), the stl files for which can be found here on Gitea.
Pen Alignment
When using a custom pen, you want to make sure the pen is placed properly in the holder. This includes:
- The pen is properly aligned height wise: the tip of the pen just touches the paper when the plotter holds the pen down.
- The pen is secured, so that it won't loosen or move during plotting.
The former, in particular, can be tricky. You can hold your custom pen next to a regular pen plotter pen and compare the heigts. To make life easier, a vertical alignment rig has been made. It can be found here on Gitea.

