Prototypology/Exhibitiology-1: Difference between revisions
No edit summary |
No edit summary |
||
| Line 1: | Line 1: | ||
== How to setup OS X and browser for an exhibition ? == | == How to setup OS X and browser for an exhibition ? == | ||
Thats very easy! | Thats very easy! | ||
=== | === Turn off the screen saver === | ||
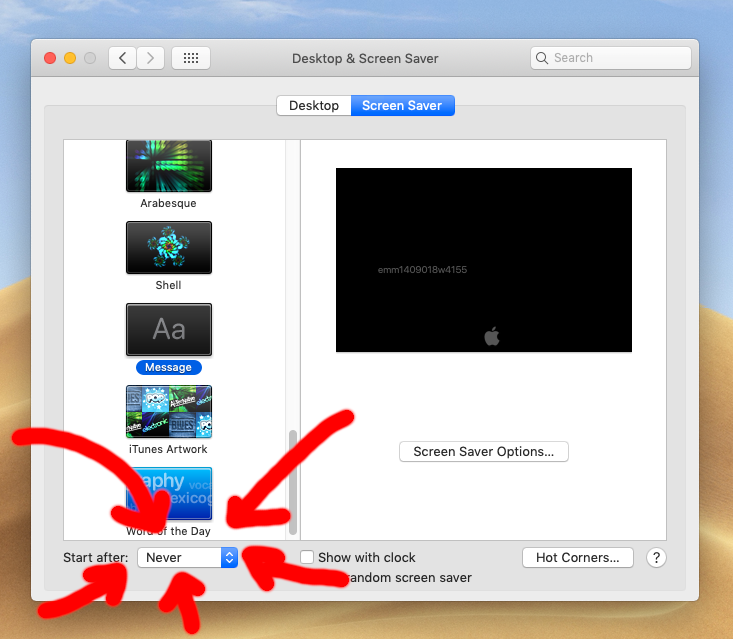
You go into the '''System Preferences''' of the OS X computer and click on '''Desktop & Screen Saver'''. There you select in the tab '''Screen Saver''' under the option '''Start after''' the option '''Never'''. | You go into the '''System Preferences''' of the OS X computer and click on '''Desktop & Screen Saver'''. There you select in the tab '''Screen Saver''' under the option '''Start after''' the option '''Never'''. | ||
[[File:Os-x-screen-saver.png|center]] | [[File:Os-x-screen-saver.png|center]] | ||
=== | === Turn off the energy saver === | ||
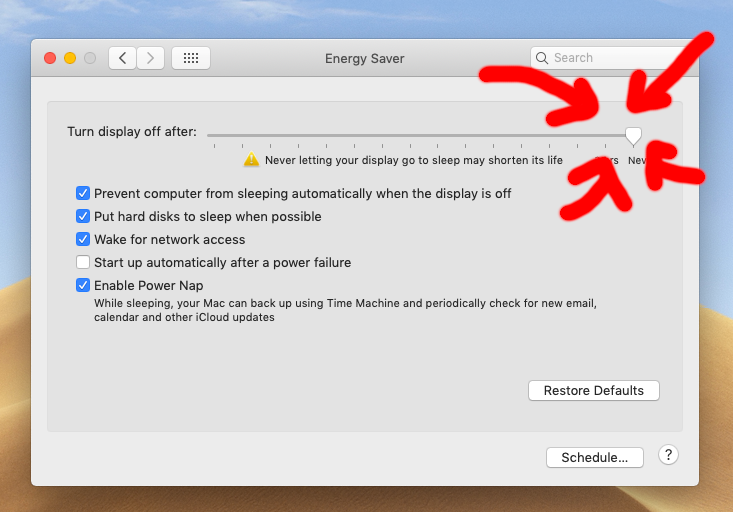
It could be that the screen turns off after some time. Therefore do the following: In '''System Preferences''' of the OS X computer and click on '''Energy Saver'''. The option '''Turn display off after''' should be '''Never'''. | It could be that the screen turns off after some time. Therefore do the following: In '''System Preferences''' of the OS X computer and click on '''Energy Saver'''. The option '''Turn display off after''' should be '''Never'''. | ||
[[File:Os-x-energy-saver.png|center]] | [[File:Os-x-energy-saver.png|center]] | ||
=== | === Autostart of the browser in Kiosk mode === | ||
Now the next step is that after login OS X will start automagically the browser and the your website in [https://en.wikipedia.org/wiki/Kiosk_software Kiosk-mode]. | |||
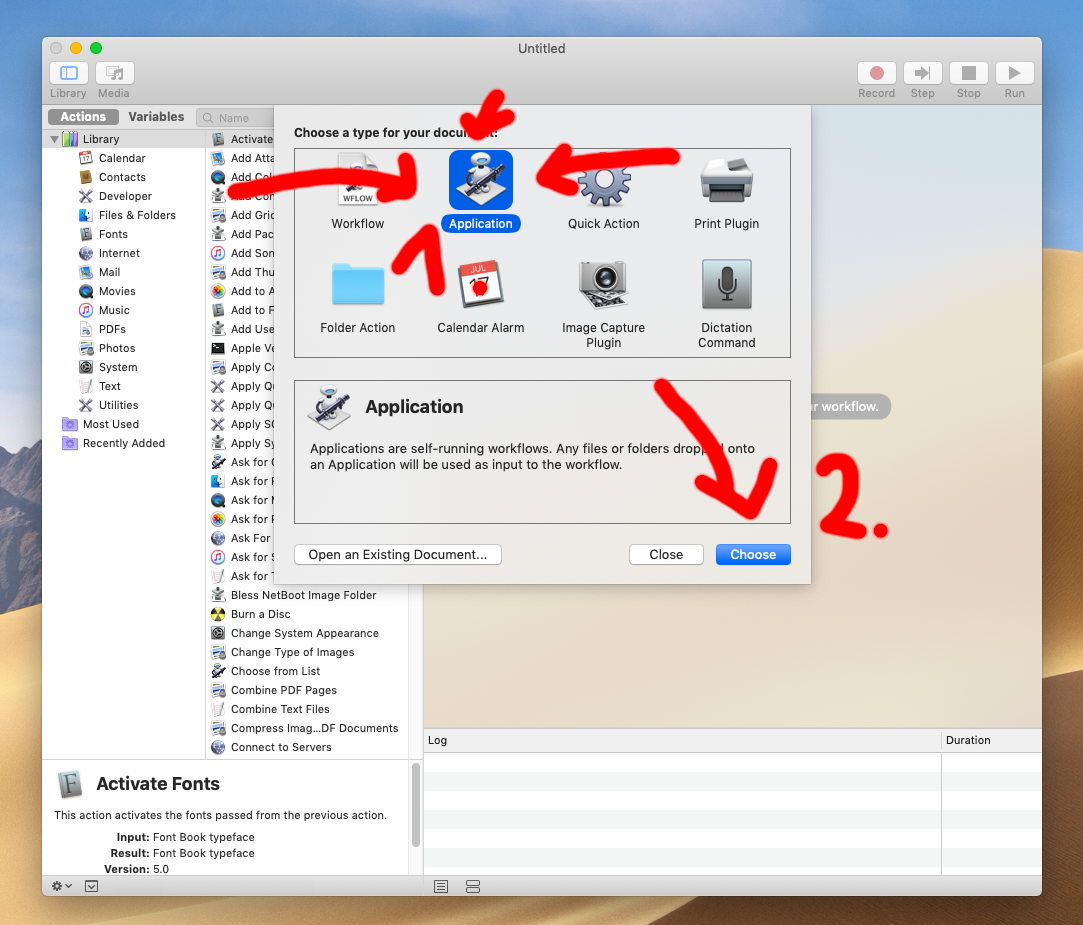
1. Start Start '''Automator.app''' and select '''Application''' | |||
[[File:Autostart1.png|center]] | |||
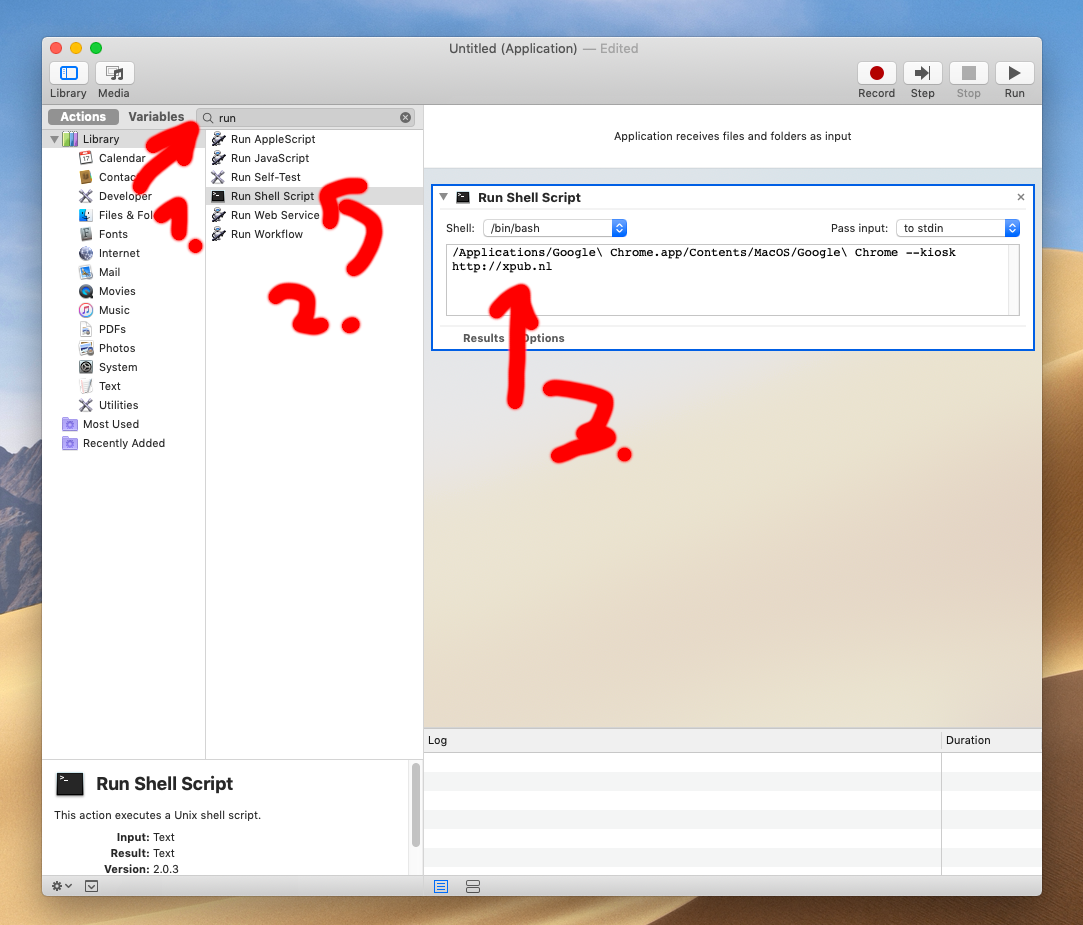
2. Click on '''Show library''', select '''Run shell script''' and add the following terminal command: | |||
<pre> | |||
/Applications/Google\ Chrome.app/Contents/MacOS/Google\ Chrome --kiosk http://xpub.nl | |||
</pre> | |||
The command start the Chrome browser in Kiosk mode at the url '''http://xpub.nl'''! Change the url to your project website :D | |||
[[File:Autostart2.png|center]] | |||
3. Test it by clicking on '''Run'''! | |||
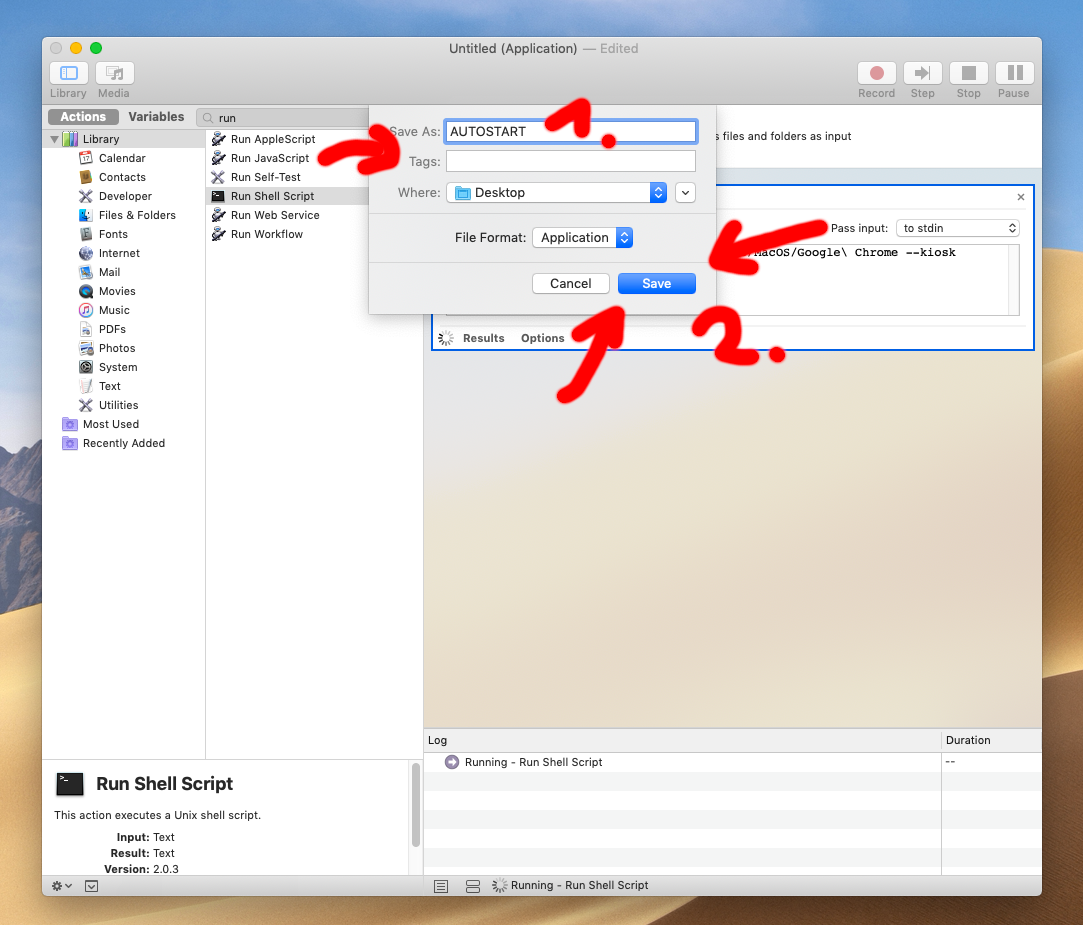
4. Now export the app and save it! | |||
[[File:Autostart3.png|center]] | |||
5. Last step! Add it to the autostart: | |||
Depending your MacOSX version: | |||
* Old versions: Go to '''System Preferences → Accounts → Login items''', or | |||
* New version: Go to '''System Preferences → Users and Groups → Login items (top right)''' | |||
Click on the '''+-symbol''' and select your app! Thats it - finished! | |||
[[File:Autostart4.png|center]] | |||
=== 4. Autologin === | |||
Coming soon ... | |||
Revision as of 15:25, 22 June 2022
How to setup OS X and browser for an exhibition ?
Thats very easy!
Turn off the screen saver
You go into the System Preferences of the OS X computer and click on Desktop & Screen Saver. There you select in the tab Screen Saver under the option Start after the option Never.
Turn off the energy saver
It could be that the screen turns off after some time. Therefore do the following: In System Preferences of the OS X computer and click on Energy Saver. The option Turn display off after should be Never.
Autostart of the browser in Kiosk mode
Now the next step is that after login OS X will start automagically the browser and the your website in Kiosk-mode. 1. Start Start Automator.app and select Application
2. Click on Show library, select Run shell script and add the following terminal command:
/Applications/Google\ Chrome.app/Contents/MacOS/Google\ Chrome --kiosk http://xpub.nl
The command start the Chrome browser in Kiosk mode at the url http://xpub.nl! Change the url to your project website :D
3. Test it by clicking on Run! 4. Now export the app and save it!
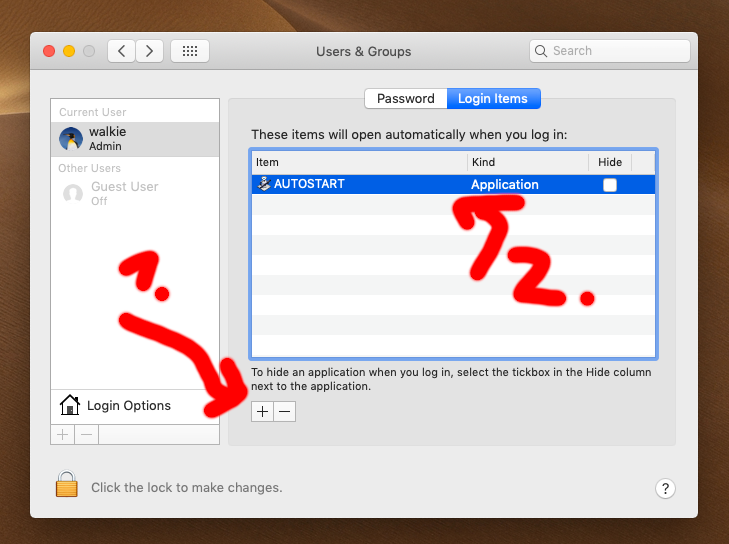
5. Last step! Add it to the autostart: Depending your MacOSX version:
- Old versions: Go to System Preferences → Accounts → Login items, or
- New version: Go to System Preferences → Users and Groups → Login items (top right)
Click on the +-symbol and select your app! Thats it - finished!
4. Autologin
Coming soon ...

