
User:Alessia/coding+3d
Javascript (~‾▿‾)~
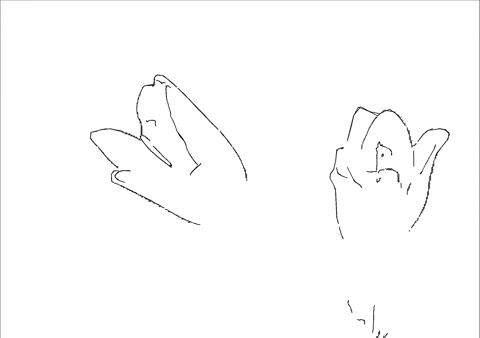
mold_simulation𓍊𓋼~

playing with organic generative art, understandig what digital morphogenesis is (approach to design based on growth processes, vital activities of living organisms...).
Inspired by:
- Hans Jenny Cymatics
- Thomas Burton Kinraide, Electric Discharge Exposure
- Lichtenberg Figures (electric discharge patterns)
- Cosmigraphics
- Alexander Ross
- Nehemiah Grew, The anatomy of plants
- Algorithmic botany???
through p5js, then direct inkscape to hpgl. I still can't find a way to convert jpg to hpgl or svg directly into the p5js editor.
It seems that everything I do is for the pen plotters (it is).The output file is pretty heavy, so to print on A3 paper I need to do some adjustments. This could totally be another flipbook.
Python
Python ASCII
https://github.com/kpberry/image-to-ascii
NumPy: Numerical Python, library, numerical data, multidimensional array
Blender Python scripting
Python API documentation: https://docs.blender.org/api/current/
UI to the user, API for the code.
Log in —- UI —- Front End —- API —- Back End
++++Enable Developer Extra and Python Tooltips!++++
The Python Console has autocompletion
The Blender Python API can’t create Blender data that exists outside the main Blender database (accessed through bpy.data)
bpy (Blender Python), there are some specific modules in Blender that may not be found in standard Python
Cheat Sheet
https://docs.blender.org/manual/en/dev/advanced/operators.html#bpy-ops-wm-operator-cheat-sheet
Open Shading Language
C syntax
creating nodes that work with CPU and Optix rendering.
Cell, Simplex and Gabor as denoiser don't work.
Ambient occlusion and bevel nodes don't work either.
https://github.com/AcademySoftwareFoundation/OpenShadingLanguage/blob/main/src/doc/osl-languagespec.pdf
Lineart animations + mini pen plotted flipbooks
python > frames > jpg > blender
> svg > pen plotter
playing with epsilon
frames to lineart
to process all photos in a folder (frames of a video) each image, directly into lineart
import cv2
import os
import numpy as np
def a function (processedimage) that takes the path to an image as input
def processedimage(imagepath):
load the image, using cv imread function, the result gets into the variable image
image = cv2.imread(imagepath)
conversion of the loaded image data ("image")to grayscale (gray) using cv "cvtColor" function
gray = cv2.cvtColor(image, cv2.COLOR_BGR2GRAY)
for the conversion there are multiple color space available.
RGB - BGR (basic in cv) - HSV (for color segmentation, cutting objects/elements in the image) - LAB (same + recognition) - XYZ - YUV (video processing)
apply gaussian blur to smooth the image to reduce noise, symplifing the image
blurred = cv2.GaussianBlur(gray, (5, 5), 0)
detect edges of blurred image using canny edge algorythm, create a black and white lineart binary image
edges = cv2.Canny(blurred, 30, 150)
find outlines of objects in the image with findContours(), contours is the list of contours detected (representes as a numpy array x,y, so it is a coordinate data), hierarchy for the image topology, I guess for the hierarchical importance of the contours. edges is the input image already edge-detected with canny. cv2.RETR_EXTERNAL prende in considerazione solo i contorni esterni, cv2.CHAIN_APPROX_SIMPLE to approximate the contour, symplify, it compress horizontal, vertical and diagonal segments and leaves there just the end points (example= square, just 4 points), to reduce memory.
contours, hierarchy = cv2.findContours(edges, cv2.RETR_EXTERNAL, cv2.CHAIN_APPROX_SIMPLE)
I put a blank canvas as background because there is a space visible between the photos and I don't know how to resolve the problem (use this just if you make the negative version)
canvas = np.full_like(gray, 0) #gray = grayscale version of the original image
loop to iterate through each contour one by one, then process them and draw them individually. This part is to draw simplified contours to the canvas, epsilon is to approximate with polygons the contours, then they are drawn with cv2.drawContours.
for contour in contours:
epsilon = 0.08 * cv2.arcLength(contour, True)
approx = cv2.approxPolyDP(contour, epsilon, True)
cv2.drawContours(canvas, [approx], -1, (0,0,0), 2) #255, in this case black, 2 thickness of contour
save the image to new file + _processed.jpg appended to original name
 outputpath = os.path.splitext(imagepath)[0] + "_processed.jpg"
 cv2.imwrite(outputpath, canvas)
process all files in the selected folder, choose the type (.jpg now)
folderpath = "prova"
for filename in os.listdir(folderpath):
   if filename.endswith(".jpg"):
       imagepath = os.path.join(folderpath, filename)
       processimage(imagepath)
image merger + svg output
import os
from PIL import Image
define the output size, in this case this is A4 size in pixels, and in 300 dp. inputfolder is the path to the folder containing the images, outputfile the merged image file
def mergeimages(inputfolder, outputfile):
   width = 2480
   height = 3508
create a list of files, images, in the inputfolder selected. Then takes just those that are files and not directories using os.path.isfile() that will be processed after
imagefiles = [f for f in os.listdir(inputfolder) if os.path.isfile(os.path.join(inputfolder, f))]
each image is rotated of 90 degrees, as I want to print them into an a4, to let the images take as much space as possible. The original images are overwrited. I tried few times without rotating the images, didn't work so I'll stick with the rotation.
for filename in imagefiles:
   imgpath = os.path.join(inputfolder, filename)
   img = Image.open(imgpath)
   imgrotated = img.rotate(90, expand=True)
   imgrotated.save(imgpath)
this to sort the images in numerical/aplhabetical order. The numerical part is extracted in each filename using filter(str.isdigit, x) converting in integer
imagefiles.sort(key=lambda x: int(.join(filter(str.isdigit, x))))
calculate number of rown and columns needed to fit all images in the page. maxcolumns, 4 in this case. This part needs to be improved, but it is working.
numimages = len(imagefiles)
maxcolumns = 4
numcolumns = min(maxcolumns, numimages)
numrows = (numimages + numcolumns - 1) // numcolumns
Poetry_recorder
I am looking for a way to visualise the evolution of the writing of a poem, recording as much information as possible, to then print. Using keyboard py library as a starting point.
Shell scripting languages
powershell
https://learn.microsoft.com/en-us/training/modules/introduction-to-powershell/
Cmdlets:(pronounced commandlets) commands to perform tasks and operations. Building blocks for Powershell scripts and commands.
Get-Command
To filter the list, keep in mind the verb-noun naming standard for cmdlets. For example, in the Get-Random command, Get is the verb and Random is the noun. Use flags to target either the verb or the noun in the command you want. The flag you specify expects a value that's a string. You can add pattern-matching characters to that string to ensure you express that, for example, a flag's value should start or end with a certain string.
Get-Location / pwd
Set-Location oppure cd (change directory)
dir / Get-ChildItem per vedere file in directory
(=ls)
Cd .. torna indietro di uno
Cls clear (doesn't affect the command history)
Open a text file with the default associated editor
Start-Process -FilePath "C:\Path\To\Your\Filename.extension"
To open the file with a specific application use the Verb parameter
“Edit” open the file with the default editor
Start-Process -FilePath "C:\Path\To\Your\Filename.extension" -Verb "Edit"
To open the file with a different application (example with visual studio code, “code” is the command to launch vscode)
Start-Process "code" -ArgumentList "C:\Path\To\Your\Filename.extension"
version of powershell
$PSVersionTable
automatic variables: https://learn.microsoft.com/en-us/powershell/module/microsoft.powershell.core/about/about_automatic_variables?view=powershell-7.4
easy timer 【┘】
To set the timer duration (seconds)
$timerDuration = 30
to ask the user for the timer duration tho (second choice)
do {
    $timerInput = Read-Host "Enter timer duration in seconds"
} while (-not [System.Int32]::TryParse($timerInput, [ref]$timerDuration) -or $timerDuration -lt 0)
Display then a message when the timer starts
Write-Host "Timer running for $timerDuration seconds..."
Start the countdown. $i, i for index, the loop counter. -gt is to compare 2 numbers, comparison operator (greater than, it returns true or false). Start-Sleep for the delay to get the countdown effect. -NoNewline to not print different lines but just one- "r" escape sequence, carriage return character, to clear the current line in the console.
  for ($i = $timerDuration; $i -gt 0; $i--) {
    Write-Host -NoNewline "Time remaining: $i seconds... "
    Start-Sleep -Seconds 1
    Write-Host -NoNewline "`r"
}
Display a message when the timer has finished
Write-Host "The end!"
sound notification (da aggiungere dopo start the countdown)
[console]::beep()
oppure
[system.media.systemsounds]::beep.play()
bouncing ball animation ᳂
function definition
function Start-bouncingball {
setting the dimensions of the animation area
$width = 20
$height = 10
variables for the ball's position ($ballX, $ballY) and direction of movement ($directionX, $directionY)
$ballX = 1
$ballY = 1
$directionX = 1
$directionY = 1
clear the console
Clear-Host
animation loop (until ctrl+c)
while ($true) {
cleat the console again to update the animation
Clear-Host
appareance of the bouncing ball, nested loop. -le comparison operator (output $true or $false).
for ($y = 1; $y -le $height; $y++) {
    for ($x = 1; $x -le $width; $x++) {
        if ($x -eq $ballX -and $y -eq $ballY) {
            Write-Host -NoNewline "O"
        } else {
            Write-Host -NoNewline "."
        }
    }
    Write-Host ""
}
frammentiamo:
this first line is the outer loop, that control the vertical position.
for ($y = 1; $y -le $height; $y++) {
the inner loop (horizontal position)
for ($x = 1; $x -le $width; $x++) {
conditional statement that check the position both in $x and $y, and if they match it prints the character "O", if not it prints a period. -NoNewline the same as before, to ensure that the characters are printed on the same line.
if ($x -eq $ballX -and $y -eq $ballY) {
    Write-Host -NoNewline "O"
} else {
    Write-Host -NoNewline "."
}
writing a Newline, an empty string
Write-Host ""
update the position of the ball
$ballX += $directionX
$ballY += $directionY
check if the ball has reached the boundaries of the area, if so it reverse the direction of movement to simulate the bouncing. * for the negative values.
if ($ballX -eq 1 -or $ballX -eq $width) {
    $directionX *= -1
}

if ($ballY -eq 1 -or $ballY -eq $height) {
   $directionY *= -1
}
pause for the animation frame, the speed of the ball
Start-Sleep -Milliseconds 100
  }
}
start animation
Start-bouncingball
spinner \
$spinnerChars contains the characters, while ($true) for the loop, foreach it iterates each character in the spinner set, "`b" is used to move the cursor back.
function Start-Spinner {
    $spinnerChars = @('/', '-', '\', '|')
    $delayMilliseconds = 100

    while ($true) {
        foreach ($char in $spinnerChars) {
            Write-Host -NoNewline $char
            Start-Sleep -Milliseconds $delayMilliseconds
            Write-Host -NoNewline "`b"
        }
    }
}
Start-Spinner
bouncing horizontal text
function Start-bouncingtext {
    $text = "text"
    $width = 50
    $delayMilliseconds = 100

    $position = 1
    $direction = 1

    while ($true) {
        Clear-Host
calculate the padding on each side
$padding = " " * ($width - $position)
display the text at the current position
Write-Host -NoNewline "$padding$text"
animation speed - pauses
Start-Sleep -Milliseconds $delayMilliseconds
update the animation
Write-Host -NoNewline "`r"
update position based on direction
$position += $direction
check boundaries and direction reversed
if ($position -eq 1 -or $position -eq ($width - [string]$text.Length + 1)) {
            $direction *= -1
        }
    }
}
Start-bouncingtext
blinking text animation
function Start-blinkingtext {
    $text = "Sleep!"
    $delayMilliseconds = 500

    while ($true) {
        Clear-Host

        Write-Host $text

        Start-Sleep -Milliseconds $delayMilliseconds

        Clear-Host

        Start-Sleep -Milliseconds $delayMilliseconds
    }
}
Start-blinkingtext
random character magic
per colore casuale dei caratteri:
$colors = @("Red", "Yellow", "Green", "Cyan", "Blue", "Magenta")
$randomColor = $colors | Get-Random
function Start-randomcharacter {
    $width = 20
    $height = 20
    $delayMilliseconds = 100

    while ($true) {
        Clear-Host

        $randomX = Get-Random -Minimum 1 -Maximum $width
        $randomY = Get-Random -Minimum 1 -Maximum $height
        $randomCharacter = [char](Get-Random -Minimum 33 -Maximum 127)
display the random character at a random position + color of the character and background
        Write-Host -NoNewline "`r"
        $colors = @("Red", "Yellow", "Green", "Cyan", "Blue", "Magenta")
        $randomColor = $colors | Get-Random
        Write-Host "$randomCharacter" -ForegroundColor  $randomColor -BackgroundColor Black -NoNewline
        Start-Sleep -Milliseconds $delayMilliseconds
    }
}

Start-randomcharacter
3D
🕸️cobweb geometry nodes🕸️

needs objects to interect with in the scene
create different collection, one must be of the scene (you need to add it easily as a node)
the beziercurve, need to be out of the collection. Drawing tool
🕷 resample curve: to let the curve not stick onto the surface, count to 2
🕷 curve to mesh: makes the line thicker
🕷 curve circle: resolution to 3, radius around .005
🕷 instances on points: (makes data disappears) add lines attached to the main lines
vjoin geometry node, great!
🕷 (node wrangler reminder = easy connect: shift+rmb, draw the connection: alt+rmb)
🕷 to control a value: to get it easier in the mess, control through modifiers tab, add input node connected from the grey circle to the value